

Header

​

Smartphone Photography Editing Apps

These are the best apps!

​​I have downloaded over 100 apps on my smartphones. Many of them were not worth the free price stage! These six apps are my go-to apps for all of my photo editing!

Footer

Header

My recommendations

Available on iPhone and Android

Snapseed

Lightroom

Retouch

After Focus

PicsArt

Polarr

Footer

Header

Snapseed by Google

iPhone
Android

Snapseed is a very intuitive, easy to use app that has more advanced tools and capabilities hidden away for the more serious photo editing. This completely free app can be as simple or advanced as you like as your photo editing knowledge and skills develop.

  • Looks/Styles are filters that can be quickly applied
  • Tune Image includes the basic Brightness, Contrast, Highlights, Shadows, etc
  • Sharpening tool as a standalone of inside the Selective tool for area-specific editing
  • Advanced Curves tool including RGB, Luminance and some helpful presets
  • Crop, Rotate and Perspective are great for re-composing your image
  • The Selective tool is one of my favourite. Selectively apply editing to a specific area
  • Brush tools include: Dodge and Burn, Exposure, Temperature and Saturation
  • Healing removes unwanted objects from your image
  • Various filters are also standalone tools; HDR Scape, Vintage, Noir, Grunge, Retrolux, etc
  • Tonal Contrast is a fantastic tool to add sharpness and clarity
  • You can view your edit history, re-adjust and delete steps - non-destructive editing
  • The best feature is the ability to mask any of your edits using the Brush tool inside the History (Stacks) section

​I have a full photo editing course using this app - here​​


Footer

Header

PicsArt by PicsArt Ltd

iPhone
Android

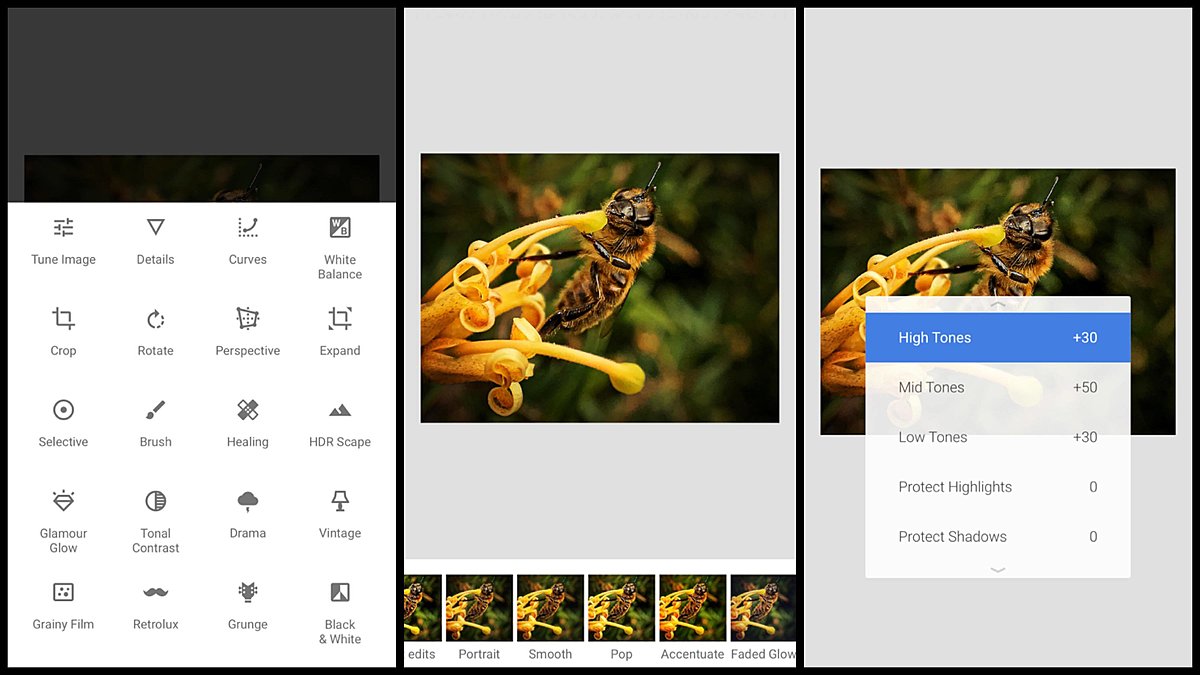
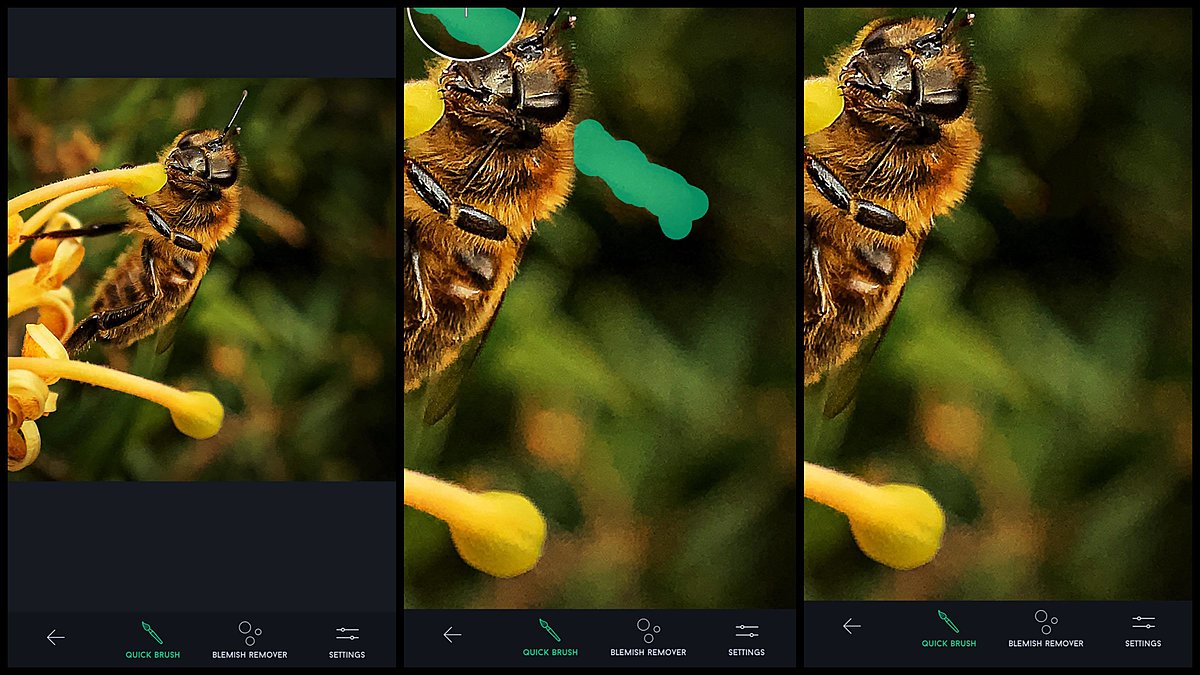
PicsArt claim to be the only editing app you'll ever need... and, they are probably right. It has so many tools available for the Android and iPhone user. This app does have some premium tools that are only available on the subscription. That said, they are very generous with the free tools.

  • This app can be a little overwhelming and difficult to navigate when you first open it. You can bypass the subscription page and make use of the free tools
  • To start, tap on the + icon in the centre at the bottom of the screen. Check out all the options. Not only can you edit photos, you can edit video, create collages, the app also has a camera.
  • Open a photo to find menus of tools at the bottom of the screen. ​
  • Tools - All the basic tools, including crop, adjust, enhance, perspective and some really cool extras dispersion, motion and clone.
  • Effects - This is where you can create abstract pieces, oil paintings, add different types of blur, turn your photo into a sketch and a whole lot moreage
  • Retouch - Most of the tools in these face retouch are the premium skin smoothing, blemish fix, eyes, teeth and more
  • Sticker - If you are creating photos for social sharing, you are no doubt familiar with stickers to add your personality to the photos.
  • Be mindful that the free version has advertising. In my experience, some of it is very adult that I would not like my kids to see them! If you are an adult, you will love this app.

    Footer

    Header

    TouchRetouch by Adva Soft GmbH

    iPhone
    Android

    This paid app (subscription) is the leading app for removing distracting and unwanted elements in your image. Every professional image that you have fallen in love with has had parts of the image removed to assist composition. This tool has all the automatic and manual tools you would find on a desktop editing program.

    • The file does not degrade in image quality when saved. This occurs in many free apps making it difficult to print in the future
    • Tutorials are available when you first download the app or at any time in the home screen
    • Quick Removal and Quick Repair - remove objects by swiping over them. Didn't work? You have lots of options
    • Blemish Remover - in a single touch, you can remove spots and blemishes - zoom in 1st
    • Line and Segment Remover - removes sections or complete lines in your image
    • Clone Stamp - this is my favourite feature. You can tap where you want the app to source image content to replace over where you are swiping to remove. If it is not blending very well, tap on settings to change the size, hardness and opacity of the brush. ​
    • Before and After icon to see how amazing this app works

    ​I have a tutorial on this app inside my photo editing course - here​​

    Footer

    Header

    Lightroom by Adobe

    iPhone
    Android

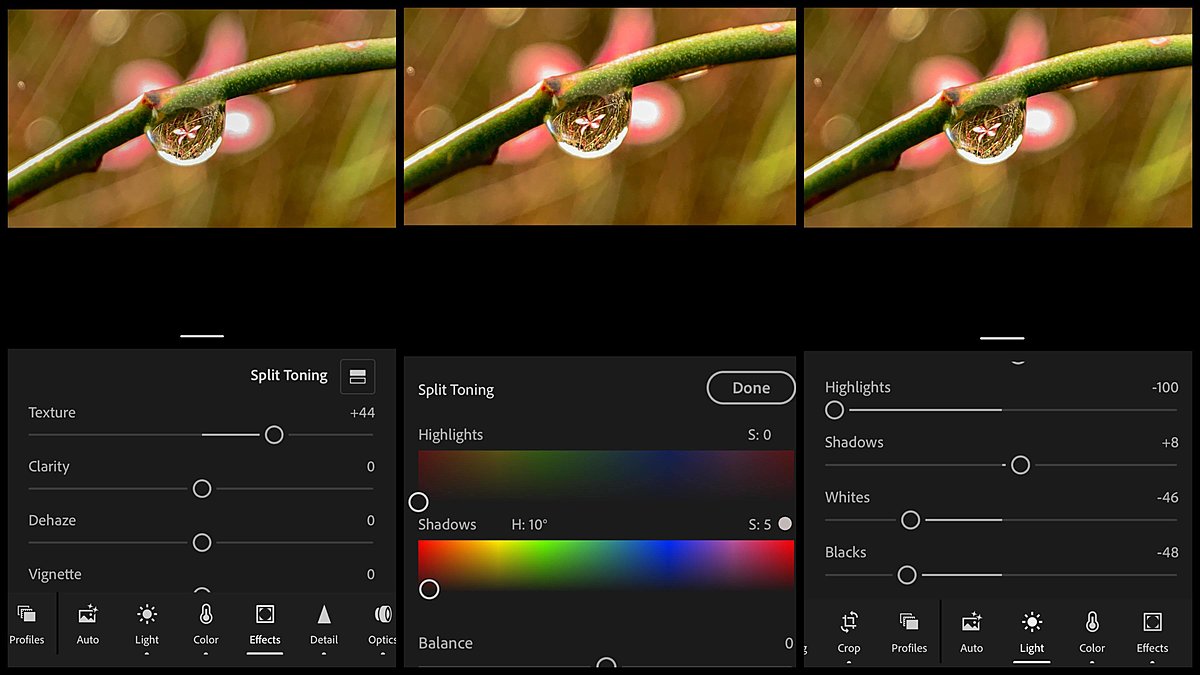
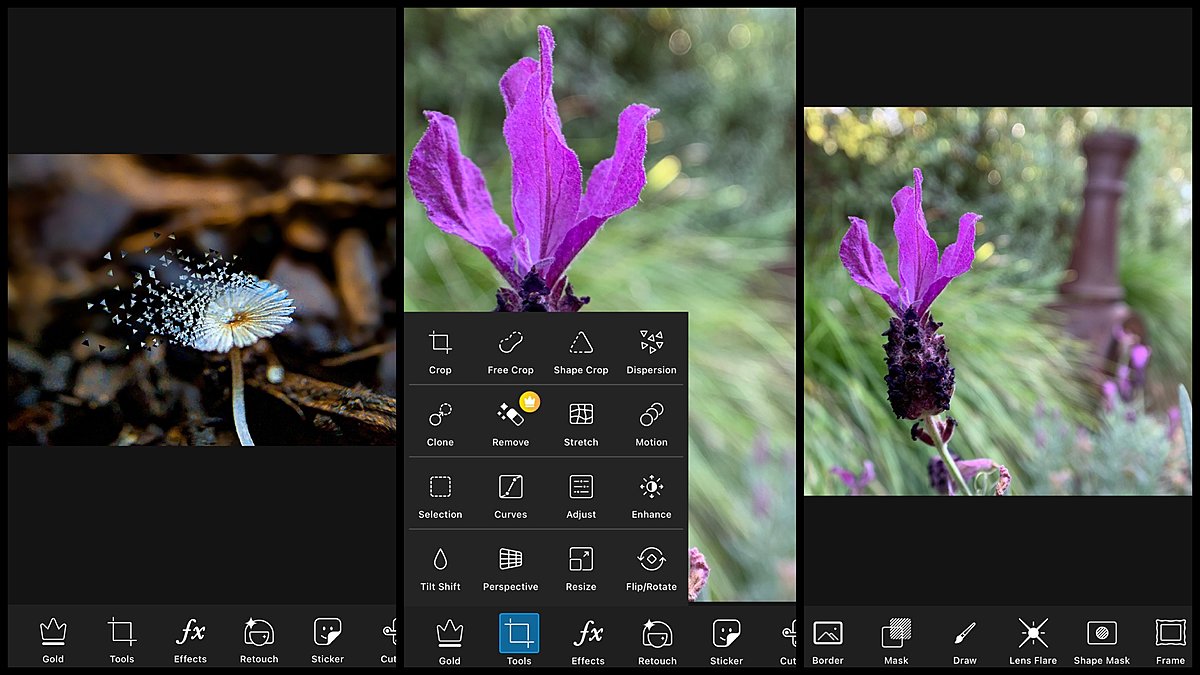
    Do not be intimidated by the word Adobe. This is a mobile version and is as intuitive to use as most apps. You tap and swipe around the various tools. All you need is a registered Adobe account to get started. Choosing the paid subscription will provide some extra tools and the ability to sync your images to multiple devices. ​I will cover some tools in the free version

    • ​Photos can be saved and exported as file formats JPG, TIF or DNG
    • You can include a watermark and/or embedded copyright information in your images
    • Multiple images can be organised using a rating, flag and keyword system
    • You can import filters (Presets) and create your own to speed up your workflow
    • Editing tools are broken down into easy sections - Light, Colour, Effects, Detail, etc
    • Light tool includes Contrast, Highlights, Shadows, Whites and Blacks
    • Colour tool includes White Balance, Vibrance, Saturation and HSL sliders
    • Effects tool includes Texture, Clarity, Dehaze, Vignette and Grain
    • Detail tool includes Sharpening, Radius, Detail, Masking and advanced Noise Reduction
    • Powerful and versatile selections (masking) to refine exact areas to specifically edit
    • The best part of this app is that it is also a manual control camera app
    • As a camera, LR mobile allows you to control shutter speed, ISO, white balance, exposure compensation, manual focus peaking, RAW DNG file formats and more.


    Footer

    Header

    After Focus by MotionOne

    iPhone
    Android

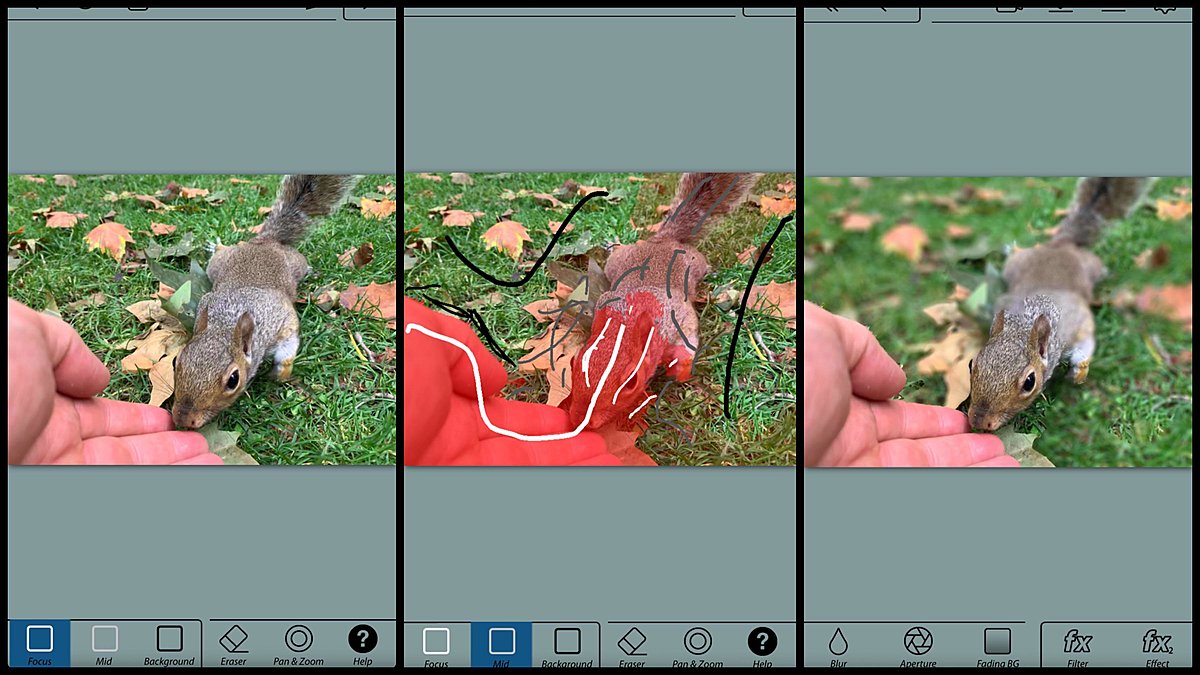
    This app is still really helpful for images we captured before we could select and re-adjust background focus during and post photo capture. This paid app (one payment) works incredibly well to selectively blur the background around an object of your choice​

    • If you have two subjects in your scene at different distances from your smartphone, the automatic depth mapping in most smartphones will make you choose one! It can only have one distance from the smartphone in focus
    • Easy to use, tap Focus and swipe on the areas you want to keep, Background for the out of focus areas and Mid for areas that you want to apply 50% of the blur
    • A negative for this app is the export size of the image is reduced to 2048px. This is still more than enough for social media sharing
    • Adjust the lens or motion blur, change the aperture shape
    • A great feature is the Fading Background. This provides a natural-looking gradient from no blur at the bottom of the image to strong blur at the top
    • A new Double Take feature helps the app identify the background to blur by taking two photos. I am not a huge fan of this feature. Stick with Select Photo and edit your image

    I have a video tutorial on using this app - here​​

    Footer

    Header

    Polarr by Polarr

    iPhone
    Android

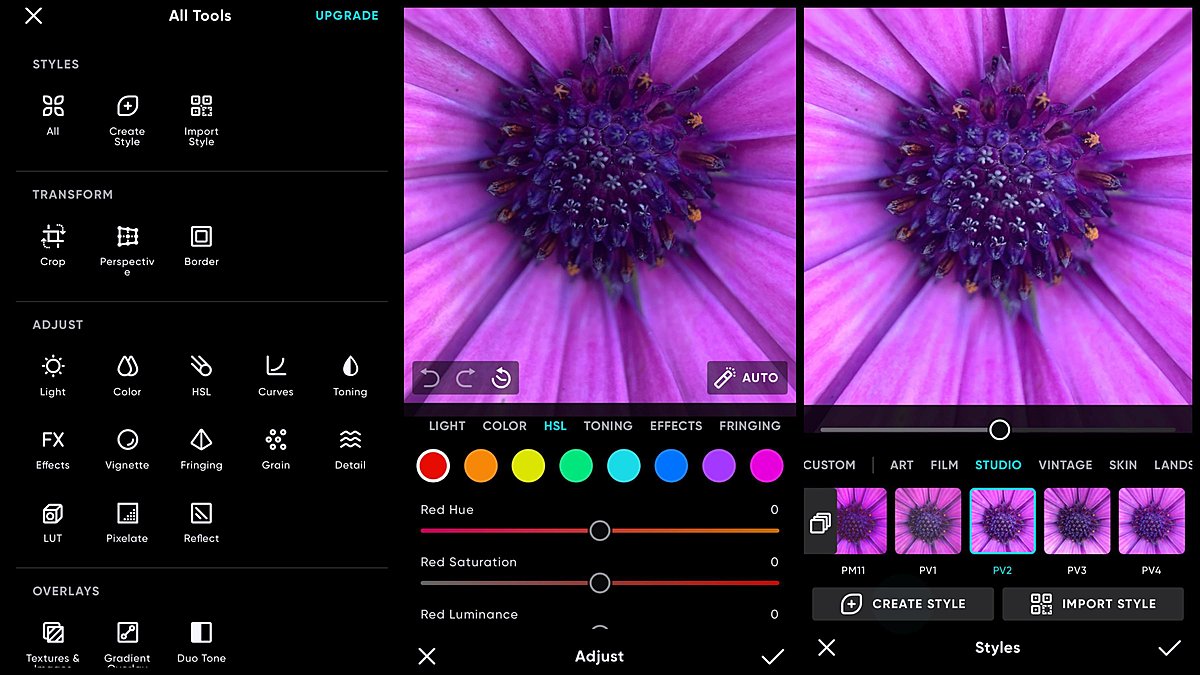
    This app has some features that are a struggle to find elsewhere. It is my go-to app after Snapseed and Lightroom. 

    • Styles (filters) - very generous amount of free filters organised into groups
    • Liquify tool for creative perspective control and distortions
    • Split toning a little more user friendly than Lightroom
    • Opening a free account lets you create and share Styles. A Pro account (subscription) gives you more masking options, Styles and future features.
    • ​This is my go-to app for more advanced tools: Fringing, Pixelate, Gradient Overlay
    • Advanced free masking tools including; Luminance, Sky, Ground and more
    • This app lets you move the centre location of the vignette and different blur tools
    • Fantastic overlays that you can apply to a selection only. An example is being able to add a sun flare to a sky selection
    • Polarr has an extensive tutorial page on their Wiki -here​
    • Snapseed is a better option if you want to apply a global edit (whole image) and then mask in exactly where you want to apply it afterwards.

    Yes, this is a subscription app. You do not need to navigate around ads that trade/sell user data to cover the costs of creating and maintaining a stable and updated apps.


    Footer

    Header

    Learn how to edit your photos

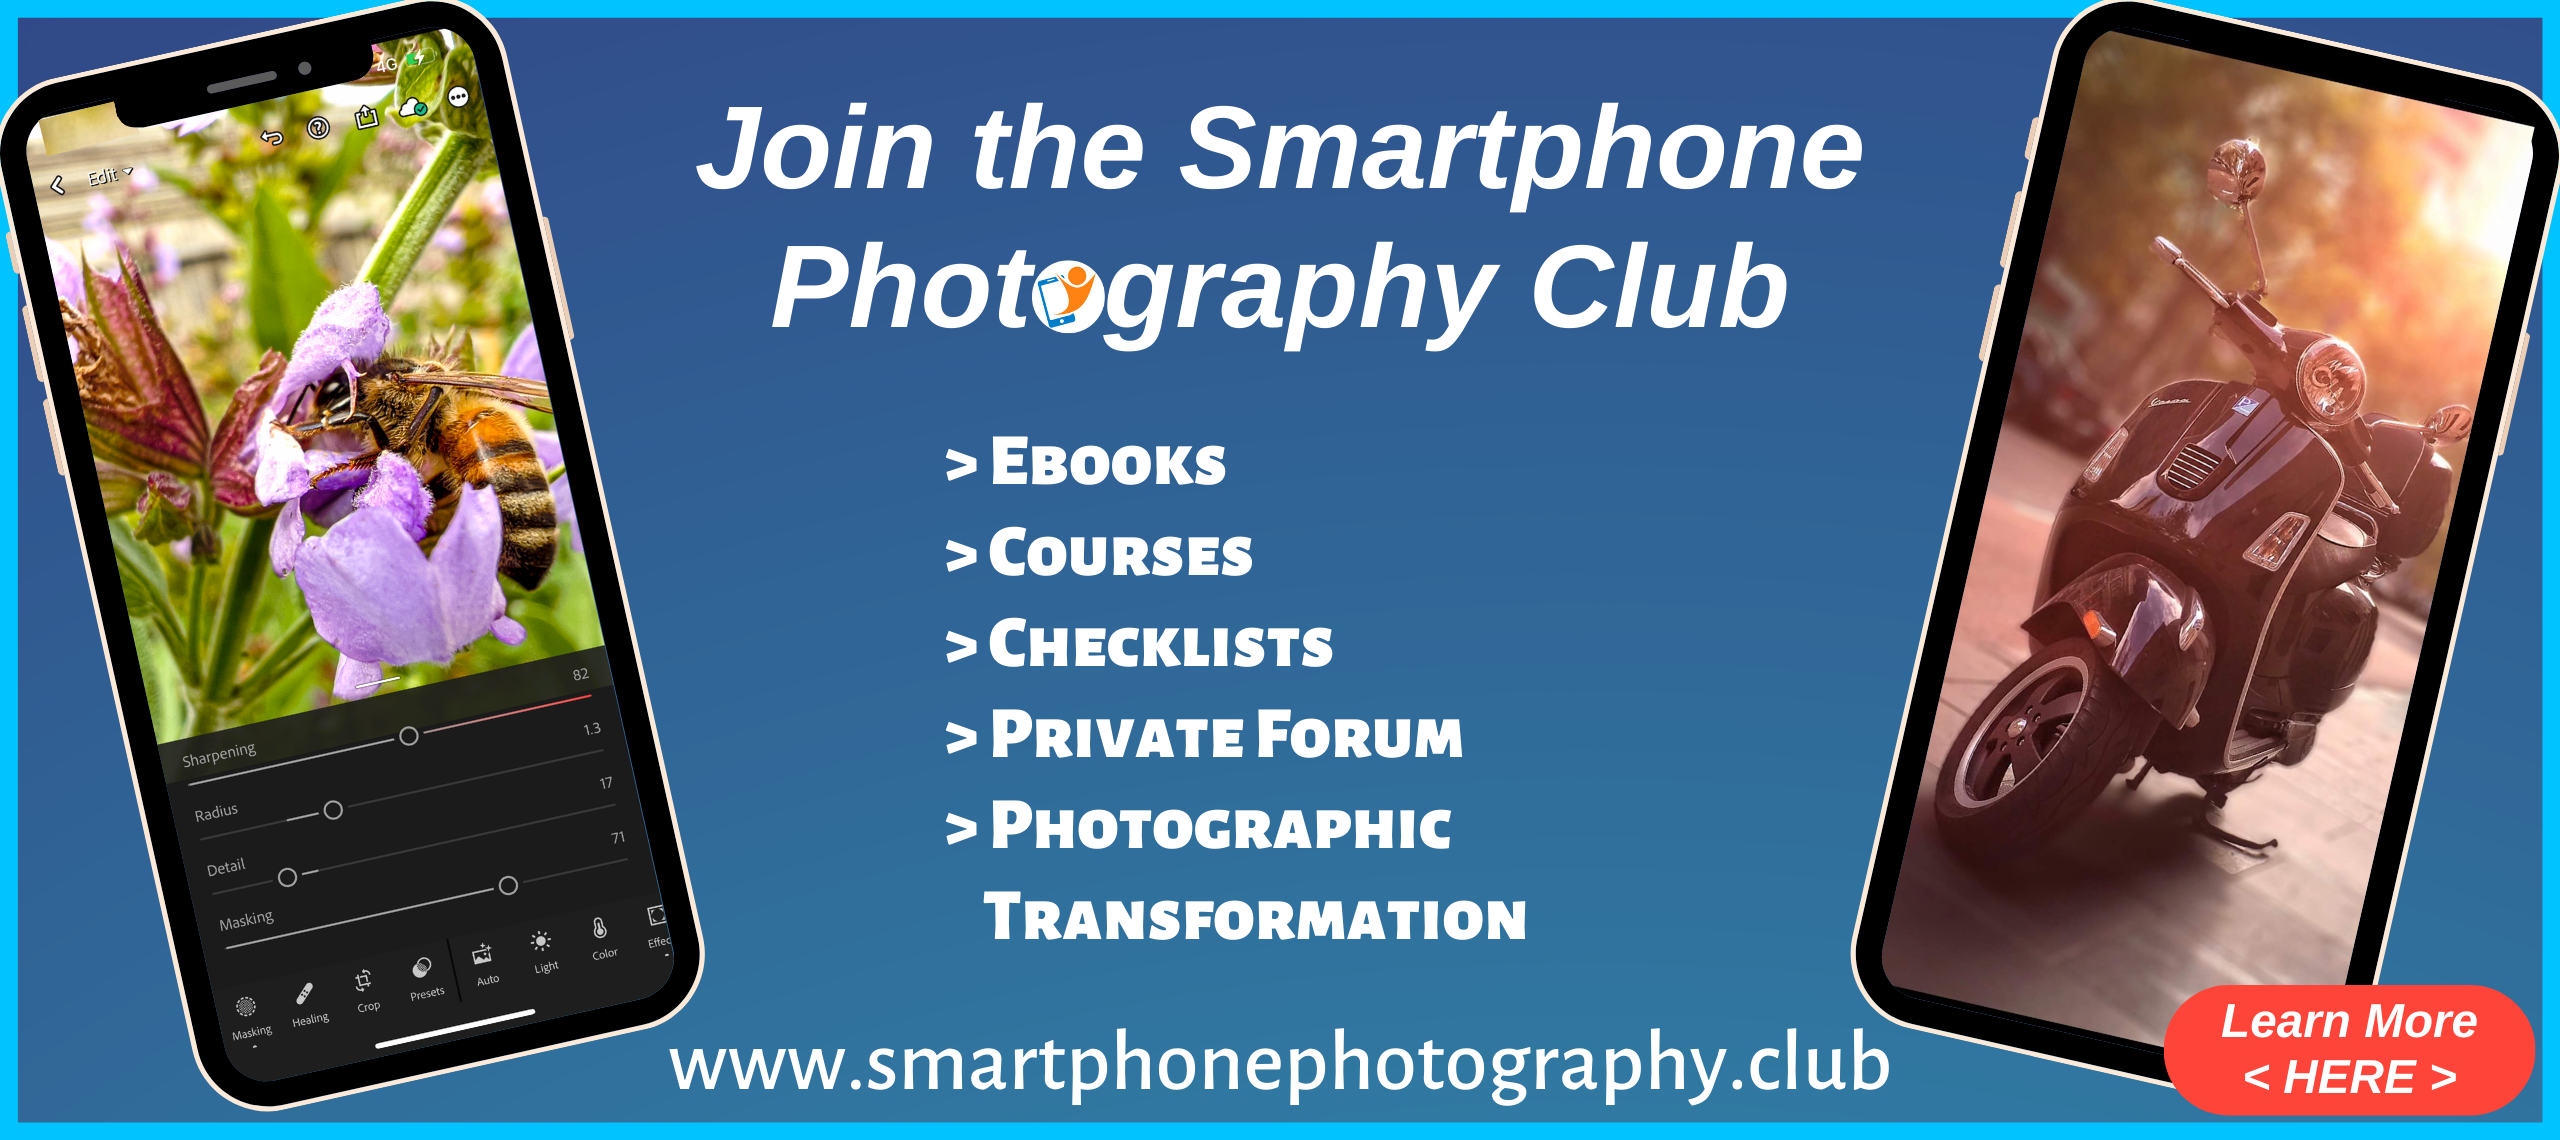
    Inside the Smartphone Photography Club, you get access to premium video courses, eBooks, checklists, workbooks, community forum and Live training. 

    One of the courses available with your membership is the Mobile Photo Editing - 4-Step System. 
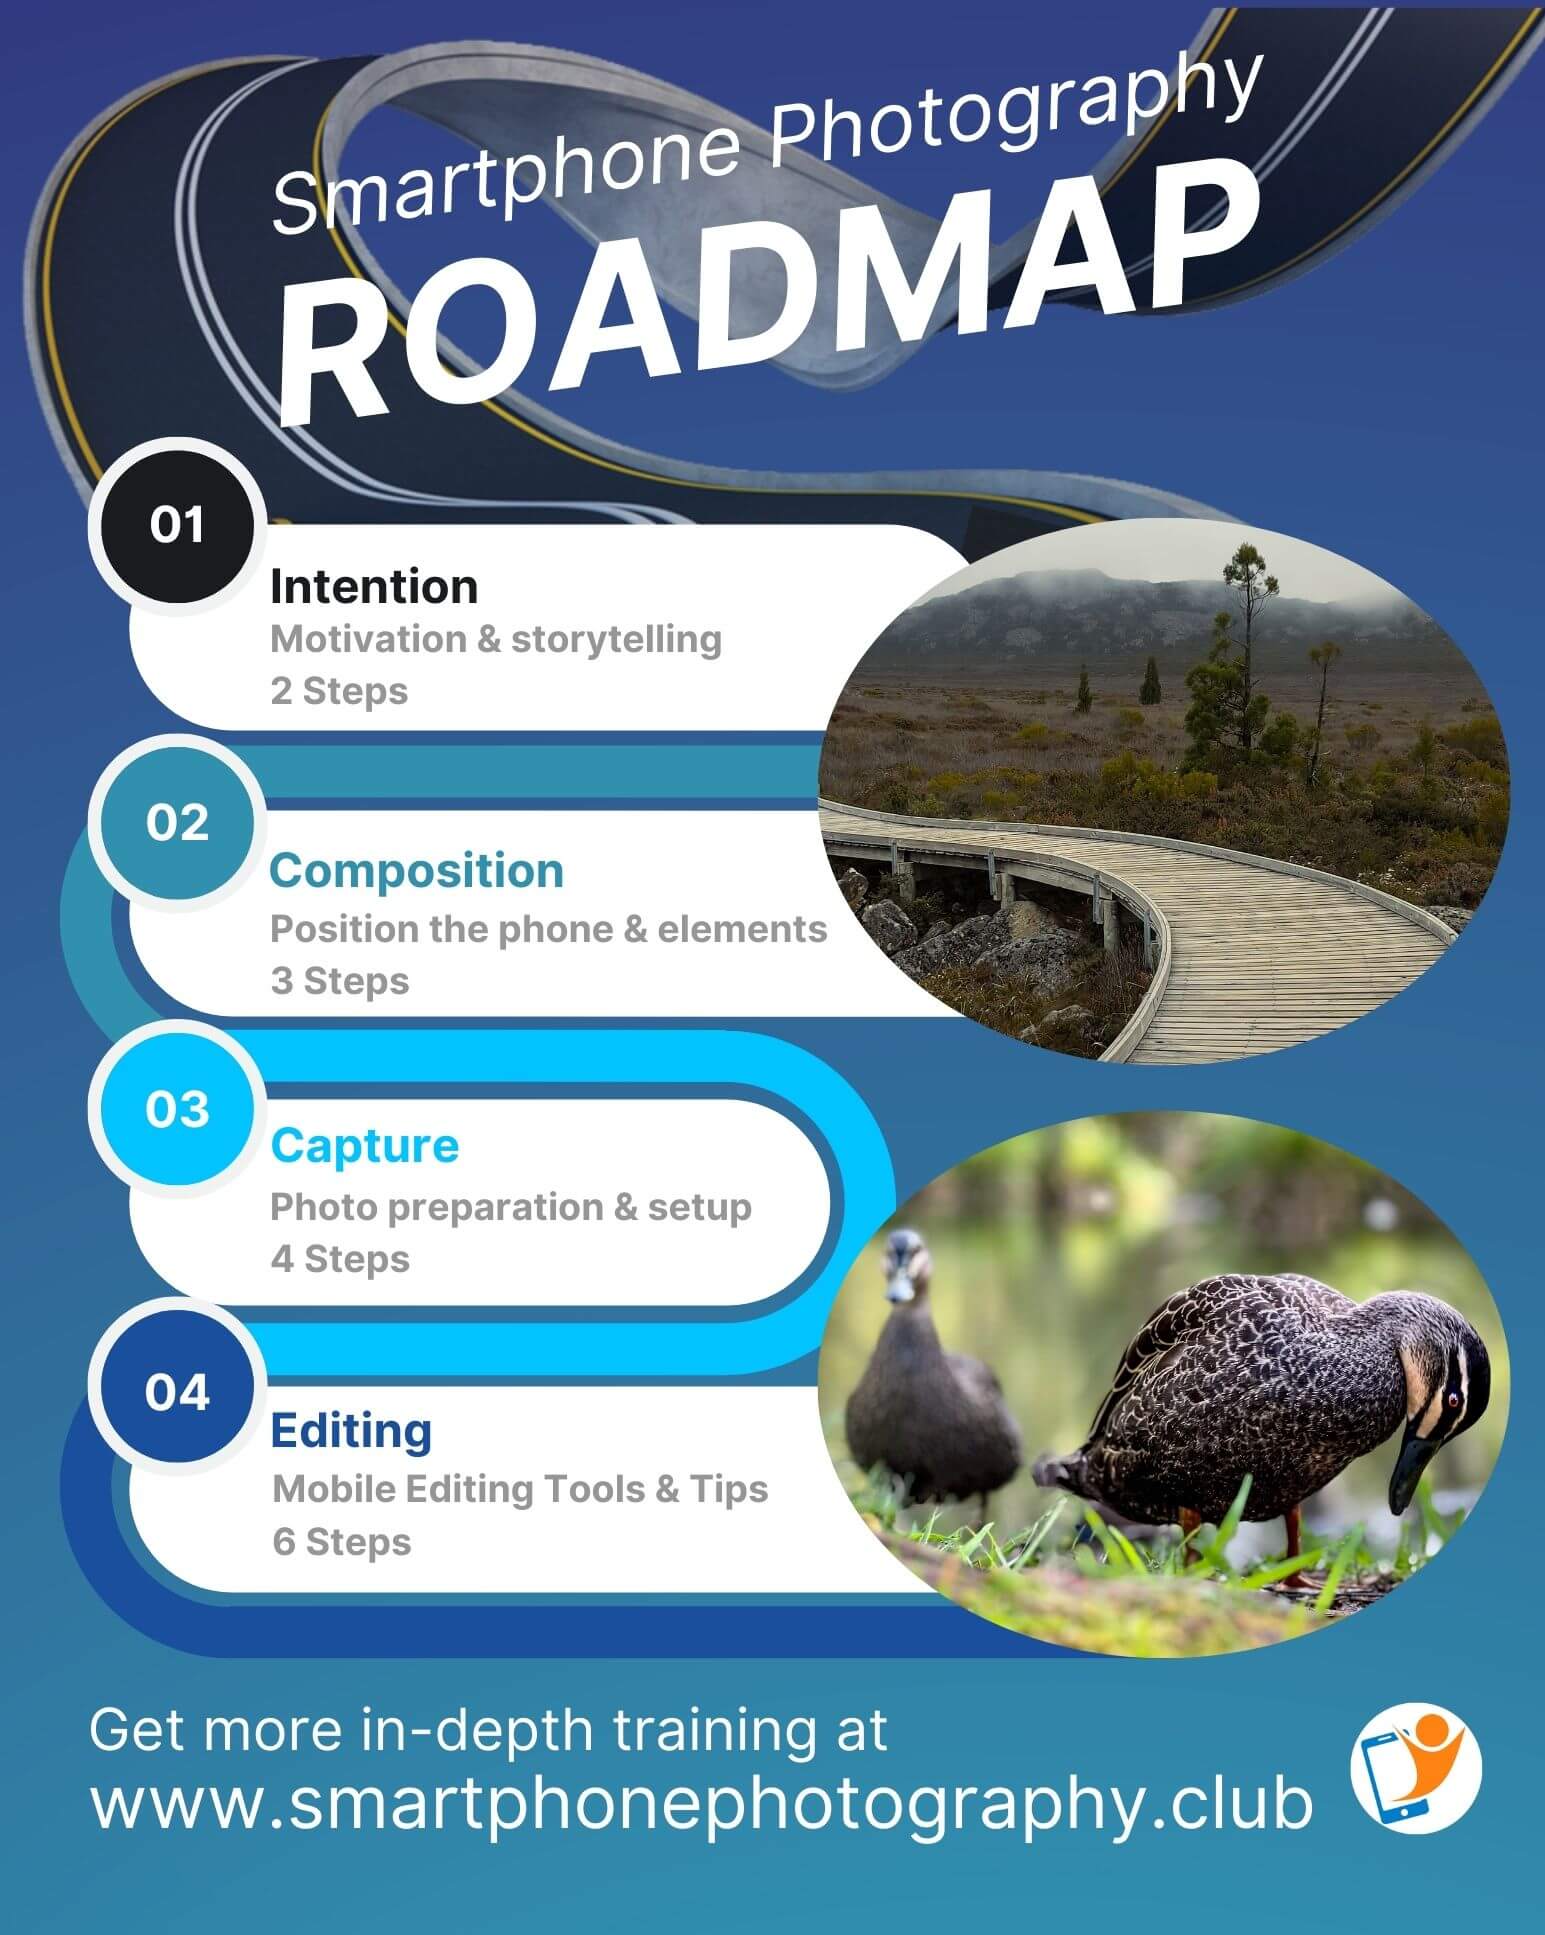
    Other inclusions:

    • 15-Step Smartphone Photography Roadmap
    • Podcast episodes, tutorials, article and YouTube videos
    • Community Forum - photo themes, discussions
    • 14-Day Photo Creativity Challenge
    • 30 Days of Lightroom Mobile - video course
    • Blurry to Tack-Sharp Photos 4-Step System - video course
    • Stronger Photo Composition 4-Step System- video course
    • Mobile Photo Editing 4-Step System- video course
    • FULL Smartphone Photography Transformation Program
    • LIVE monthly Zoom call - photo feedback and check in​mask in exactly where you want to apply it afterwards.
    Learn More About the Smartphone Photography Club

    Footer