How to Add Products and Make them Look Awesome

Now that you have your store up and running, we'll walk you through how to fine-tune it, starting with your products. In this second chapter of our book, you'll learn how to add products to your store and make them look awesome.
1. How to Add Products to Your Store
The process of adding products to your store is different with every platform. For more information about how Printful integrates with each of the platforms, check out this Printful YouTube playlist.
Shopify, WooCommerce, Storenvy, BigCommerce, Ecwid, Weebly, Etsy
These platforms have a product generator that pushes new products straight to your store. Which means that instead of adding new products to your store manually and then syncing them all with Printful, you can log in to your Printful account and create products that are automatically added to your store.
This is how it works:
1. Go to “Stores" in your dashboard and click “Add." You'll be prompted with a box that looks like this:
2. Click on the product you want to add, and choose the specific model.
3. Upload your print file, and select your color and size variants (you can pick several at a time). You can also adjust the size and placement of your graphic.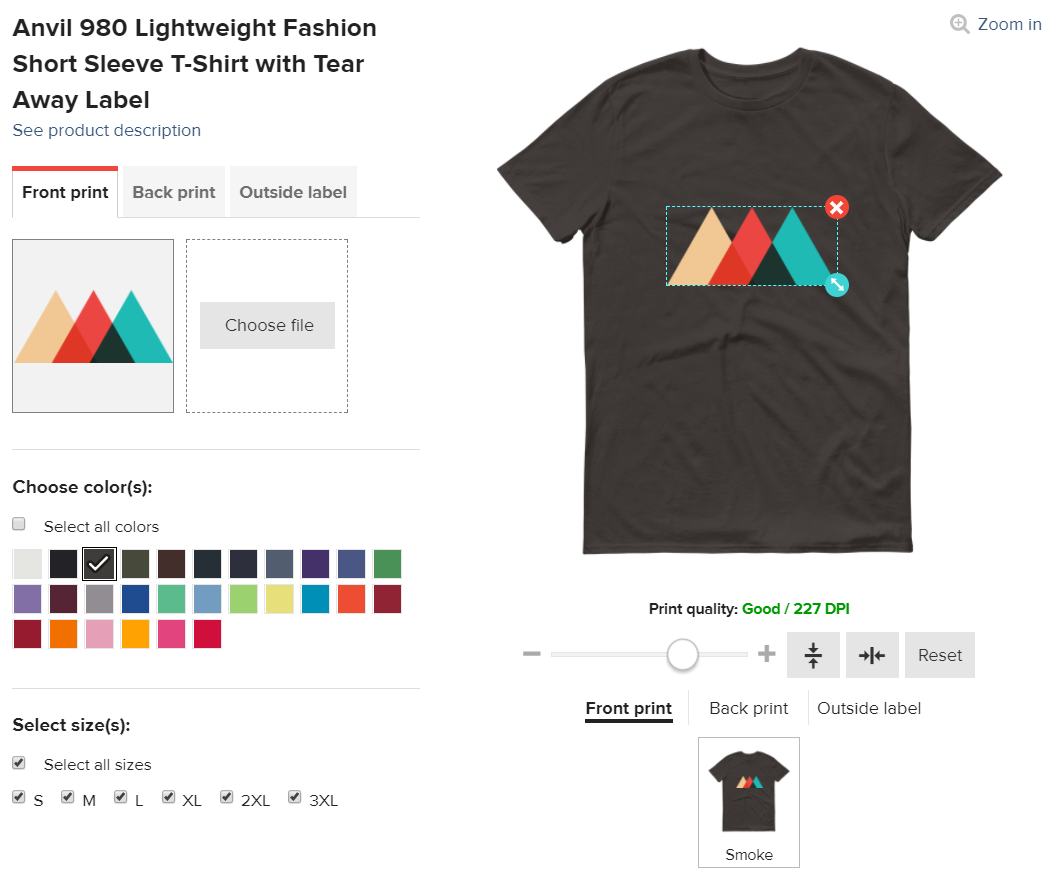
4. When you're satisfied with how it looks, click the button “Proceed to mockups" to pick which file format you'd like to upload for your mockup image. Next, click "Proceed to description"
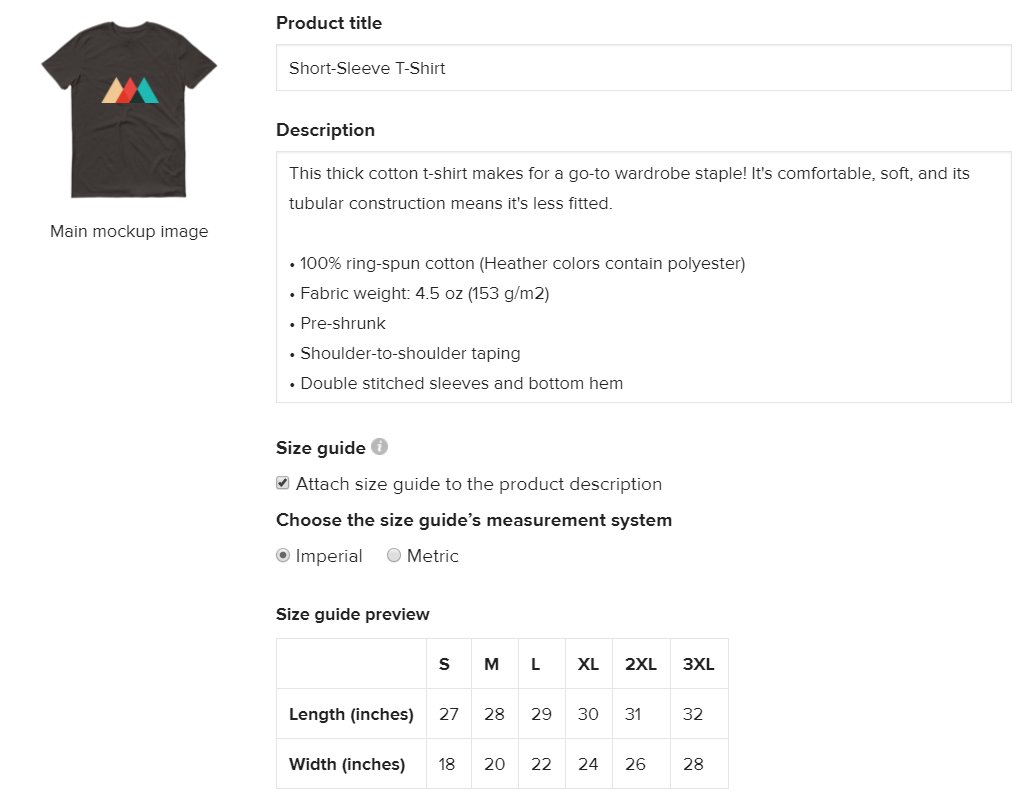
5. On the Description page, edit your product name and description (more on that later), and click "Proceed to pricing".
6. Decide on your retail price and profit, and once you're satisfied, publish the product to your store!
Amazon
Although adding products to your Amazon store happens through Printful’s push generator, this advanced and technically dense integration will require more input from you than the integrations discussed above. When adding products, you’ll need to take into account a set of rules and guidelines on Amazon’s side.
For a step-by-step guide of pushing products to your Amazon store, watch this YouTube tutorial and make sure to read this blog post on the key things to bear in mind when integrating your Amazon account with Printful.
Gumroad, Big Cartel
You'll have to add the products to your store first and then manually sync them with Printful. It's a bit different for every platform, but these are the main steps:
1. Connect your store with Printful if you haven't already.
2. Add a product through your store's platform.
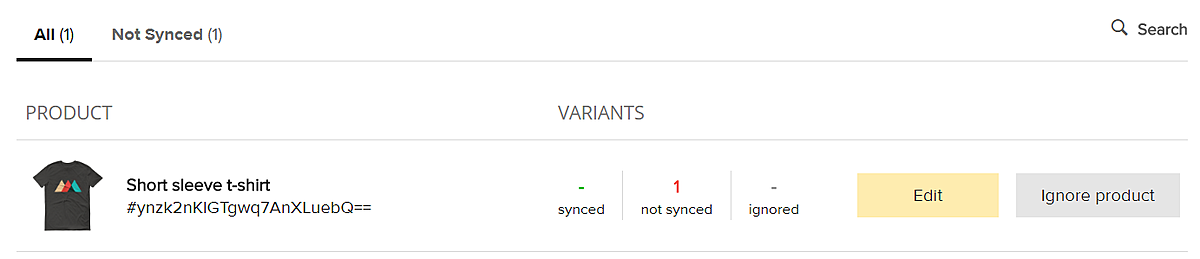
3. On Printful, go to Stores -> Sync. If you don't see any products on that page, then hit refresh.
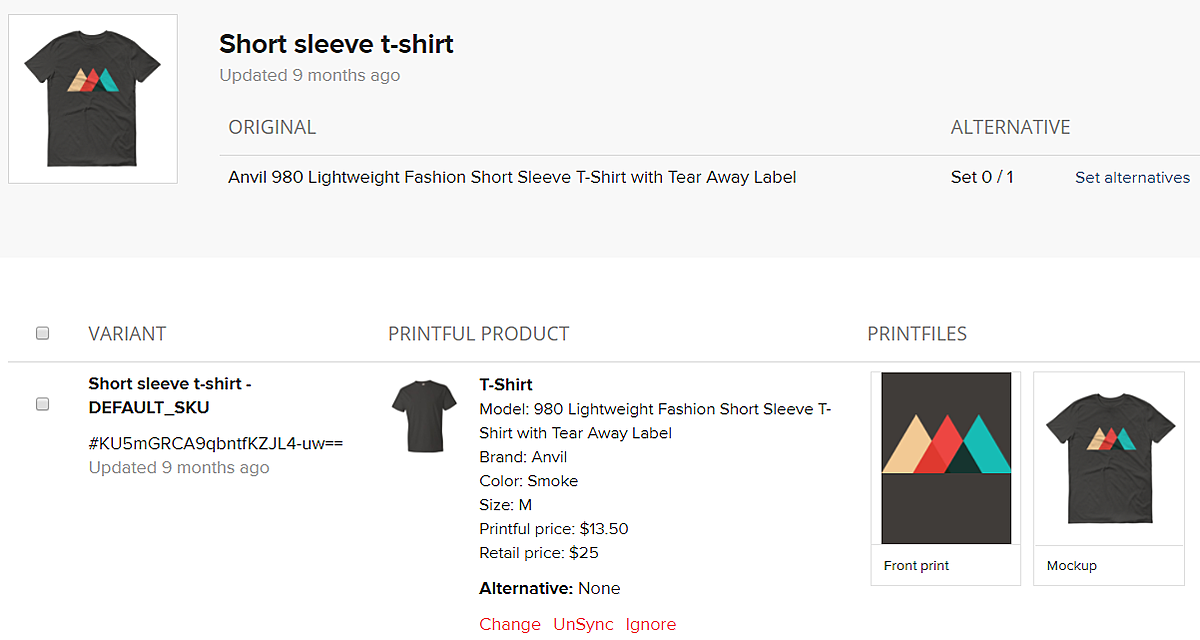
4. Click the "Edit" button. This is where you'll select the product and upload the print file and mockup for each variant (size, color)
5. Since it can be time consuming syncing products with a lot of variants, you can opt to sync as orders come in. So, when an order comes in for a product that isn't synced yet, it'll go on hold until you sync it.
ShipStation
This is a third party app that lets you integrate with platforms that don't integrate directly with Printful, such as eBay and Squarespace. It’s essentially a middleman between Printful and the platform you’ve chosen. You’ll be adding products to your storefront and manually syncing them as orders roll in from ShipStation.
Maintaining your store via ShipStation will require a bit of technical know-how. You can read more about setting up ShipStation here.
And there you have it! Be sure to check out our YouTube channel for our other video tutorials with even more detailed step-by-step instructions.
Extra resources:
- Check out your platform's FAQ section where you'll find specific info on how to set up products.
- If you're still not confident about adding new products, you can always get in touch with our customer service team and let them help you solve your problems. Shoot them an email or start a chat.
- Post a question on our Printful Insiders Facebook group. Other Printful users have probably had the same questions and experiences, and they can help!
- Want to expand your store with non-Printful products and keep all your business in one place? Check out our Warehousing & Fulfillment service!
2. How to Create Awesome Product Photos
It's not enough to post your products and leave it at that – you have to sell them to your customers who don't get to see your cool stuff in person. It's your job to show them through awesome product photos and descriptions.
Our mockup generator is a useful tool not only for us to better understand how you want your product to look, but also to show your customers how your product looks.
However, good product photos are critical, and you need to go beyond a basic mockup photo.
Airbnb started offering professional photos of their bookings. The results? Properties with high-quality photos get twice as many bookings and bring in an average of $1,025 per month. Part of this is of course the added security, knowing that an Airbnb photographer has checked the place out. But, part of it is the photography.
The same goes for stuff you're selling on the internet.
So, here are some basics of product photography.
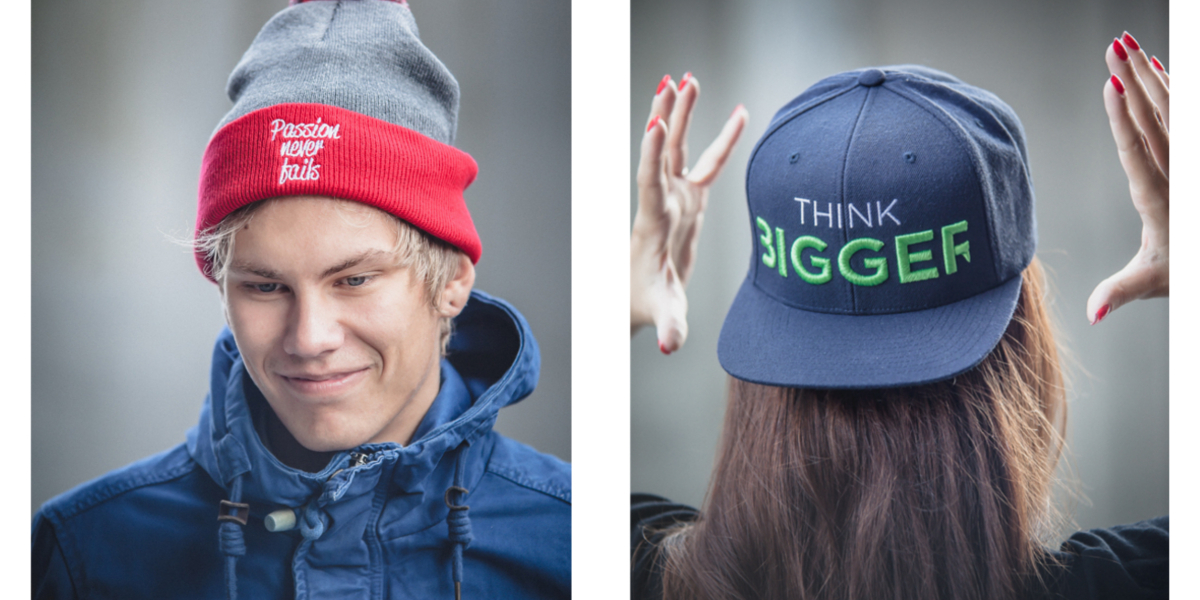
1. Use action shots: this is applicable to apparel products. It's good to show simple, photos of just the clothing, but try to include a few of how they actually look on real people. It gives a better idea of how the product fits, and creates a visual of what your customers expect to see for themselves. Here's how Startup Vitamins does it:
If you have multiple apparel products, you can create a styled product photo. Give some other style tips for wearing your product, and add examples of looks that customers will want to emulate.
2. Use a simple background: you want your product to be the main focus, not everything going on around it. If you're taking product shots, we recommend a white background. It's safe and simple, and with the right lighting, camera settings, and a touch of editing, it's relatively easy to make it look professional.
That's not to say you can't have any other background. Sometimes an ornate, staged backdrop helps tell the story of your product and your customers can see themselves in the photo. These are a couple of the product shots for dishware at CB2 with beautifully staged tables.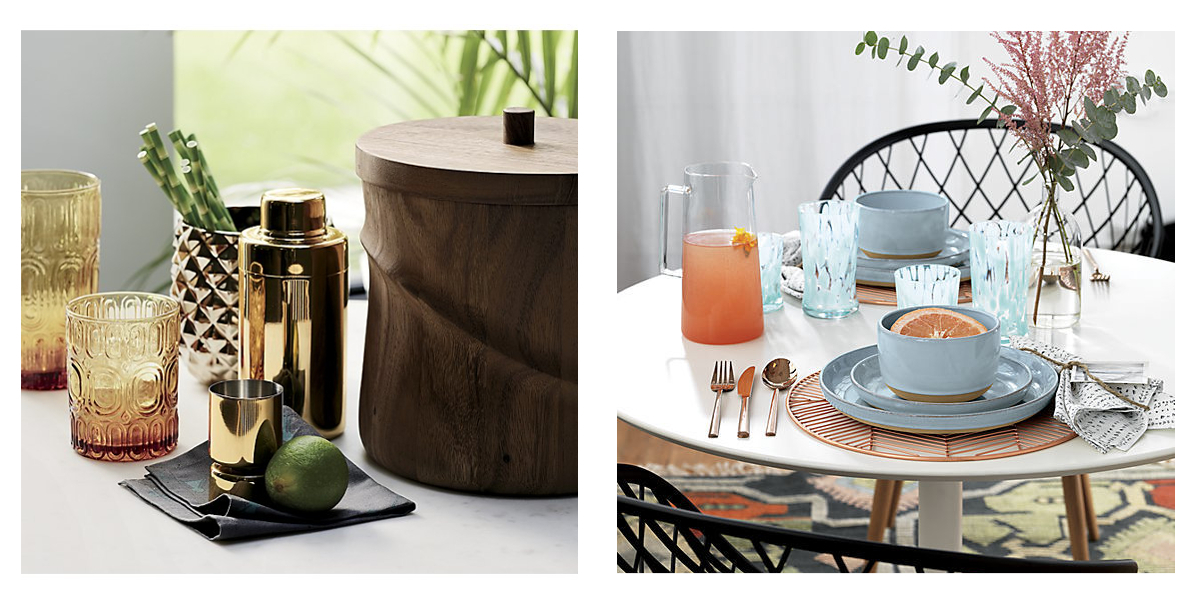
3. Zoom in: is there a particular detail you want to draw attention to? Include a zoomed in photo of it. This gives your customers a better idea of how your product looks, and it shows off intricate details of your design.
Extra resources:
- This Shopify guide has everything you need to know if you want to DIY your product photos. You'll find tips on how to set up a background, which camera settings to use, how to edit photos, and more.
- If you'd rather leave it to a pro, Printful's Ecommerce Photography team can snap high-res shots of your products and send them to you, ready to upload to your store.
3. How to Write Awesome Product Descriptions
So, you're showing your products in their best light and giving your customers a clear visual of what they're looking at. Now you need to use killer copy to persuade customers to hit that “buy" button.
Product descriptions are also important to create your brand's voice and tone. All of your messaging, from landing pages, to emails, to product descriptions, sets the tone for your brand's personality. How do you want to communicate with customers? Are you funny and playful, or more serious and to the point?
It'll take some time, practice, and testing to write killer product descriptions, but here are a few tips to get started.
1. Be specific: include a size guide with measurements to help customers decide on which size they need to buy. What kind of fabric is it made out of? If you're selling a poster, what kind of paper is it? You want to include some practical details to help your customers learn more about what they want to buy.
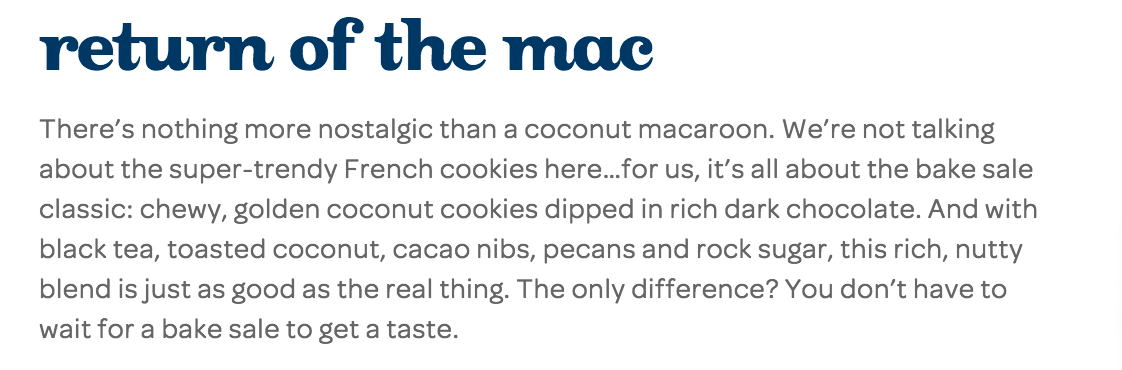
2. Be creative: while you should include informative details about your products, you shouldn't be boring. Veer away from generic write ups and get creative. Instead of flat-out writing that your product is “high-quality," describe the reasons why. The fact that it's high-quality is implied.
This example from David's Tea doesn't directly say this blend is delicious. Instead, it describes the taste using decadent words that evoke tons of imagery and taste.
 3. Be aware of your audience: who are you writing for and what kind of language appeals to them? Never forget the customer journey – put yourself in their shoes and figure out what you need to tell them to make them buy your stuff.
4. Tell your story: do you have a story behind your product? Share it in the description. It adds more personality and a human element to your store. Take this example from vainags.com – it sells apparel with the design of a traditional Latvian headdress and the product description talks about its history.

5. Use keywords: this will help people find you on search engines. What keywords would people most likely use to find your products? For example, a search for “Men's short sleeve pineapple print sublimation t-shirt," might not be a popular search term. “Pineapple print shirt" might be more likely.
Bam! You Created Some Awesome Products
So what happens after your products are lookin' awesome? You still have to figure out how to get your store in front of people and generate sales. This is what we'll be covering next, so stay tuned!
Extra resources:
- This Printful blog post, this one from Kissmetrics and this one from Shopify go over more examples and tips on how to write product descriptions that sell.
- You can always use Printful's product descriptions for your store if you're not sure where to get started! They're a helpful resource, but we recommend you personalize your product descriptions and write in your own voice.