All About Gait
(Walking)
This eBook will detail common issues that many deal with after a stroke with regards to gait- and exercises to help
This eBook will detail common issues that many deal with after a stroke with regards to gait- and exercises to help
INTRODUCTION
Gait (walking) may be the single most important and common issue that physical therapists help to recover after a stroke. Here are tips and exercises from a stroke survivor and physical therapist herself.
Main gait related issues seen after one suffers a stroke:
I hope some of my tips help you. For years I have been told that the blog I started writing (www.mycerebellarstrokerecovery.com) after I got sick has helped people with specific problems so I decided to condense information into several Ebooks. Having a stroke is devastating. You're not alone. I'm here to help.
In each different part, there are exercises that would help with the condition that I write about. Some of them may overlap. I have pictures of both exercises that you can do at home and more advanced exercises that you may need to do at a gym.
These lists of exercises are in no way exhaustive. There are many, many more. Also, specific to repetitions/ sets/ weights - My recommendations are pretty similar for each exercise. You'll have to figure out what you can do on your own. You can always make an exercise harder by adding weight/theraband or reps.
Thank you SO, SO much to physitrack.com for allowing me to use their pictures of exercises in my eBook!!!!!!!
Amy Elder, PT, DPT, Cert.MDT
The information provided is not intended to be a substitute for professional medical advice, diagnosis or treatment. Never disregard professional medical advice, or delay in seeking it, because of something you have read in this eBook. Never rely on information in this eBook in place of seeking professional medical advice.
Sometimes, looking at the search terms that were used of how people ended up on my blog is a great way to give me an idea for a new post. This exact wording was put into Google (or maybe a lesser-known search engine)….”Why do you go up with the good and down with the bad?”
I’ll explain this using the example of a sprained ankle. Think of an orthopedic injury that requires you to put less weight through one foot when walking or it will hurt very badly. When it comes to the weird gait patterns after a stroke, sometimes this won’t apply.
At first, in some cases, this advice may not apply to you due to your specific symptoms. It did not apply to me for the first couple of years after my stroke. Because of the tremor and ataxia in my right leg, I had to do the opposite of this gait pattern for quite some time when negotiating stairs. Going down with the bad didn’t work for me because my “bad” leg had a mind of its own for a while and I had zero control over it. I wasn’t able to direct it and tell it where to go.
Some time later, when I had more control of my right leg, I was able to use this piece of advice.
Ok, back to the question. Pretend your right ankle is messed up. So the right leg is the “bad” leg. When going up stairs, the entire weight of the whole body must be lifted up to the next stair. You wouldn’t want to put all that weight through your messed up ankle. So, when you go up stairs, you “lead” with your left leg, using that leg to do all of the work lifting your body, and bring your right leg up to same step to meet it. That way, when climbing a step, all the weight being lifted is on the “good” leg. You wouldn’t want all that weight put on your messed up ankle.
Going down a flight of stairs is the exact opposite. Again, you don’t want all that weight on your “bad” leg, so you would put your “bad” leg down onto the next, lower step first, which will transfer all the body weight to the left “good” leg and it can then do the job of lowering your body down without using your right leg at all.
Try it. Go down a step, put your right leg first on the step below. You should feel your left side tense up a little as it prepares to perform the act of lowering the body to the next step down.
On the next few pages, there are some exercises pictured with instructions that a physical therapist (PT) will give patients to help with stair negotiation. On many of the exercises, you'll see the instruction, "Make sure you are holding onto something when attempting this exercise." This instruction always stands for safety, but try to put as little weight through your arms as you feel comfortable doing. The weight should be on the leg that you are attempting to make stronger.
Header
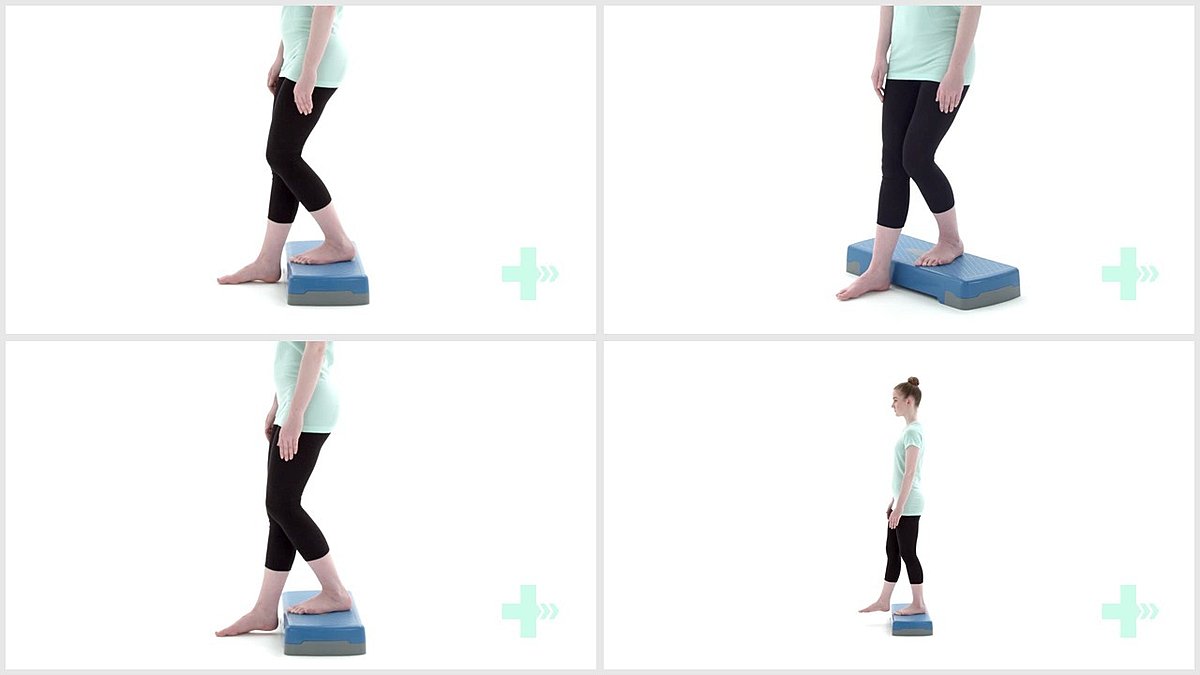
1. Step toe taps
10 Sets / 10 Reps
Header
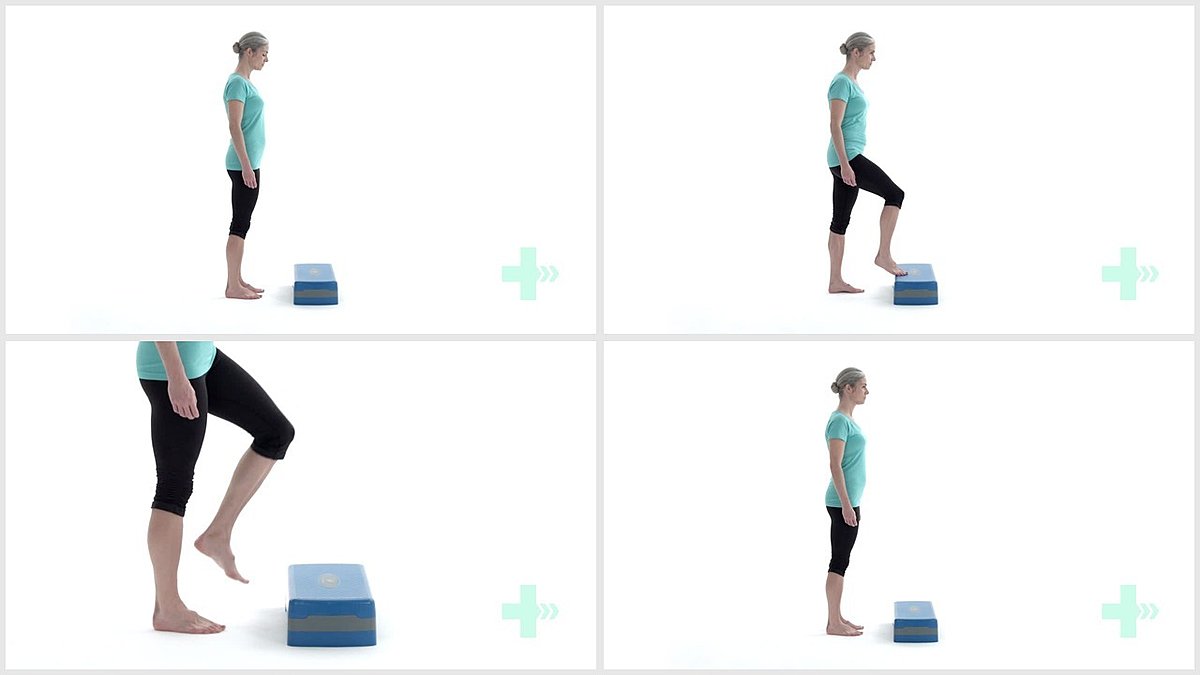
2. Step up
5 Sets / 20 Reps
Header
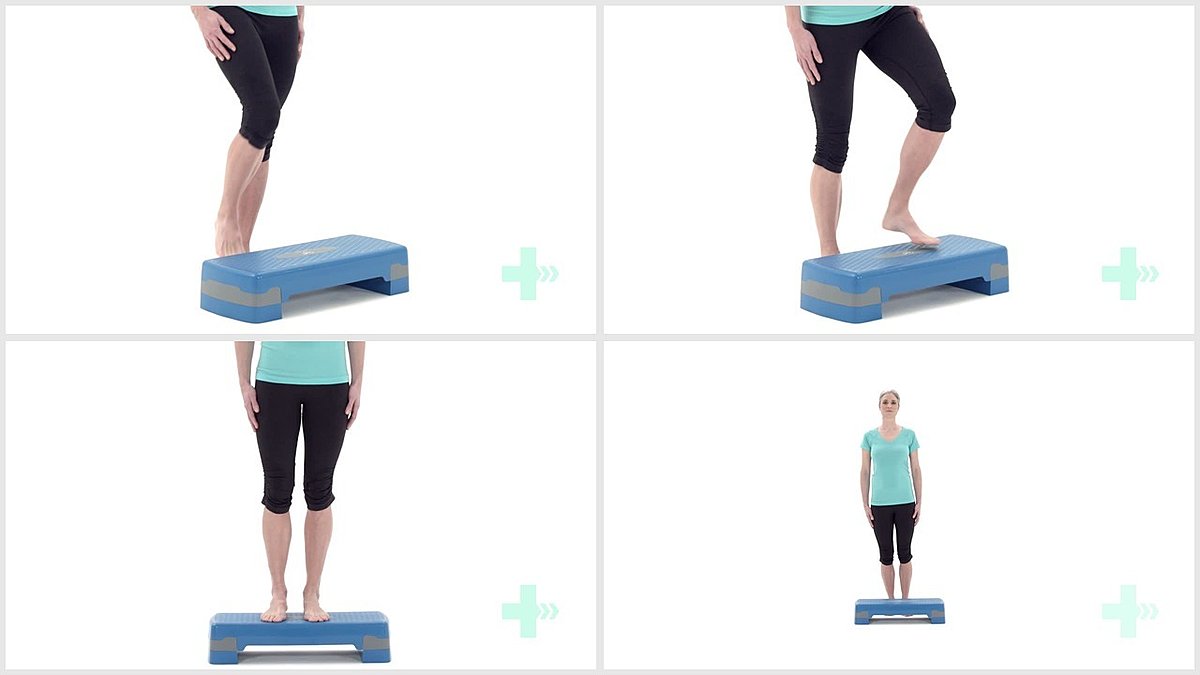
3. Step up and over
5 Sets / 20 Reps
Header
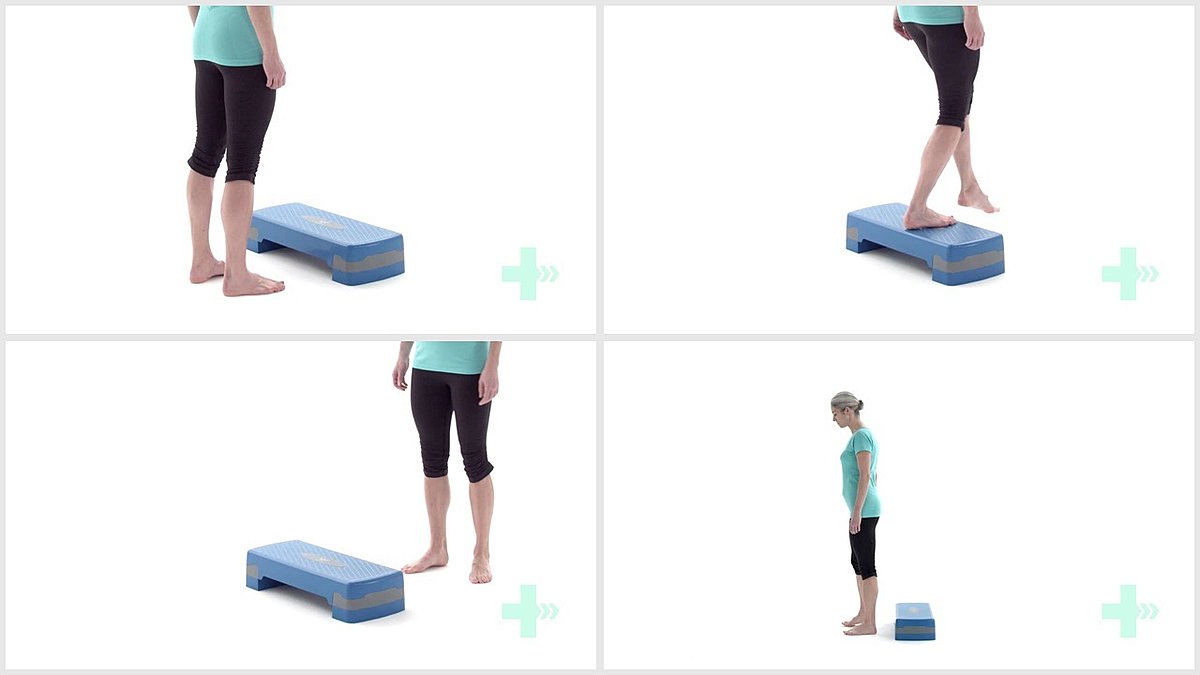
4. Step down
5 Sets / 20 Reps
Header
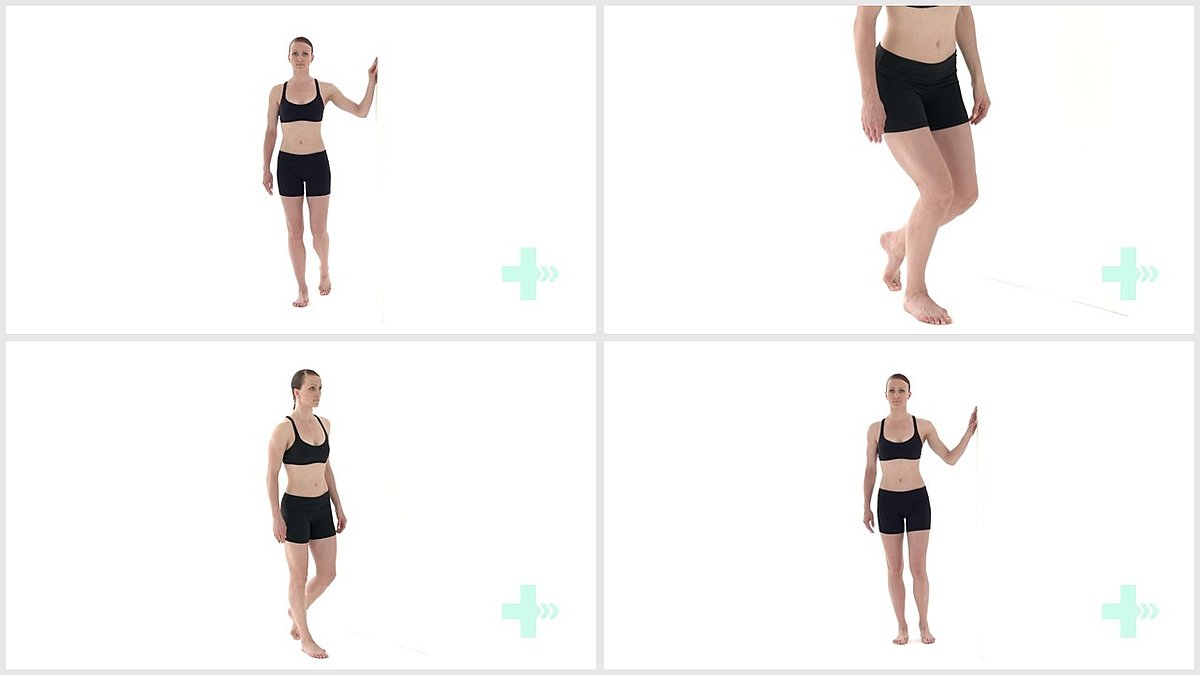
5. Stepping backwards
5 Sets / 20 Reps
Header
6. Lateral step ups
5 Sets / 20 Reps
Part 2 - Canes
This chapter will help to explain how to properly use a cane when walking and how it can help you
Here’s how to use a cane correctly when walking on level ground.……
You hold the cane on the OPPOSITE side of the weaker side. In my case, my right side is all goofy so I held my cane with my LEFT hand. The purpose of a cane is to increase your base of support which improves your balance so that you don’t fall. So, at the same time that you take a step forward with the BAD leg, the cane, held with the opposite hand, should be advanced forward simultaneously. When I walked with a cane, I would move the cane forward with my left hand AT THE SAME TIME as when I took a step forward with my right, weaker leg.
The definition of balance is keeping your center of mass (COM) over your base of support (BOS). If your center of mass goes outside the base of support, you fall. Manipulating the COM/BOS is how therapists move people around. In standing, a woman’s center of mass is around her belly button and a man's is around his chest.
When you’re standing, your feet are your base. Stand up and imagine a circle around your feet – that’s your base of support. Stand with your feet wider apart. It’s easier to balance, right? That’s because you just made your base of support bigger. When balancing on one leg, you have a wee little base of support. This makes it harder. That’s why therapists tell people to use canes and walkers. To increase their base of support. When you’re using a cane, your BOS is no longer just your feet, but the point of that cane is included in the circle around your feet (opposite of the bad leg) so the BOS is bigger. If you held your cane on the same side as the bad leg, your base of support wouldn't be increased by much.
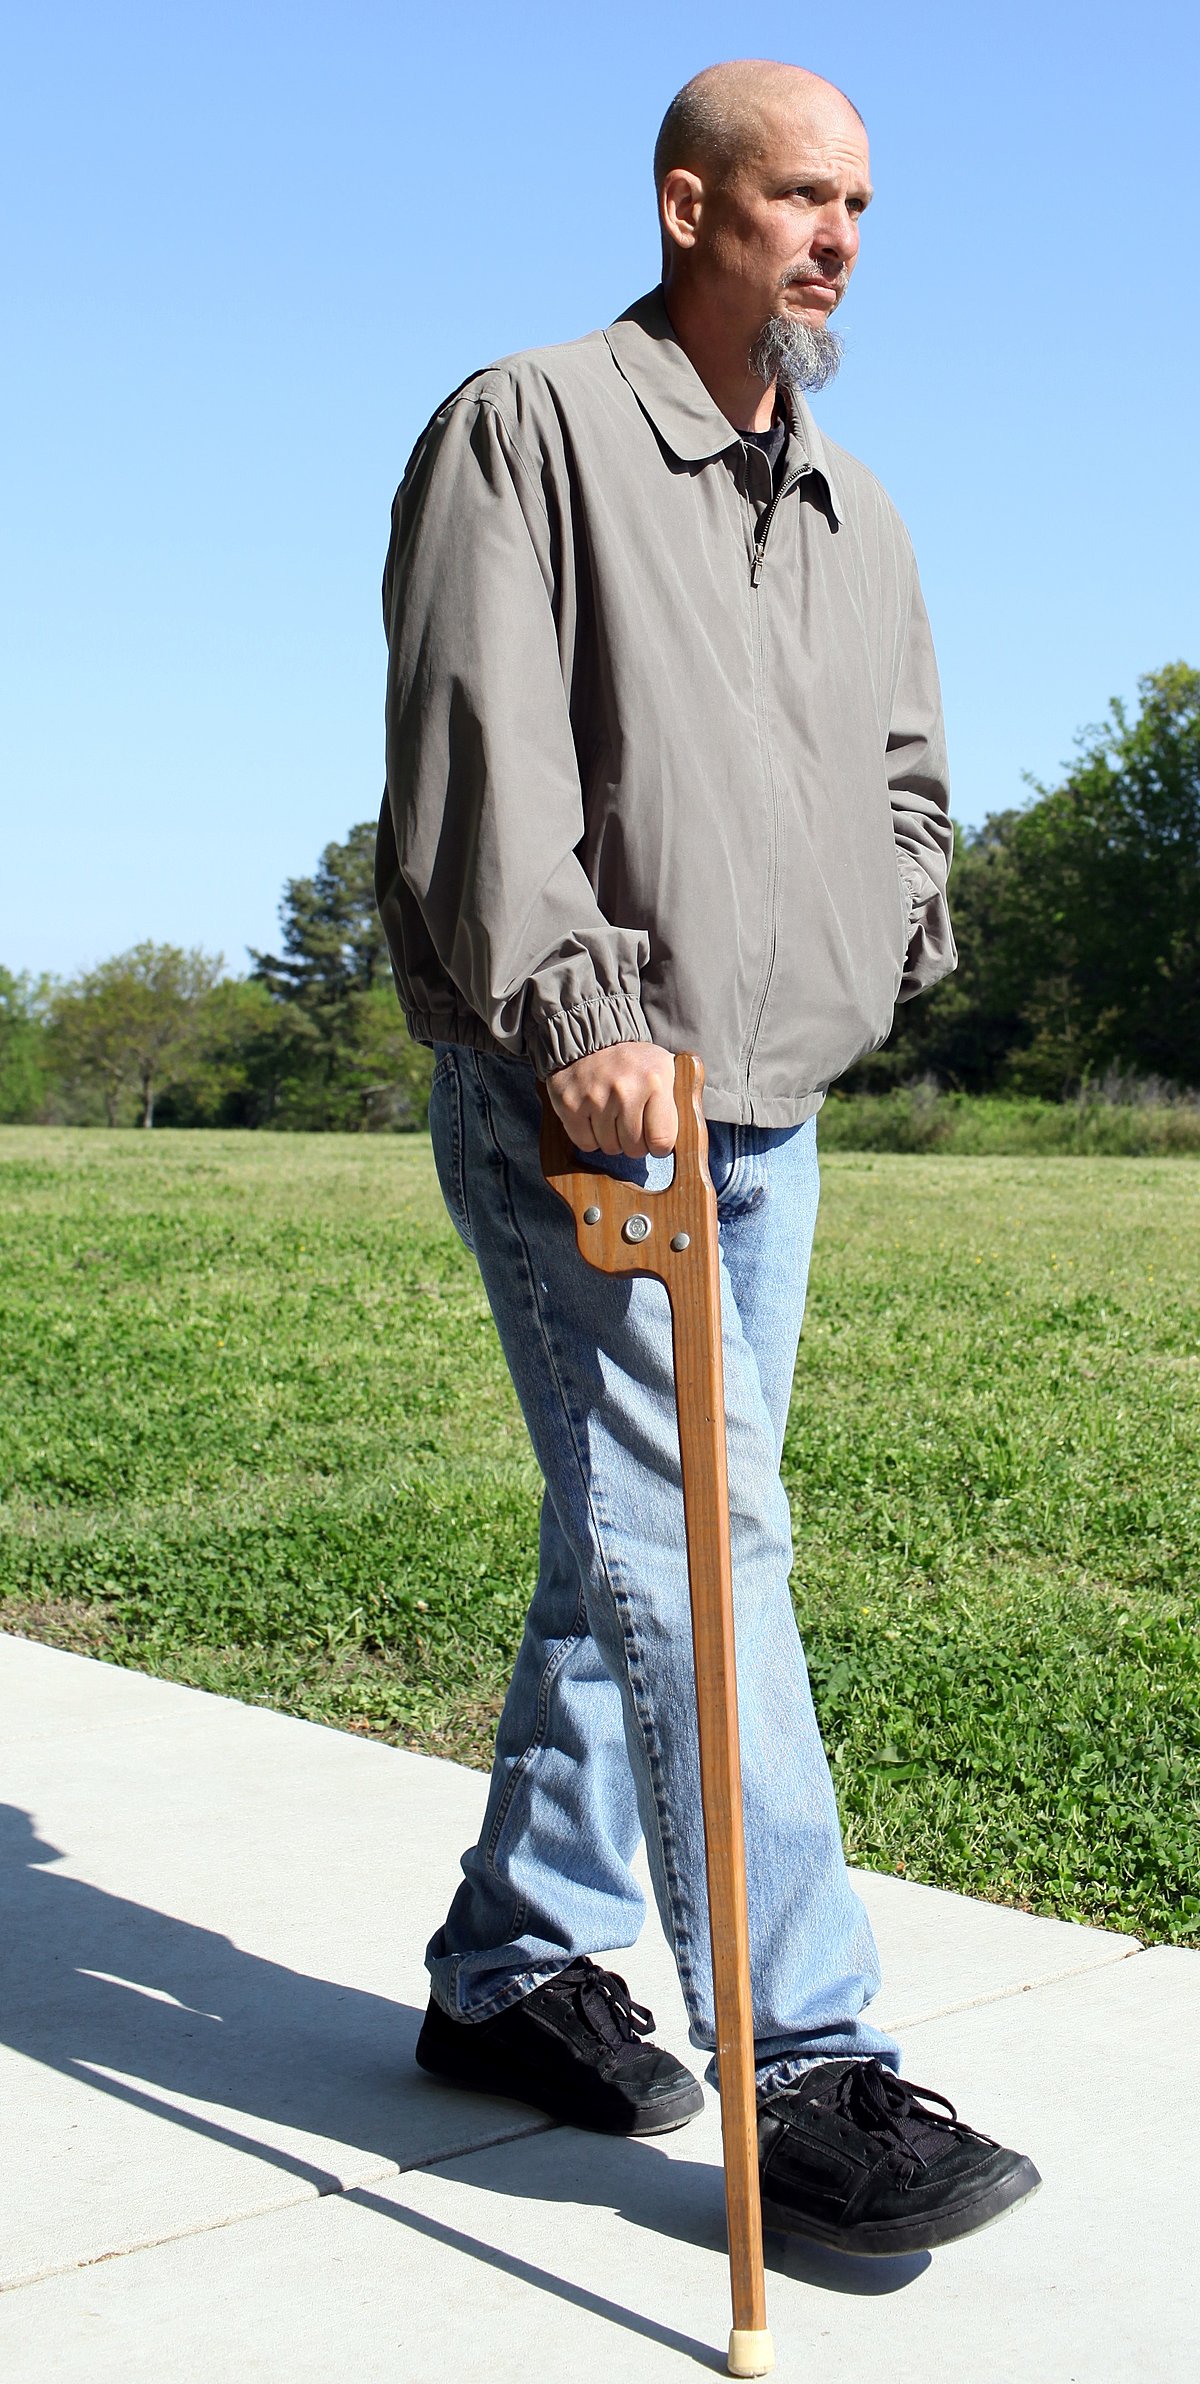
The above picture is an incorrect example of use of a cane. A cane should never be advanced forward on the same side of a leg. The cane should always mimic what the opposite, weaker leg is doing.
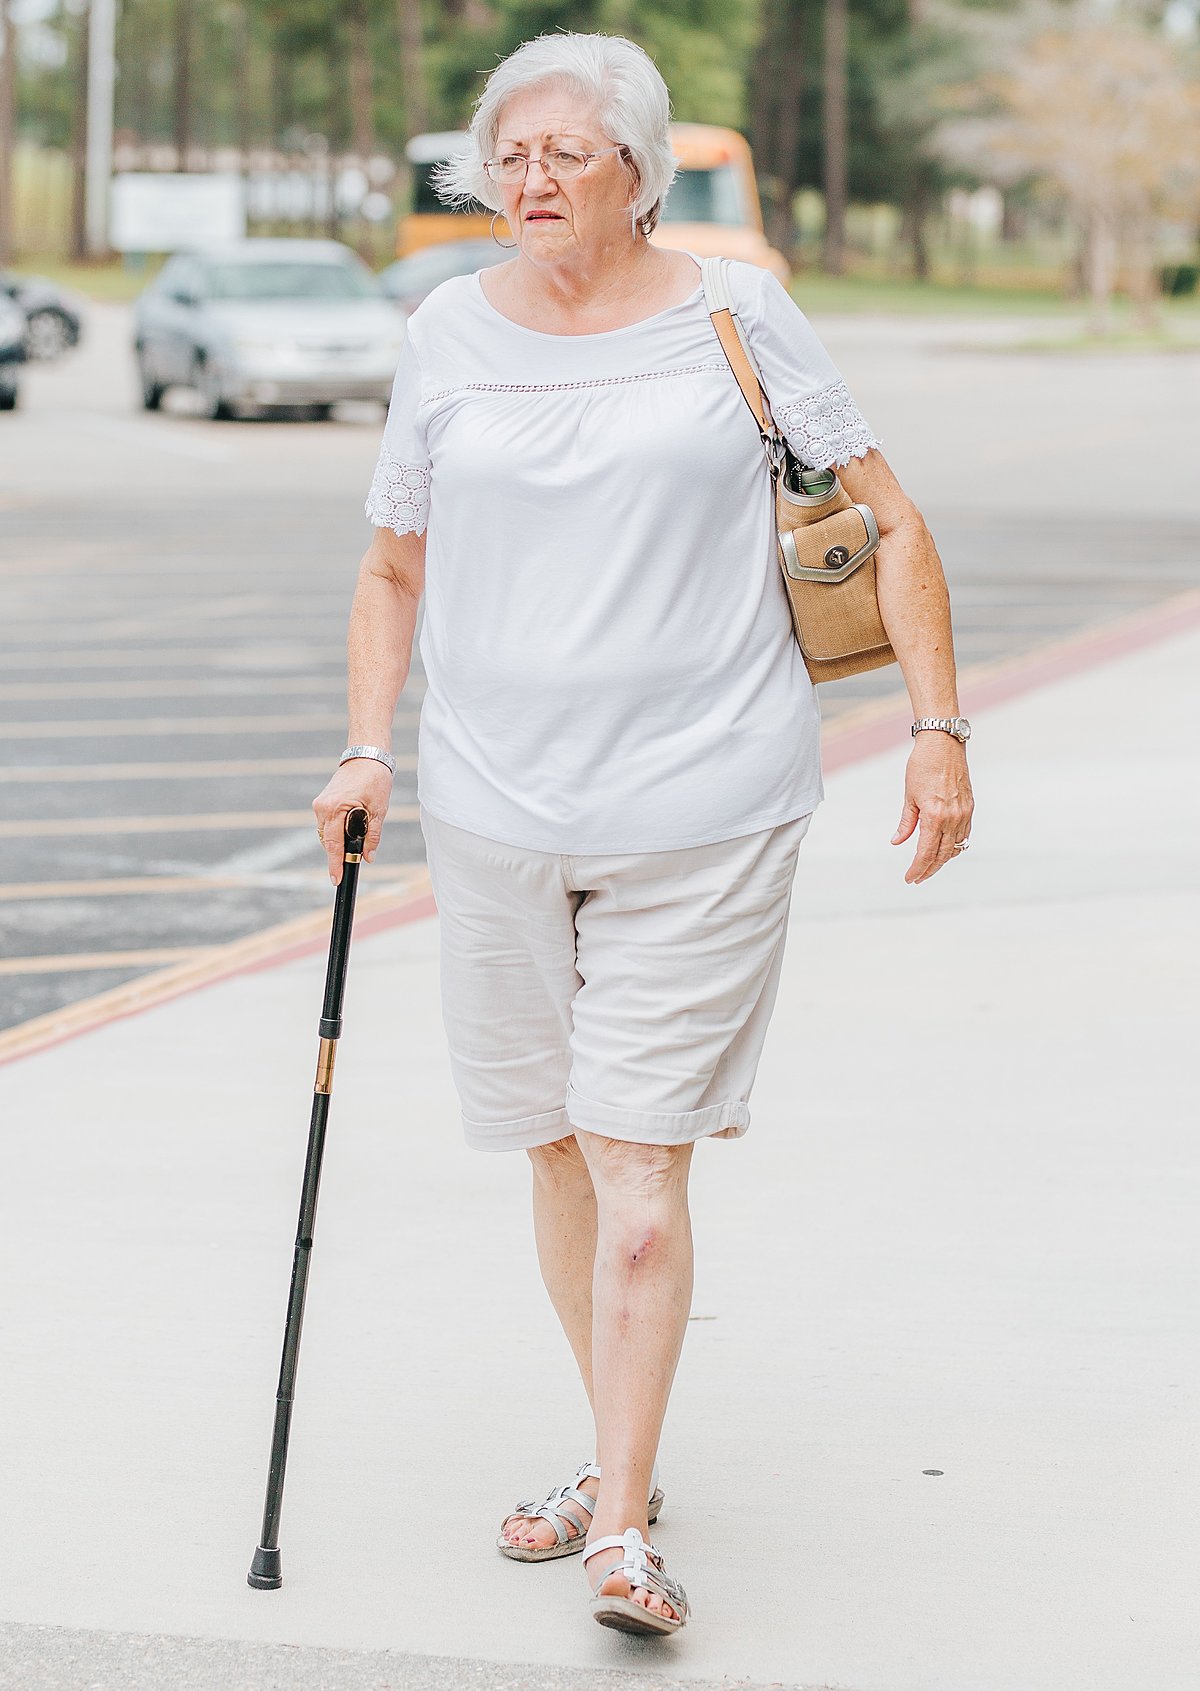
This is the correct use of a cane (assuming her left leg is the injured one). The cane is advanced forward along with the opposite, weaker leg.
Photo by Elle Hughes
I wrote about how to safely go up and down stairs with a bad leg. Now it's time to write about how to use a cane on steps. A previous chapter mentions the phrase “Up with the Good, Down with the Bad.” Consider your cane a part of the BAD. Whatever you do with the weaker leg, the cane held by the opposite hand, does the same or similar thing.
So to go up stairs, you would first take a step up leading with the GOOD leg. Next, bring up the cane held in the opposite hand, followed by the "bad' leg and the cane to the meet the 'good' leg on the higher stair. You always want the cane to do the same thing (or same thing just prior) as the bad leg, because the bad leg needs that support. This is for safety. Getting the bad leg stronger and back to normal function is an entirely different story.
To go down stairs, again remember, “up with the good, down with the bad.” So, to go down stairs, put the cane below you first (held with the opposite hand), then take a step down with the 'BAD' leg . The cane will already be there for support.
The cane side always does the same thing that the bad side is doing, or does the same thing just prior to advancing the bad leg. Next, step down to the same stair with the GOOD leg. It’s the opposite of what you do when going up stairs.
You’ll do the opposite of this in physical therapy to get that leg stronger. I’ve said the word 'opposite' 3 times in this chapter, I hope you’re not confused.
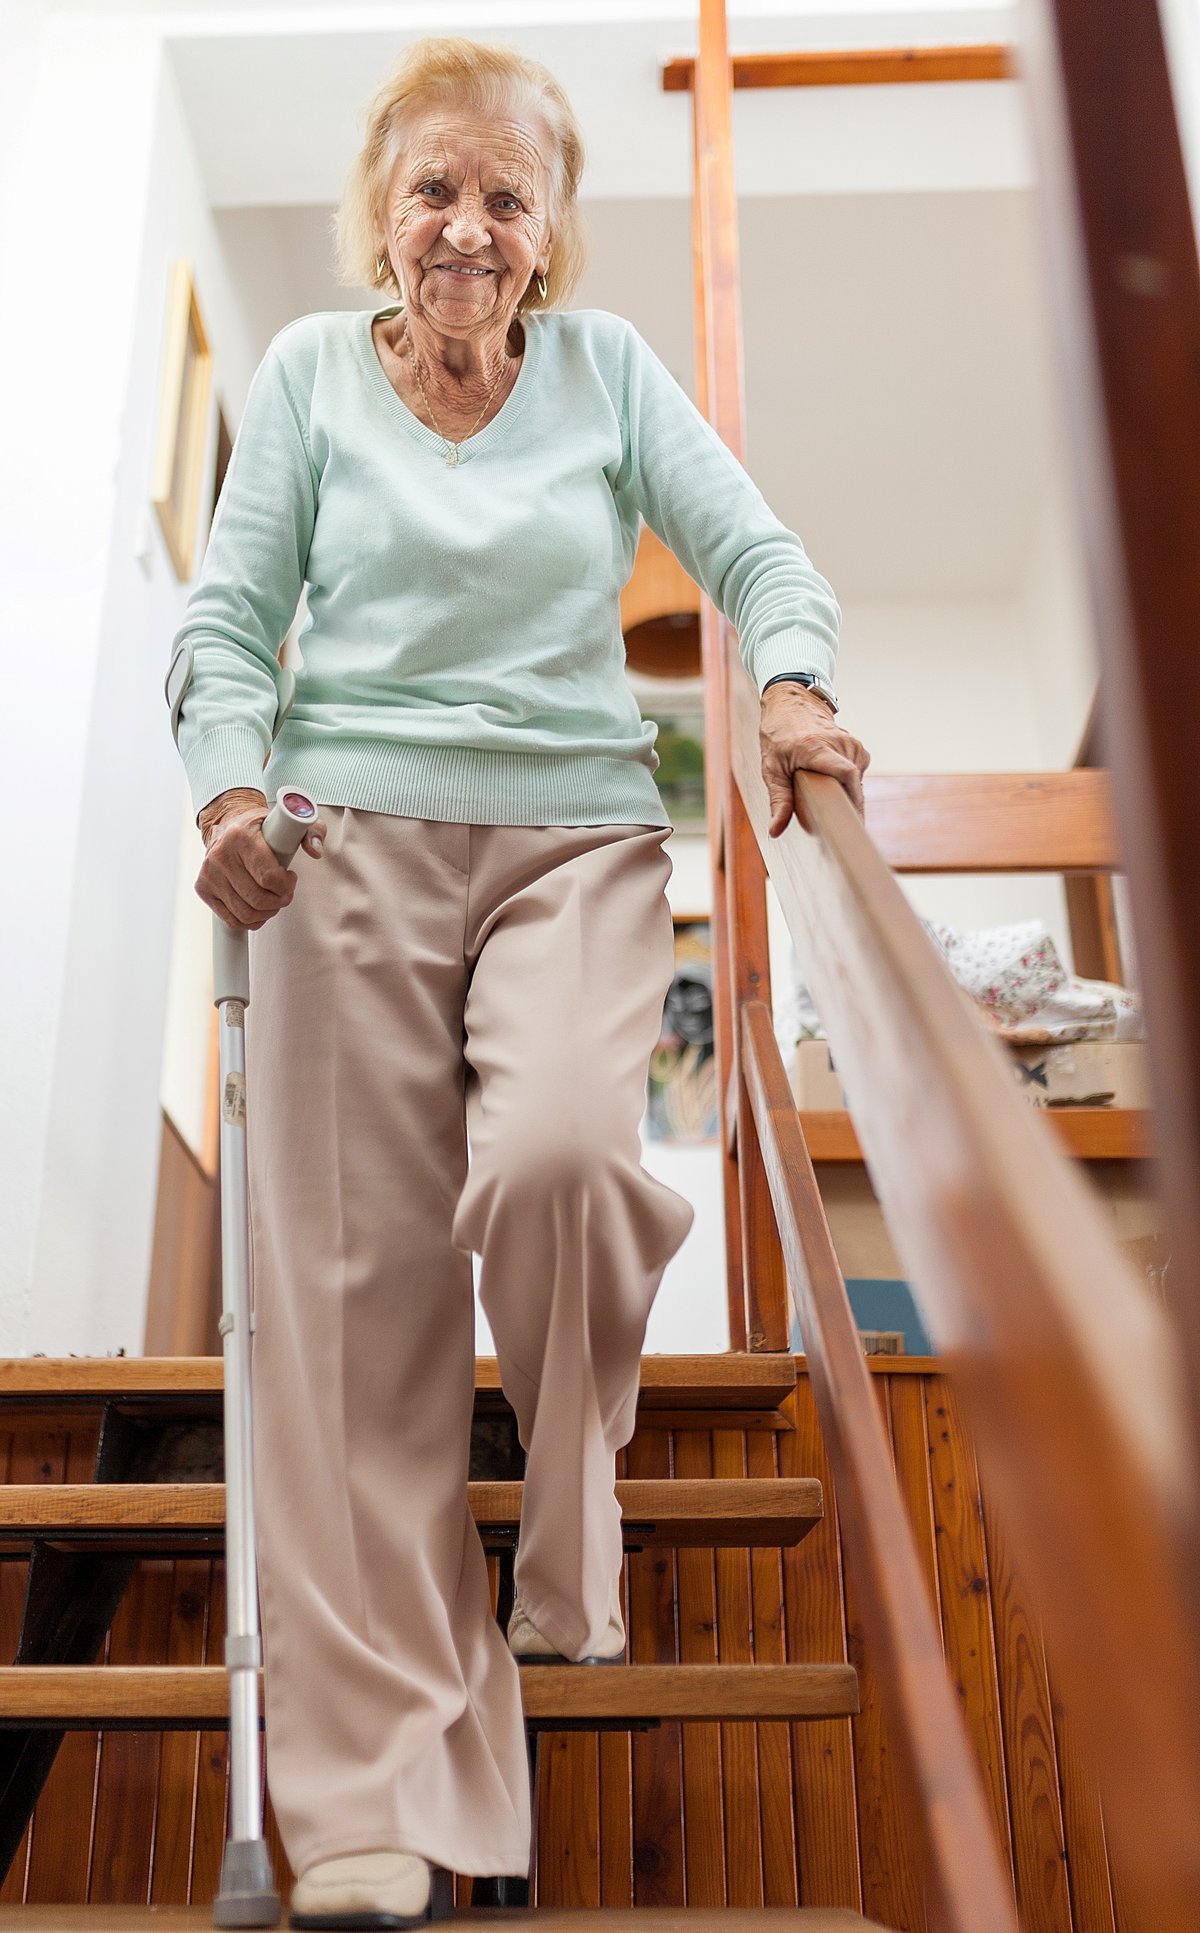
The image below would be incorrect assuming the woman's left leg is the weaker one. Assuming this, she is holding the cane appropriately opposite the weak leg. But the problem is, the left (weak) leg should descend before the right leg.
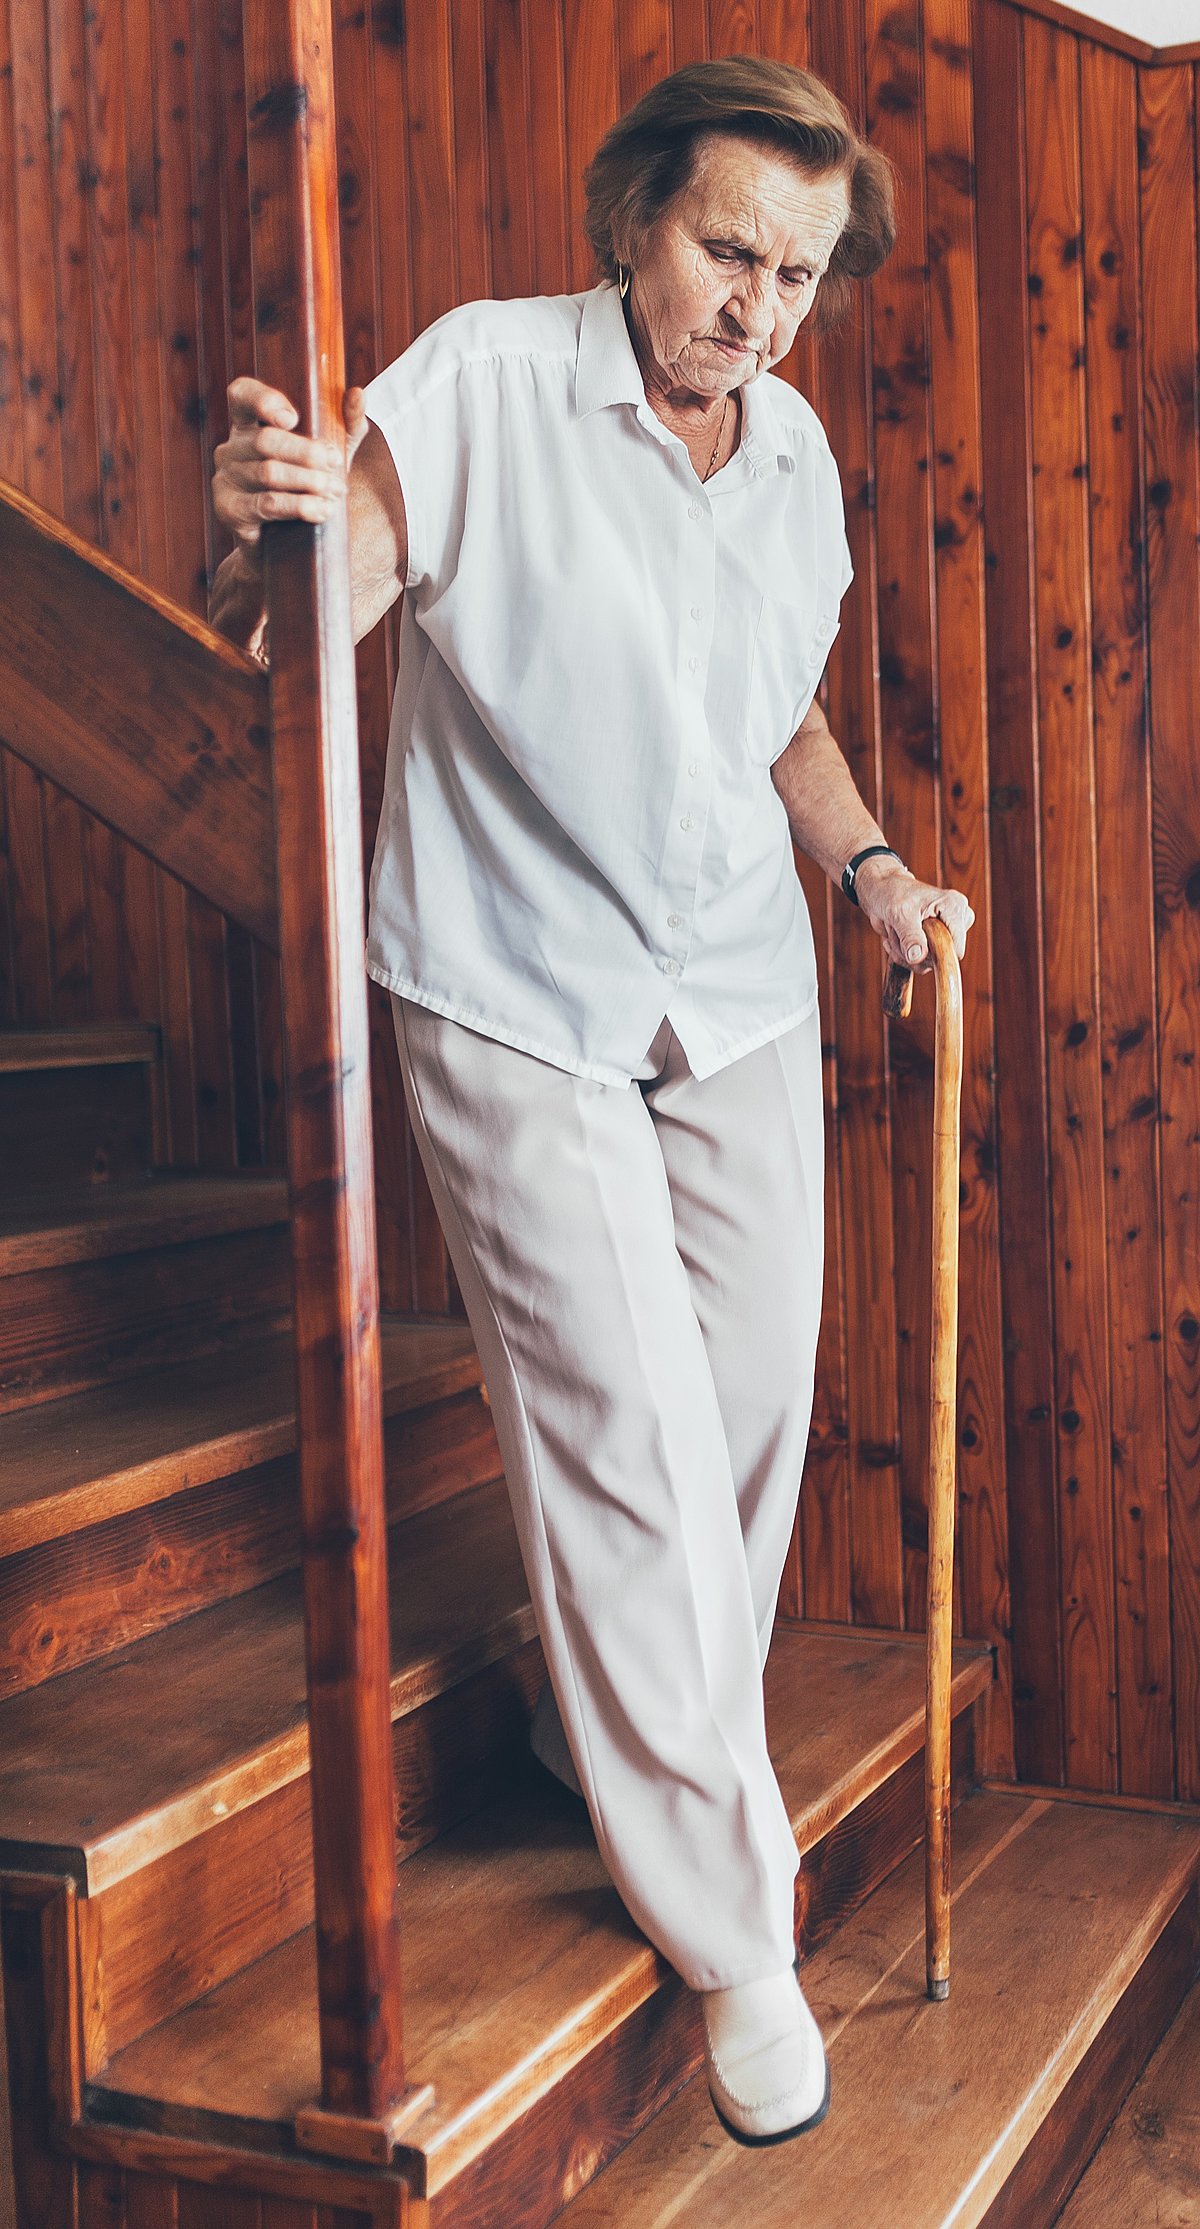
The image below demonstrates the correct way to use a cane going down stairs. The cane is held opposite to the weaker leg (assuming the right leg is the weaker one) and is on the same level as the weaker leg, giving more support.
Foot drop is a very common condition caused by stroke. You may have heard foot drop or drop foot or foot slap. Foot slap is a little different but they all involve weakness of the same muscle. This muscle is called the tibialis anterior.
Lift your foot up and keep your heel on the ground. Feel on the front of your lower leg the part that gets hard and pops out. That’s your tibialis anterior muscle. This muscle is responsible for an action called dorsiflexion.
Dorsiflexion is lifting the foot, bringing the toes closer to the shin. When this muscle isn’t working right, that action doesn’t happen and your foot drags. Your toes don't clear the ground and can trip you when you walk. The foot isn’t being lifted up properly. Strokes frequently cause this.
This is the reason someone will get an AFO (ankle foot orthotic). An AFO is something you wear on your lower leg keeping the foot lifted at all times. This makes it easier to walk.
A tip – a PT will say you need an AFO and think they’ve fixed the problem. Now you can walk – success! Not so much to a stroke survivor. Whenever you’re wearing that AFO, it’s doing the work for you. You should wear it to walk outside for safety’s sake and less embarrassment but as soon as you get home, take it off and try to do everything yourself.
Some exercises to help this condition are on the next few pages.
Header
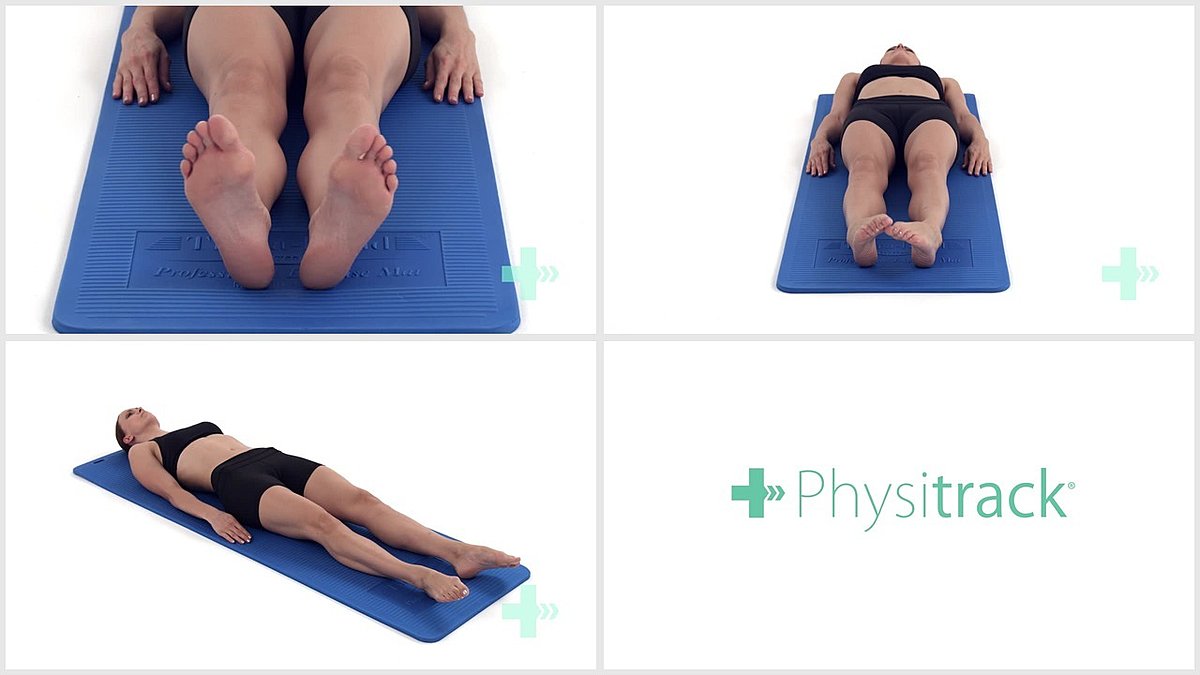
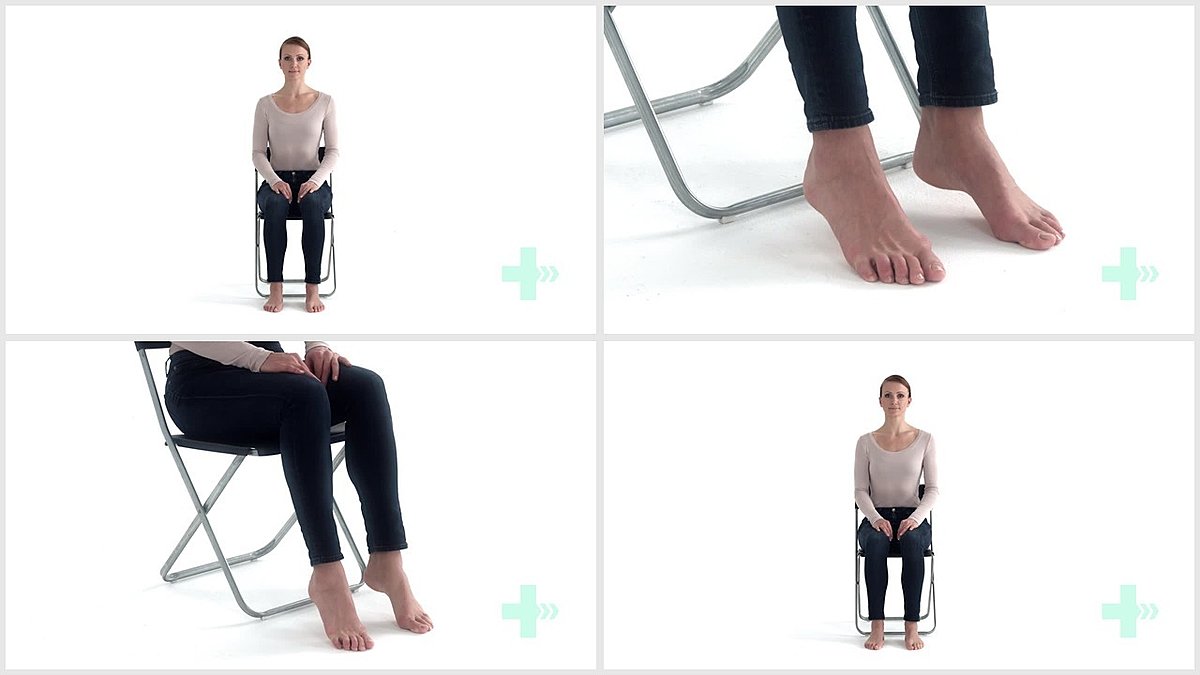
1. AROM ankle dorsiflexion
5 Sets / 20 Reps
Header
2. Alphabet exercise
5 Set / 5 Reps
Header
3. AROM ankle circumduction
5 Set / 5 Reps
Header
4. Ankle dorsiflexion stretch with towel
1 Set / 5 Reps / 10 s hold
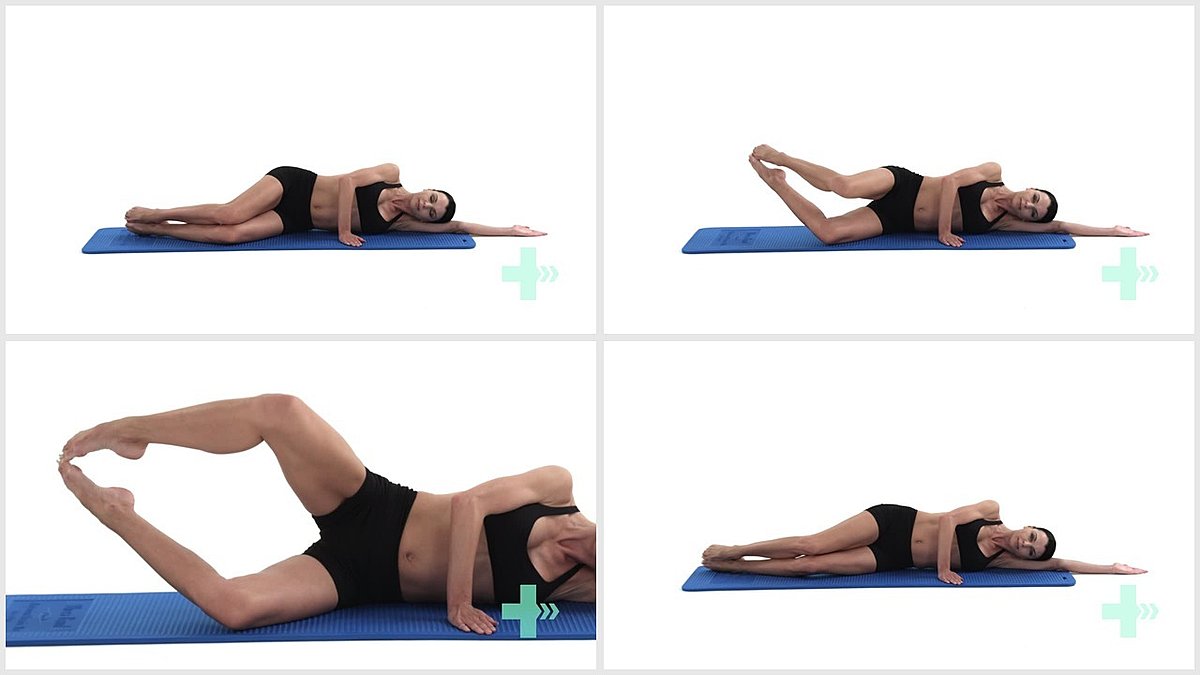
Header
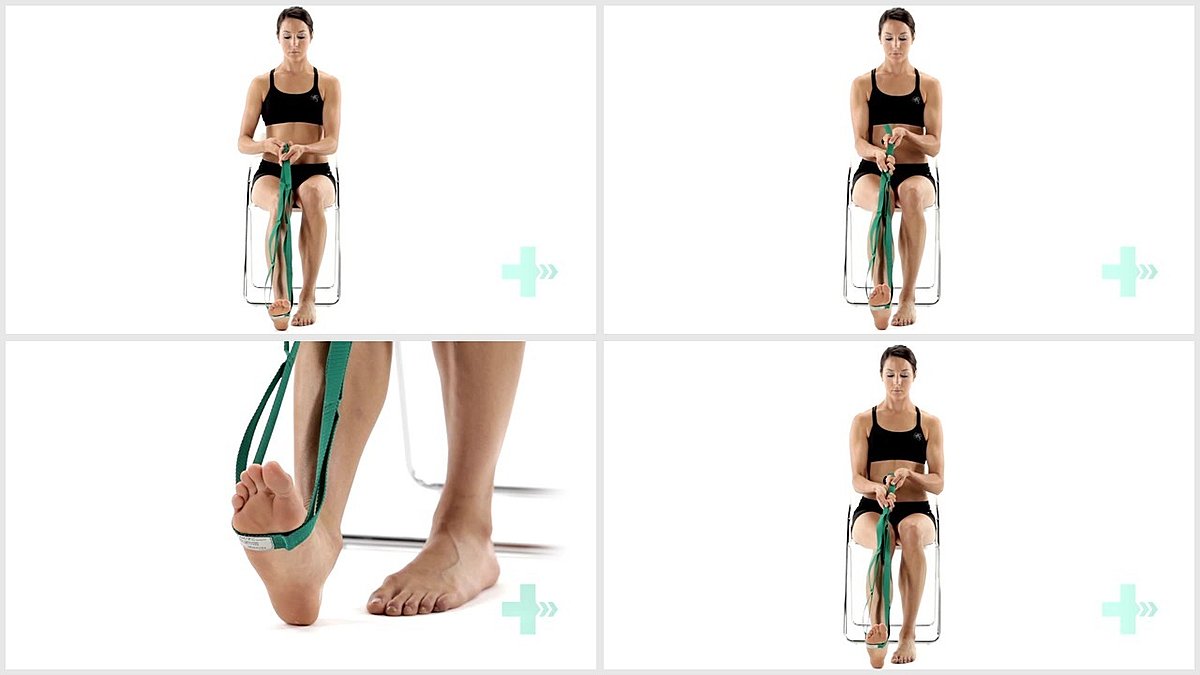
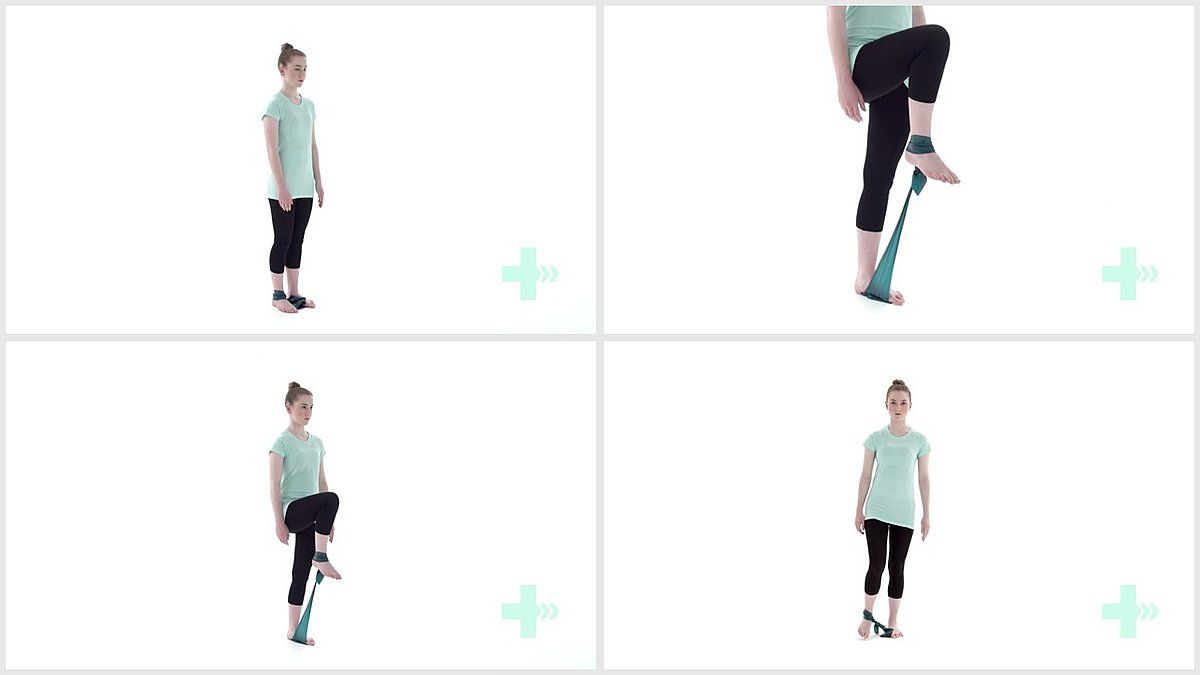
5. Great toe extension stretch with strap
5 Sets / 5 Reps / 10 s hold
Header
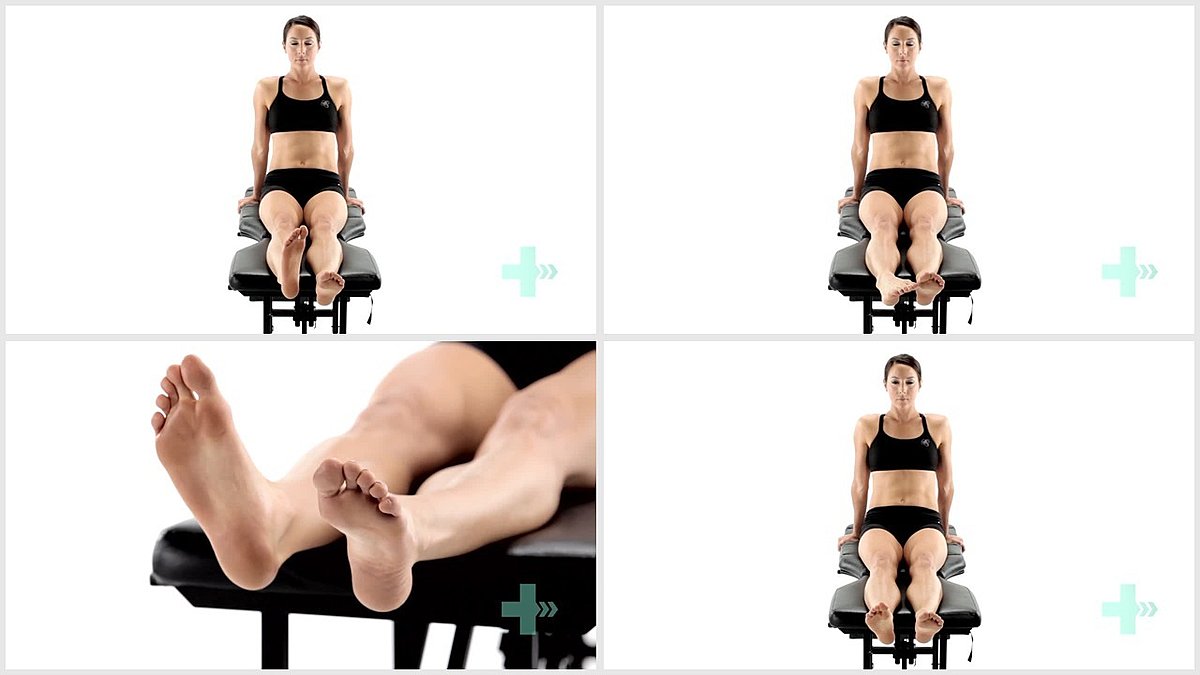
6. Tibialis anterior toe raises
1 Set / 20 Reps / 2 s hold
Header
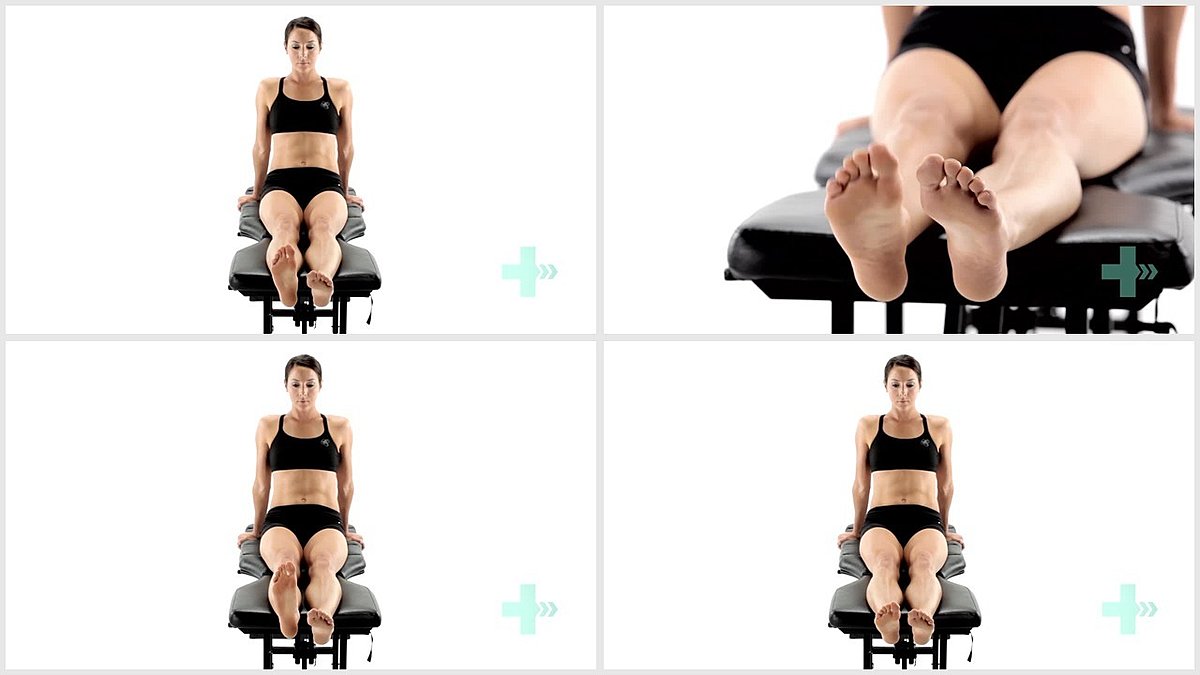
7. Isometric ankle dorsiflexion
10 Sets / 10 Reps / 10 s hold
Header
8. Resisted ankle dorsiflexion
5 Sets / 20 Reps
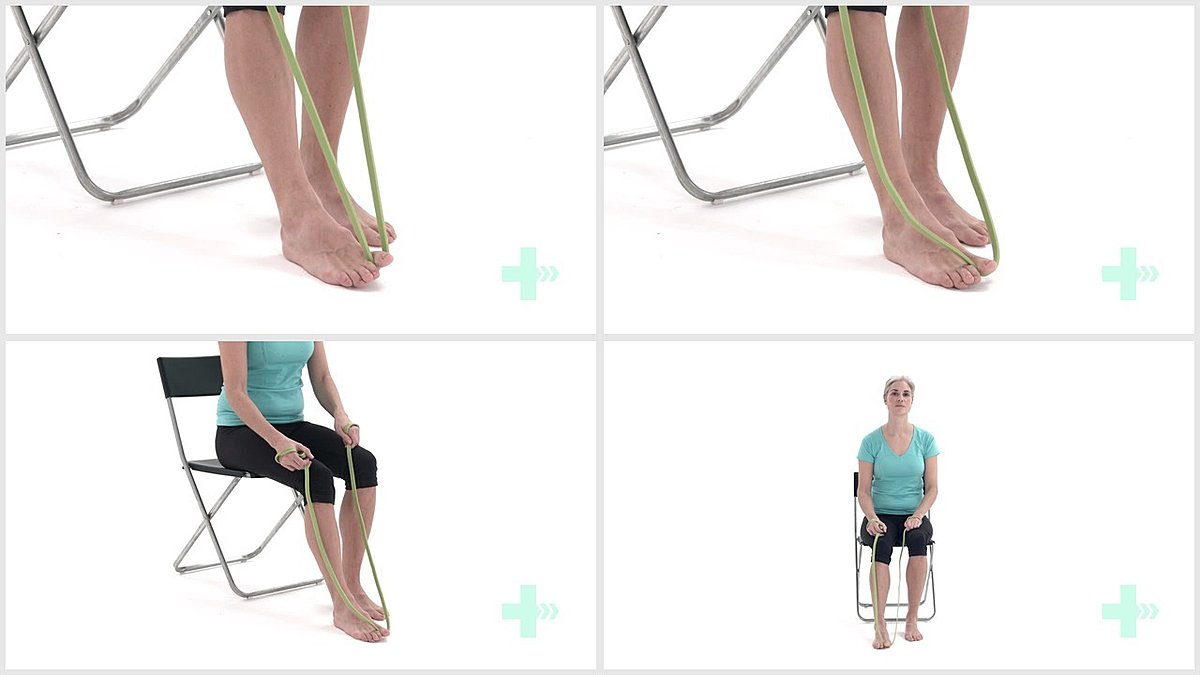
Header
9. Resisted inversion/eversion
15 Sets / 20 Reps / 2 s hold
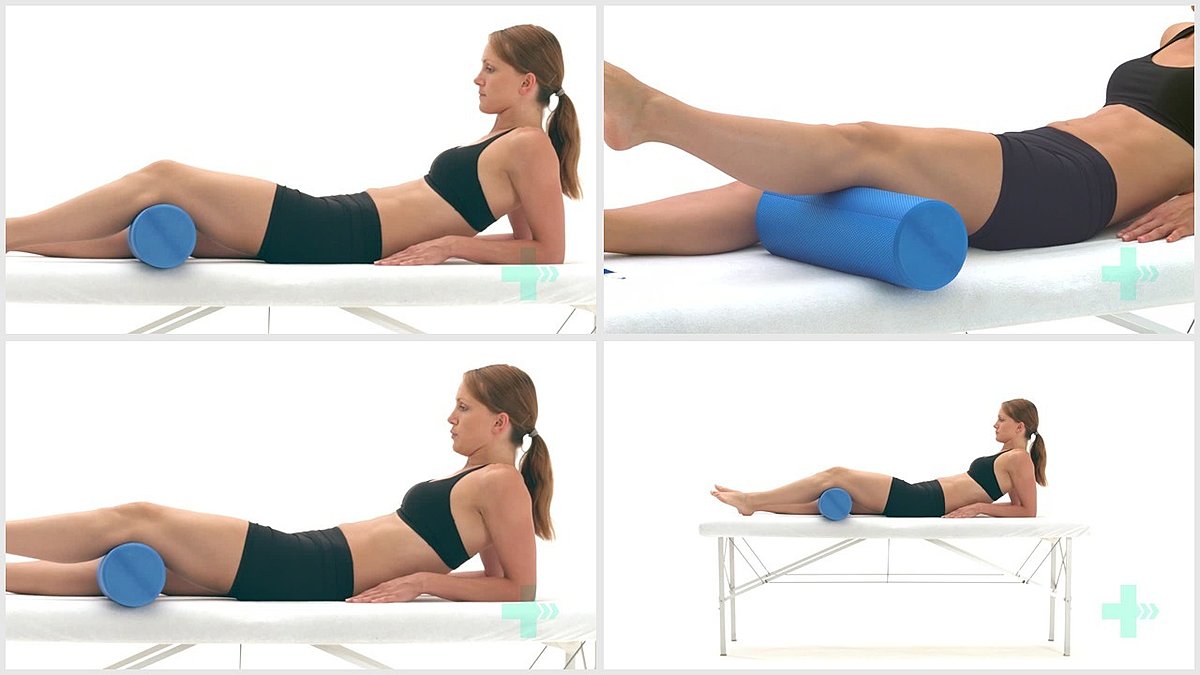
Header
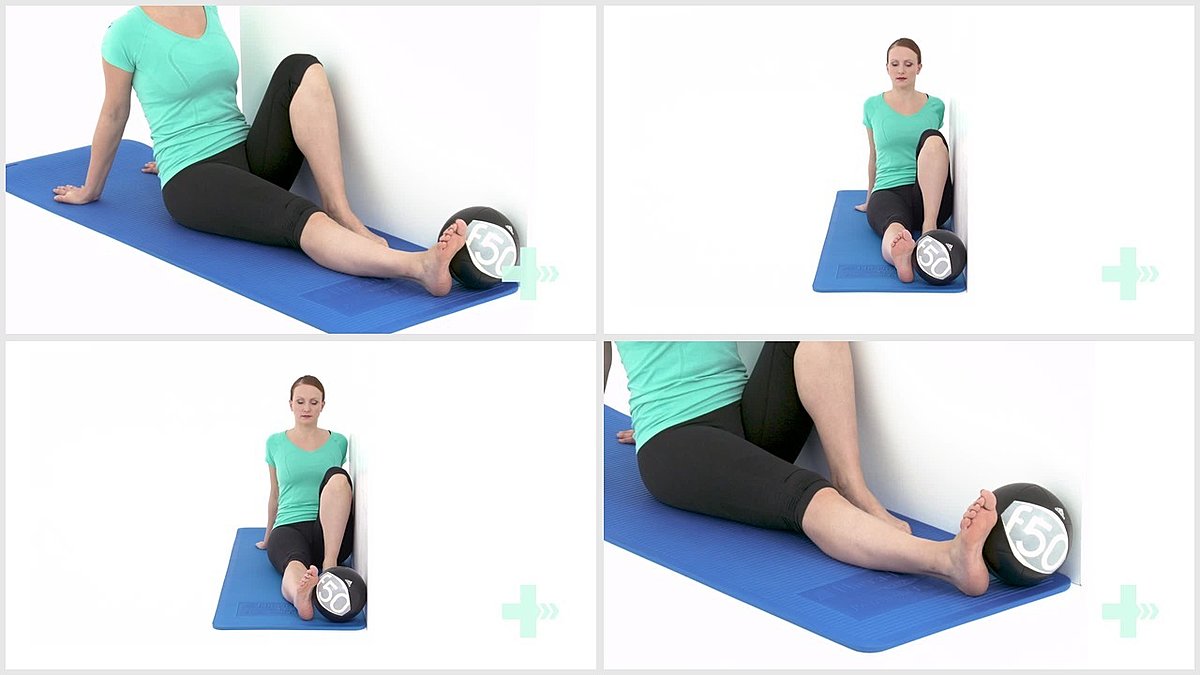
10. Isometric inversion in long sit against ball
5 Sets / 5 Reps / 10 s hold
Header
11. Resisted ankle inversion
5 Sets / 20 Reps
Header
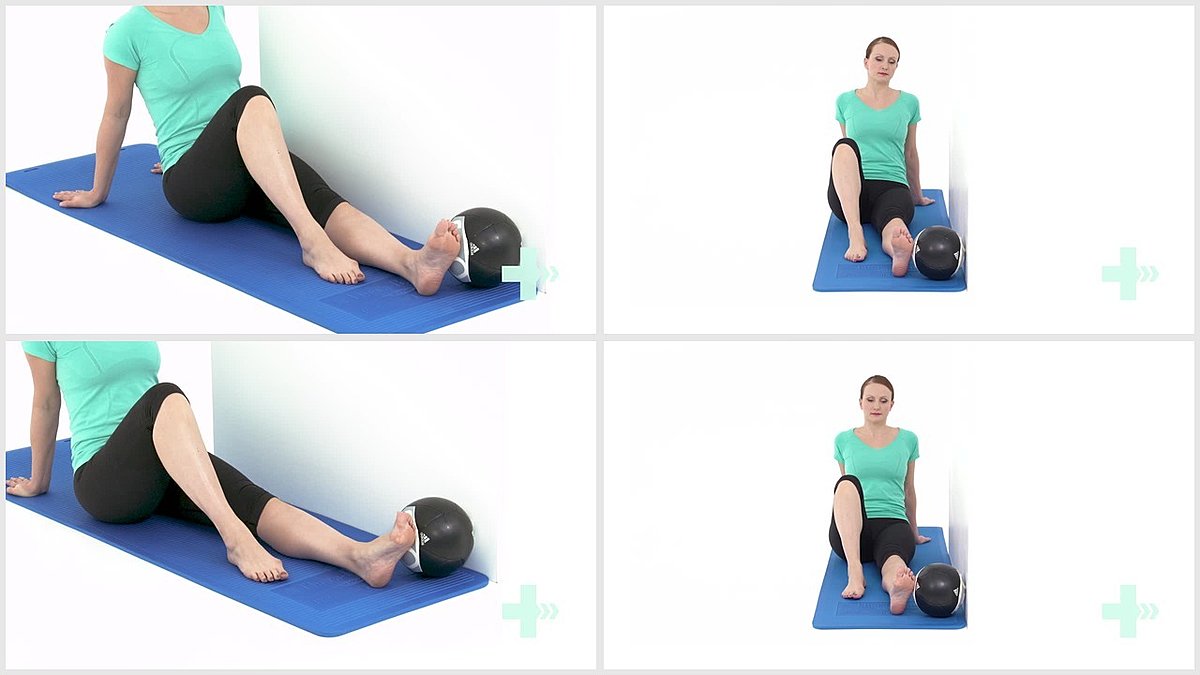
12. Isometric eversion in long sit against ball
5 Sets / 5 Reps / 10 s hold
Header
5 Sets / 21 Reps
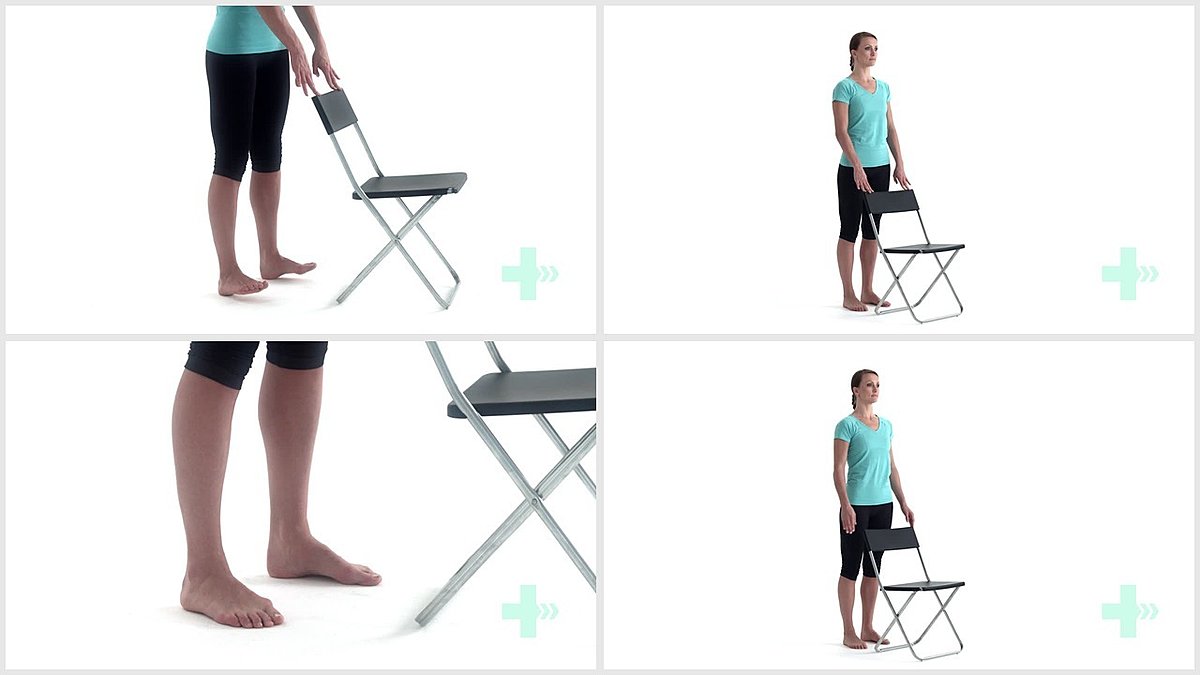
Header
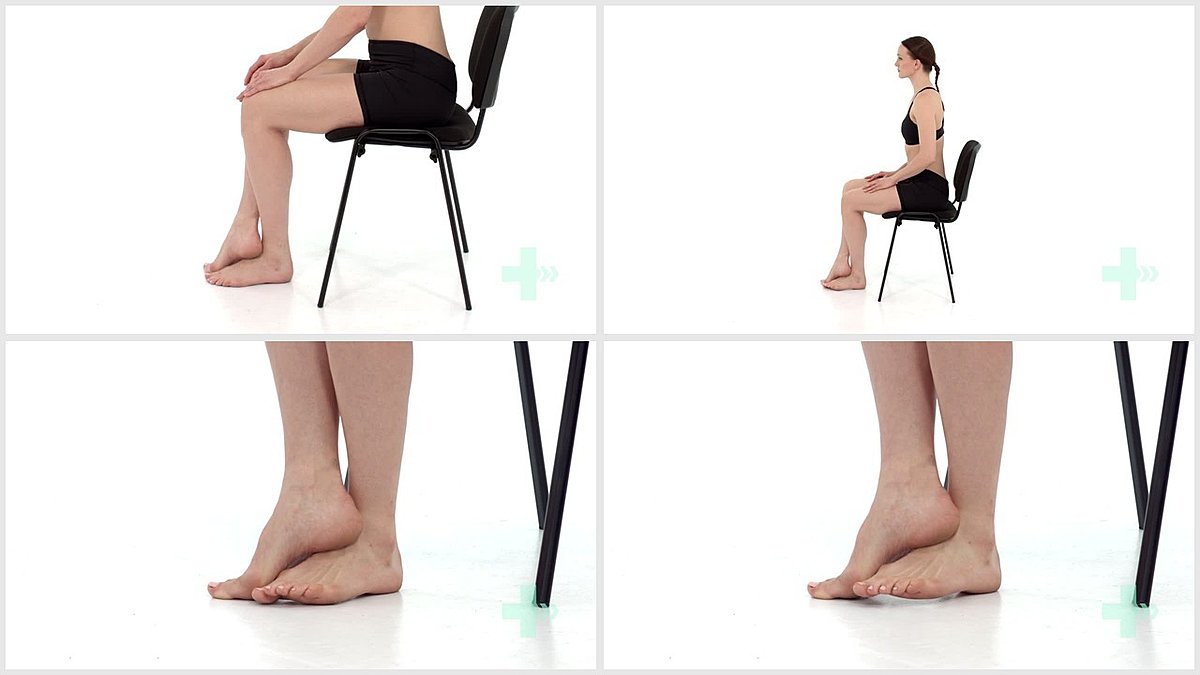
14. Hold and relax, heel raises
5 Sets / 20 Reps / 2 s hold
Header

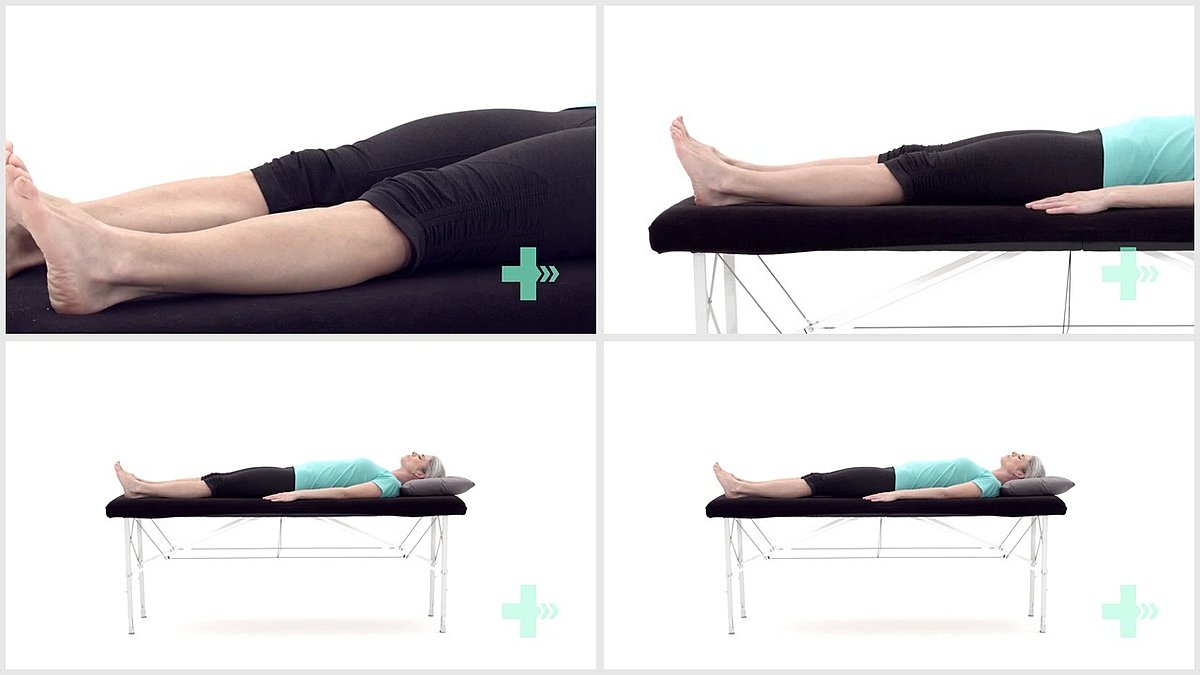
15. SAQ (short-arc quad) in long sitting
5 Sets / 20 Reps
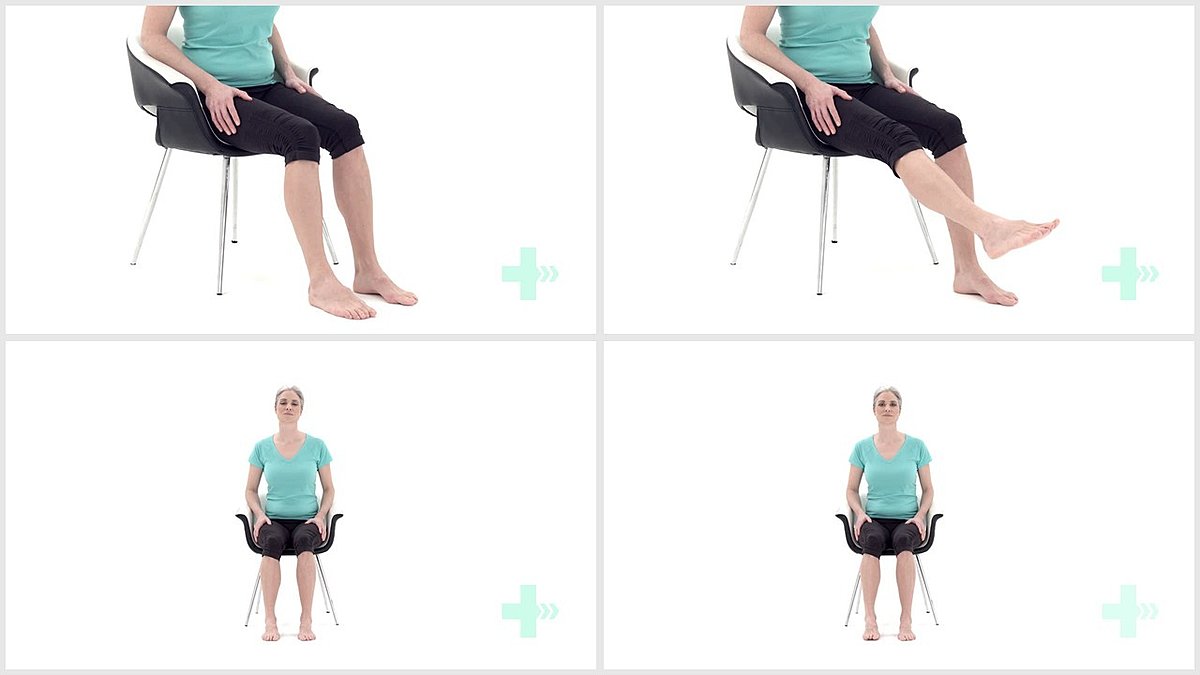
Header
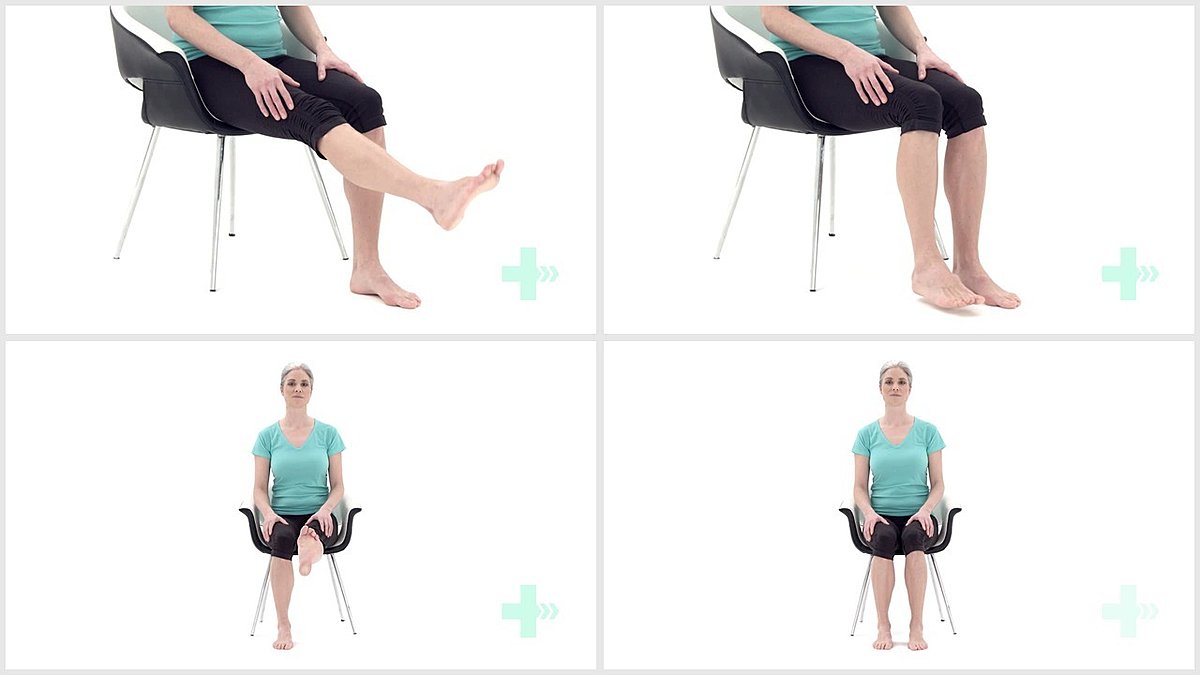
16. Knee extension in sitting
5 Sets / 20 Reps / 2 s hold
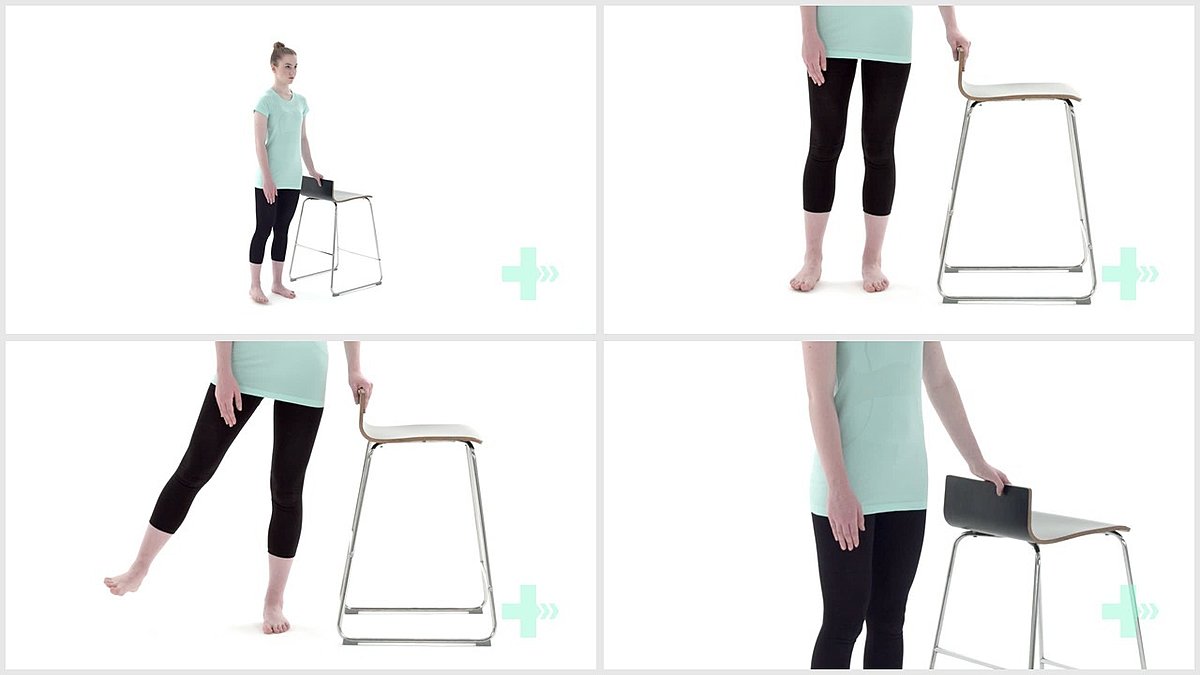
Header
17. Standing weight transference side to side
10 Sets / 20 Reps / 5 s hold
Header
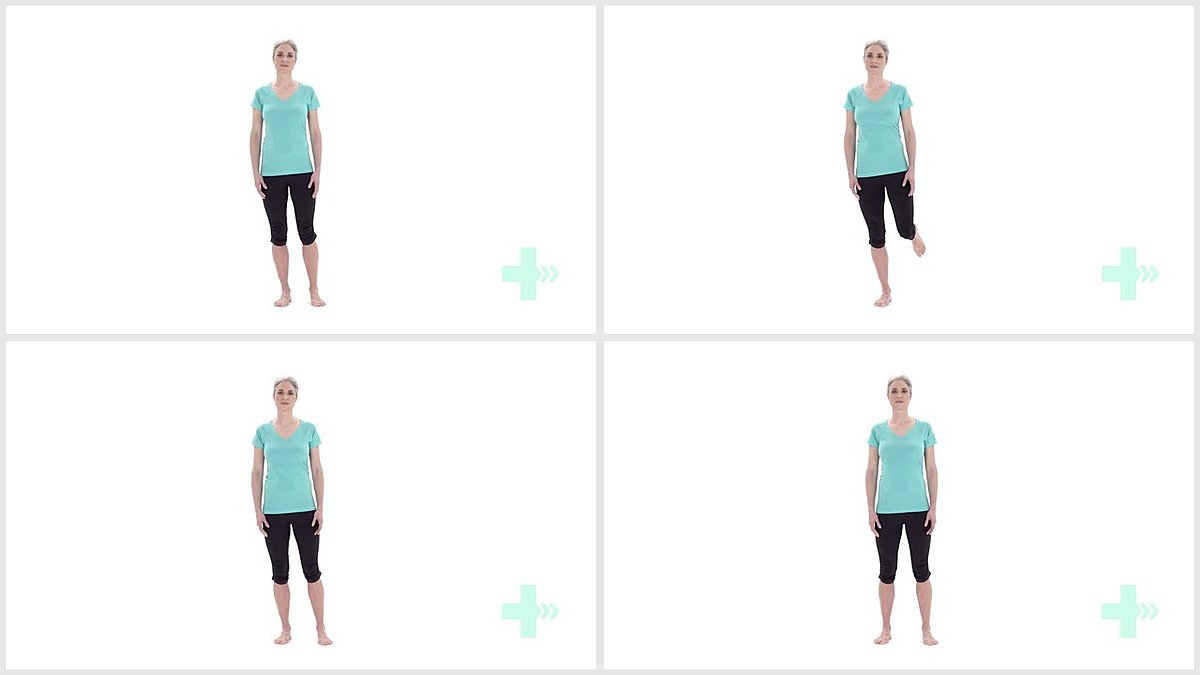
18. Single leg balance
10 Sets / 10 Reps / 10 s hold
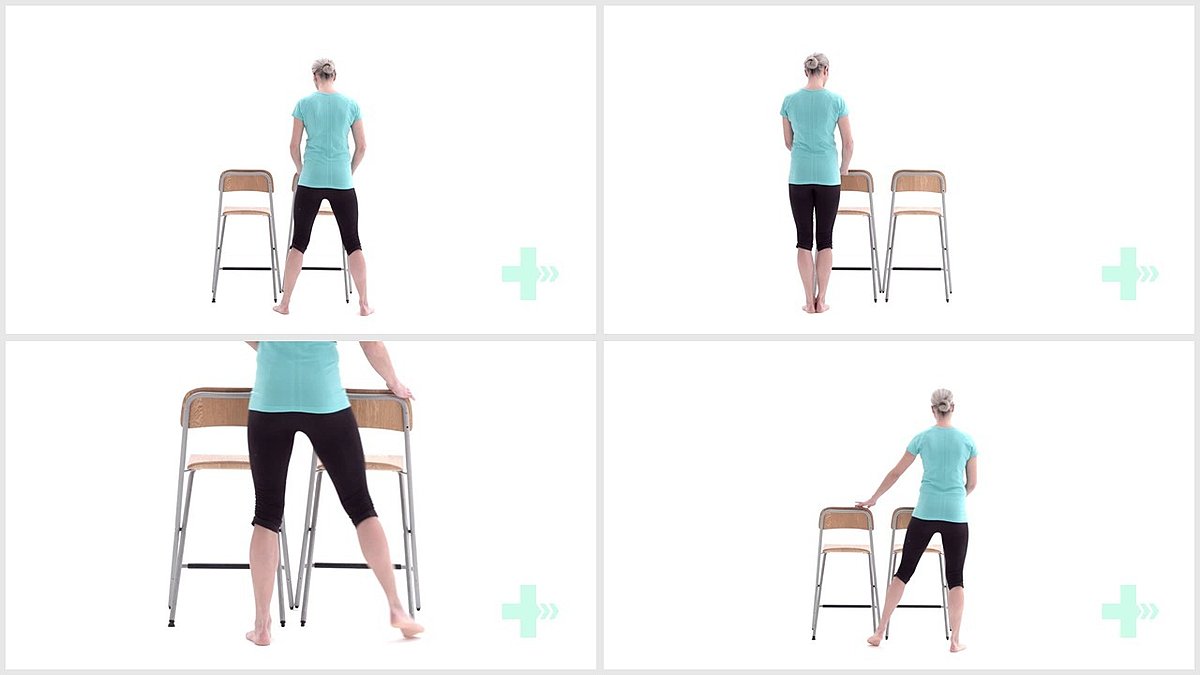
Header
19. SLSq semi-supported
3 Sets / 10 Reps
I was walking behind someone in a coffee shop today who displayed a telltale sign that he had either a stroke or another neurological injury affecting the legs. Or just one leg. When this guy advanced forward with his right leg (took a step forward), his leg swung out to the side instead of following the normal gait pattern of flexing the hip, bending the knee, and lifting the foot. The right leg just stayed straight and swung out to the side. When the body does this, it’s called circumduction of the leg.
It did this for clearance of the foot so that he wouldn’t trip. The body automatically compensated with other muscles to make up for the muscles that were not being properly used. The foot couldn’t lift and the knee couldn’t bend which – if the leg was able to go straight forward - would cause the man to trip. The leg automatically swung out to the side in order to clear the foot from the ground and prevent tripping.
There are several things going on here. Starting at the top of the leg, the hip flexor muscle is not working properly. I’m assuming this is because of signals from his brain not communicating correctly to his leg muscles, but of course I could be wrong not knowing this man.
Sit down with your knees bent. Raise your right knee. Can you do that? Your hip flexor was responsible for that movement. When you’re walking, your hip flexor must activate in order to raise the leg and move it forward a little.
Next, your knee has to bend which also helps with clearance of the ground. If you can do that, the hip flexors may or may not be as much of an issue. You'll also want to strengthen the hip adductors as well. These are the muscles on the inside of the hip that pull your leg inward closer to the body. They'll be all stretched out and weak from the hip always abducting (taking away from the body) the leg in this gait.
Lastly, perhaps the most common issue with circumduction is at the ankle. Are you able to lift your foot? Not just lift it, but bend it at the ankle, bringing your toes up towards the shin? A lot of times, an AFO (ankle-foot-orthosis) will be issued in this case which is a hard, non-bendable orthotic placed on the back of your calf that lengthens to underneath the foot to keep it in proper positioning. It is solid in a neutral position so that tripping is minimized. This is great to use in the short term but the goal is to get those dorsiflexor muscles (muscles on the front of the lower leg responsible for flexing the foot upwards) working properly again.
If this sounds like your gait, then your hip flexors, knee flexors and especially the dorsiflexors need to be focused on for strengthening.
Header

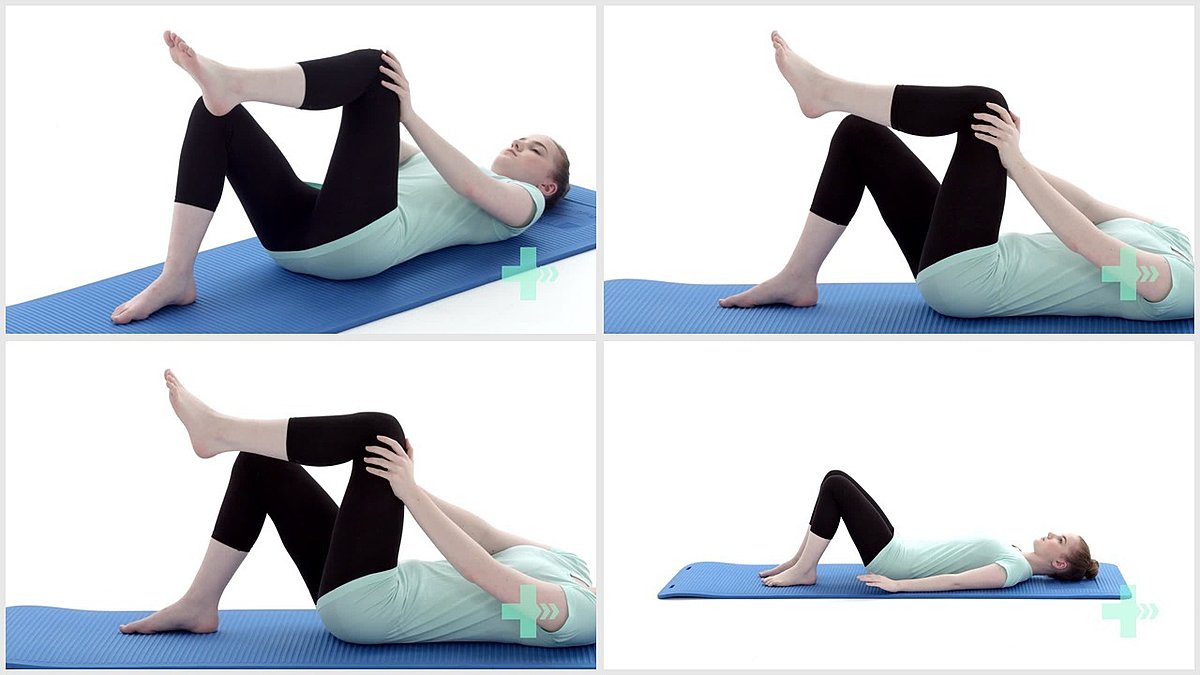
1. AROM hip flexion supine
5 sets/ 20 reps
Header
2. Isometric hip flexion (supine)
10 Sets / 10 Reps / 10 s hold
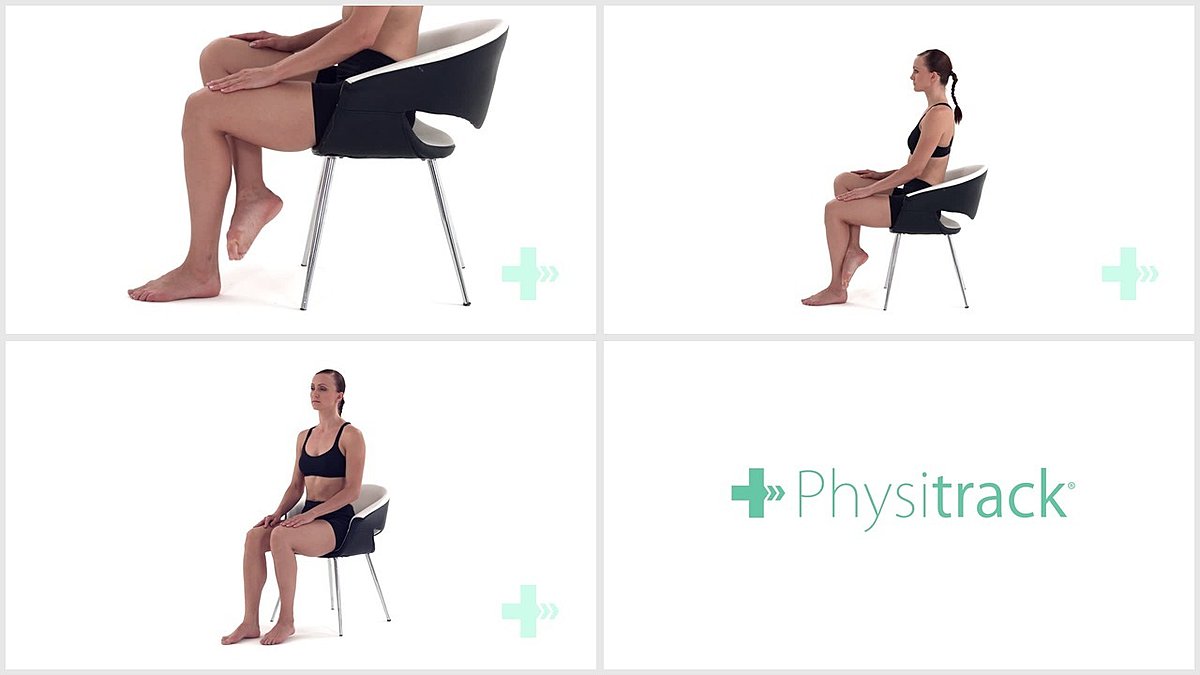
Header
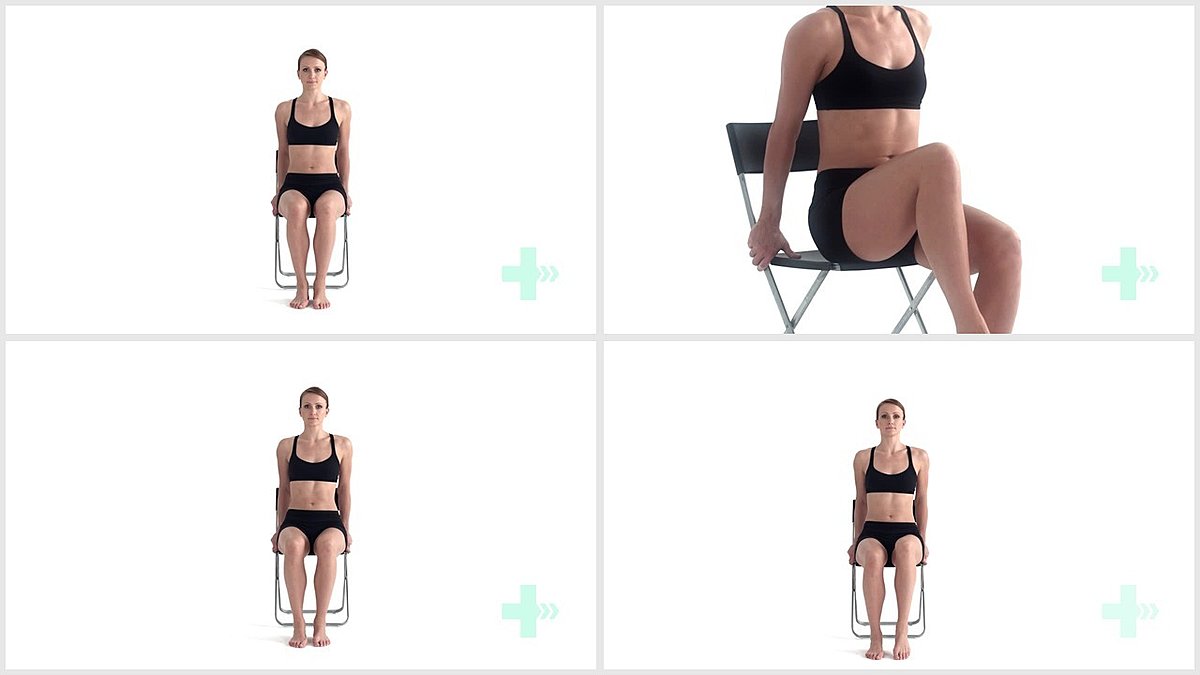
3. Sitting active hip flexion
5 Sets / 20 Reps / 2 s hold
Header
4. SLR
5 Sets / 20 Reps / 2 s hold
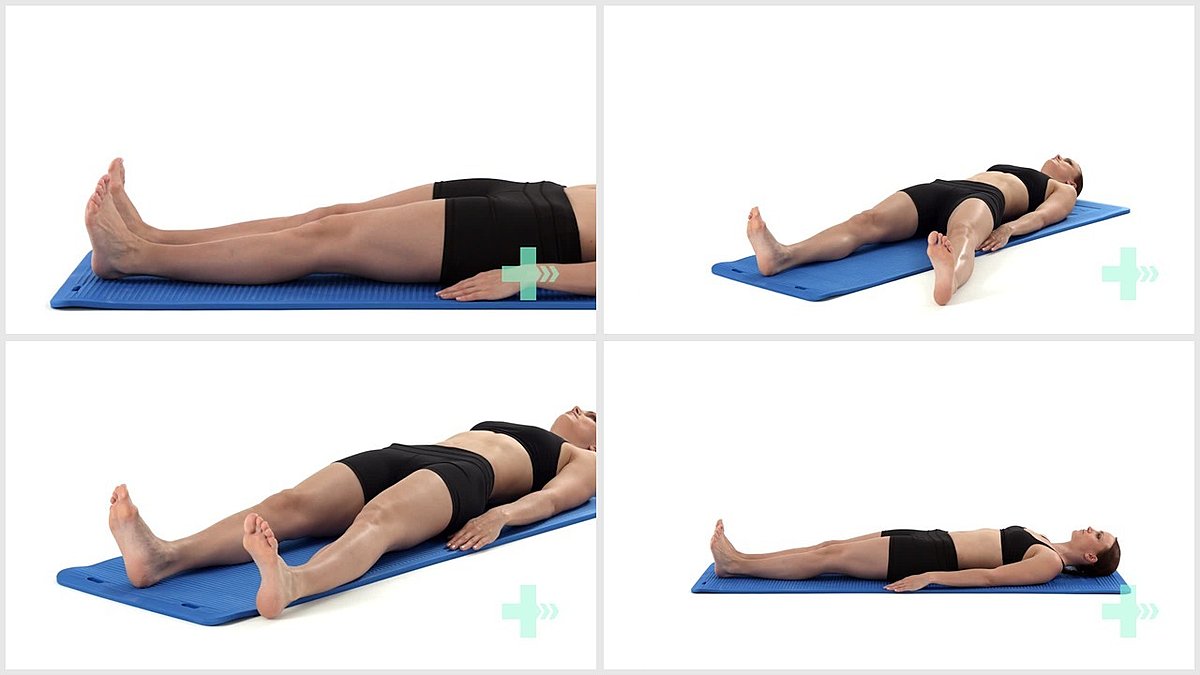
Header
5. Straight leg raise long sit
5 Sets / 20 Reps / 2 s hold
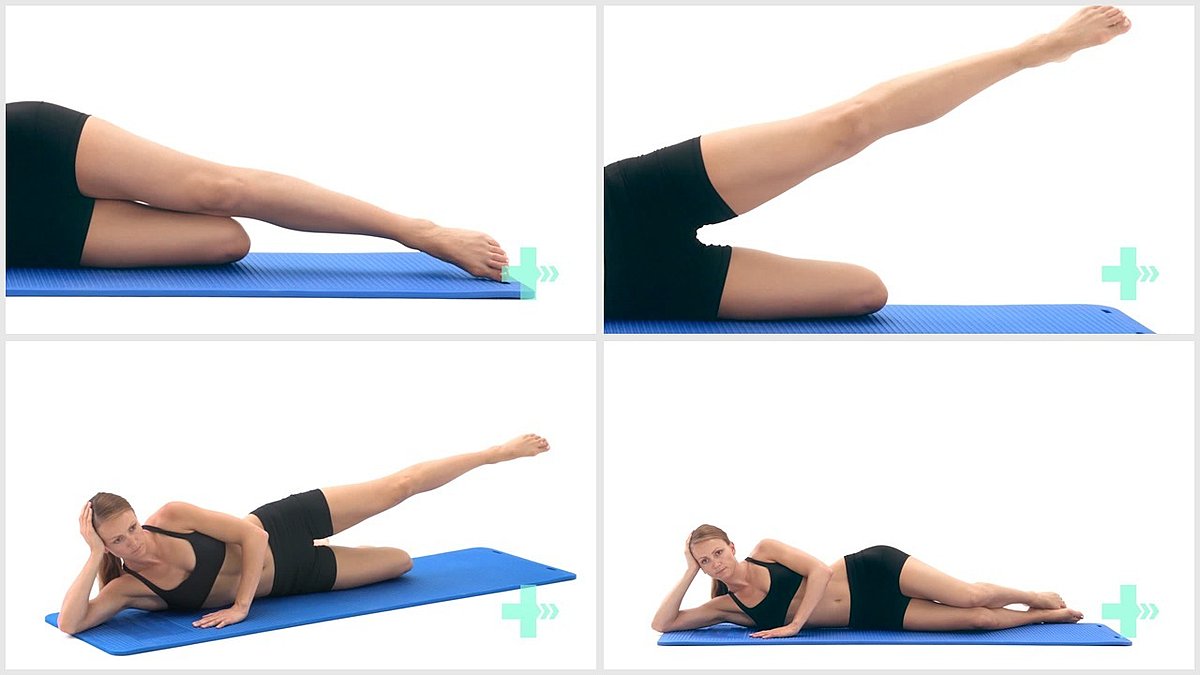
Header

6. AROM hip abduction side lying
5 Sets / 20 Reps / 2 s hold
Header
7. AROM hip flexion and extension in crook lying
5 sets/ 20 reps
Header
8. Eccentric leg raise
5 sets/ 20 reps
Header
9. Hip adduction level 1
5 Sets / 20 Reps
Header

10. Prone hip extensions long lever
5 Sets / 20 Reps / 2 s hold
Header

11. Standing hip flexion
5 Sets / 20 Reps
Header
12. Resisted hip flexion (kicking)
5 Sets / 20 Reps
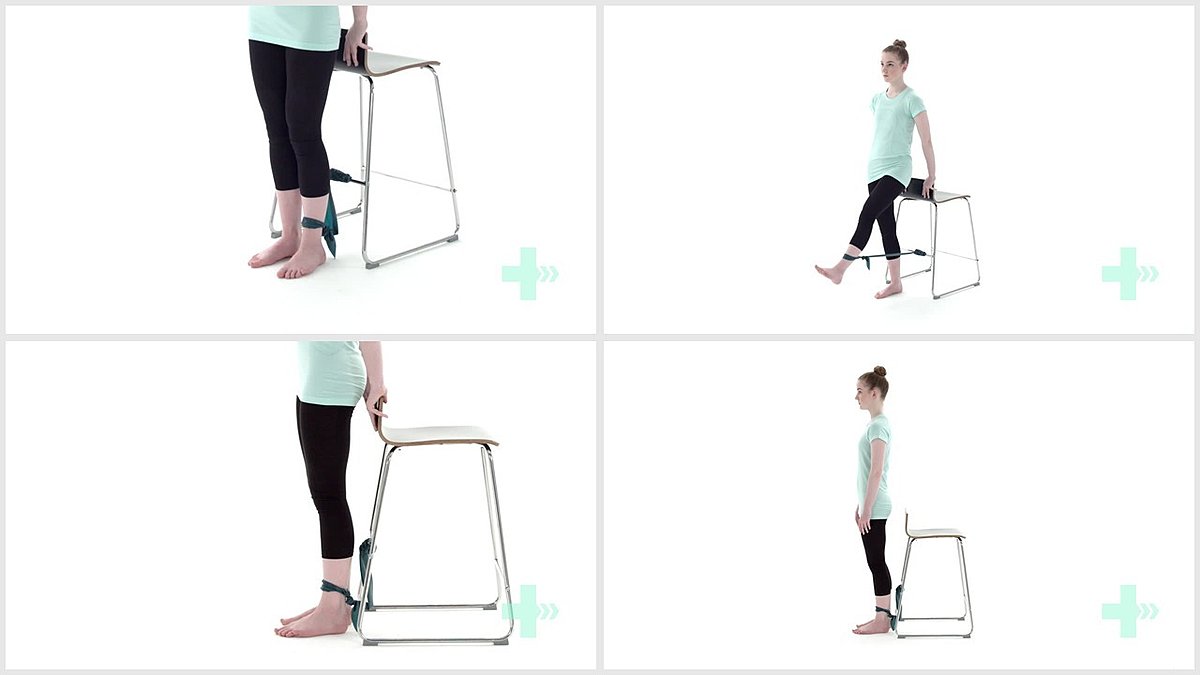
Header
13. Resisted hip flexion (standing)
5 Sets / 20 Reps
Header
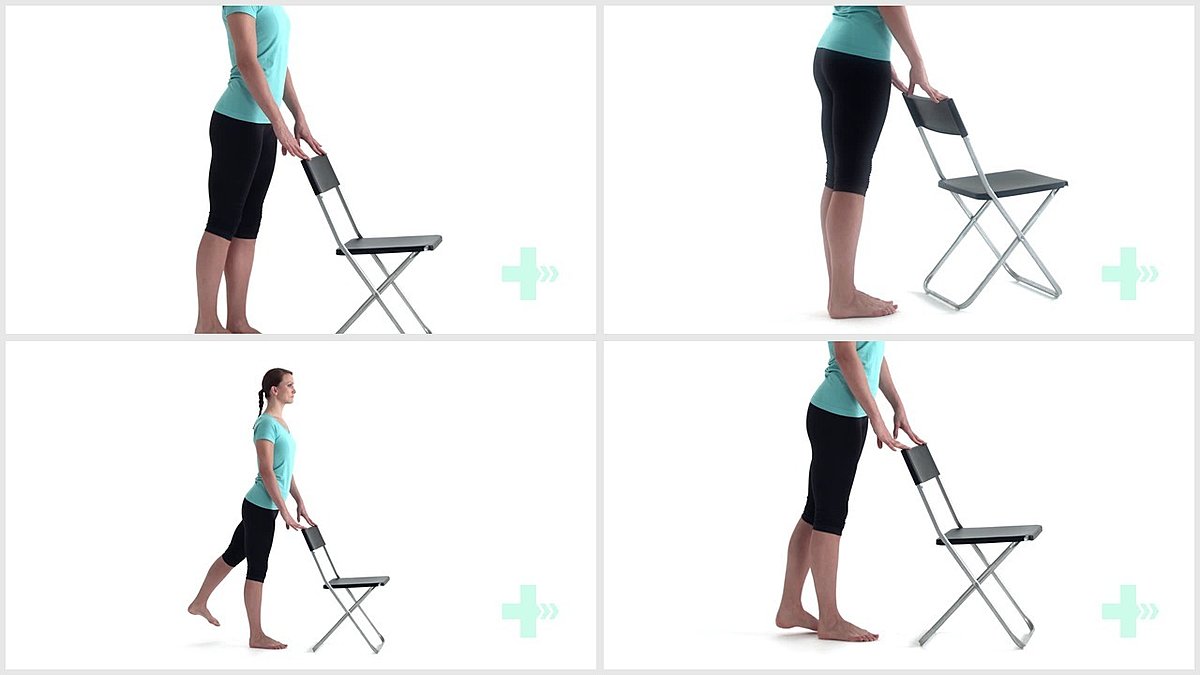
14. Mini squats from a frame
5 Sets / 20 Reps
Header

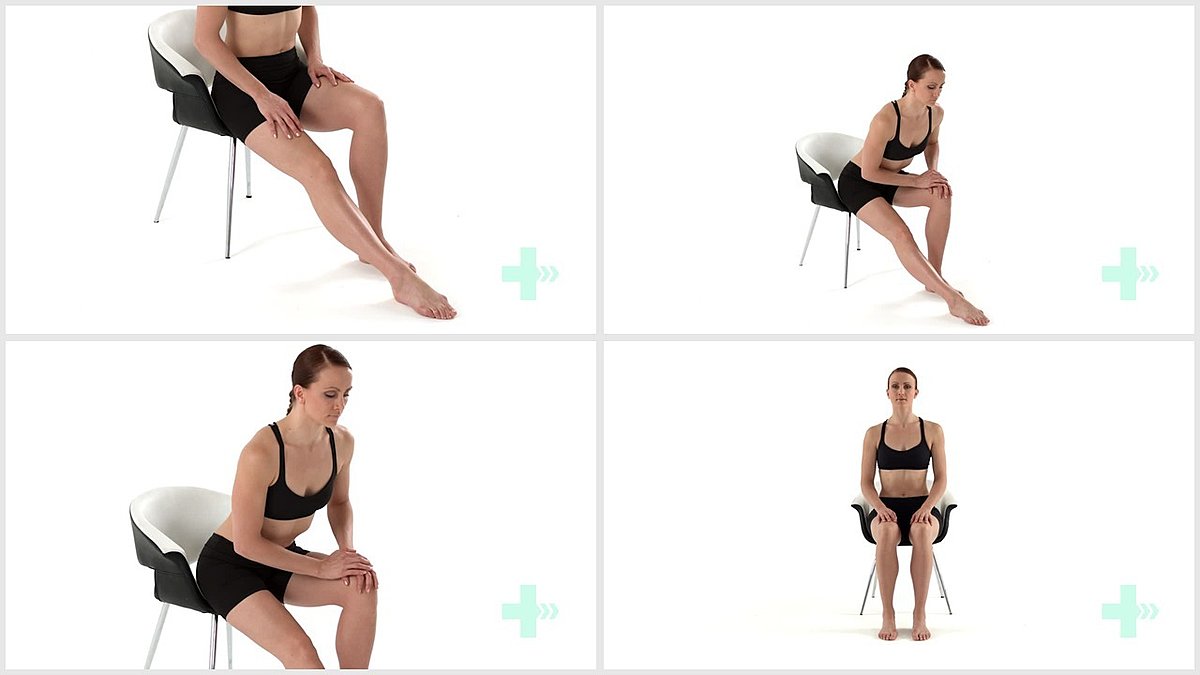
1. Hamstring stretch in sit
3 Sets / 3 Reps / 10 s hold
Header
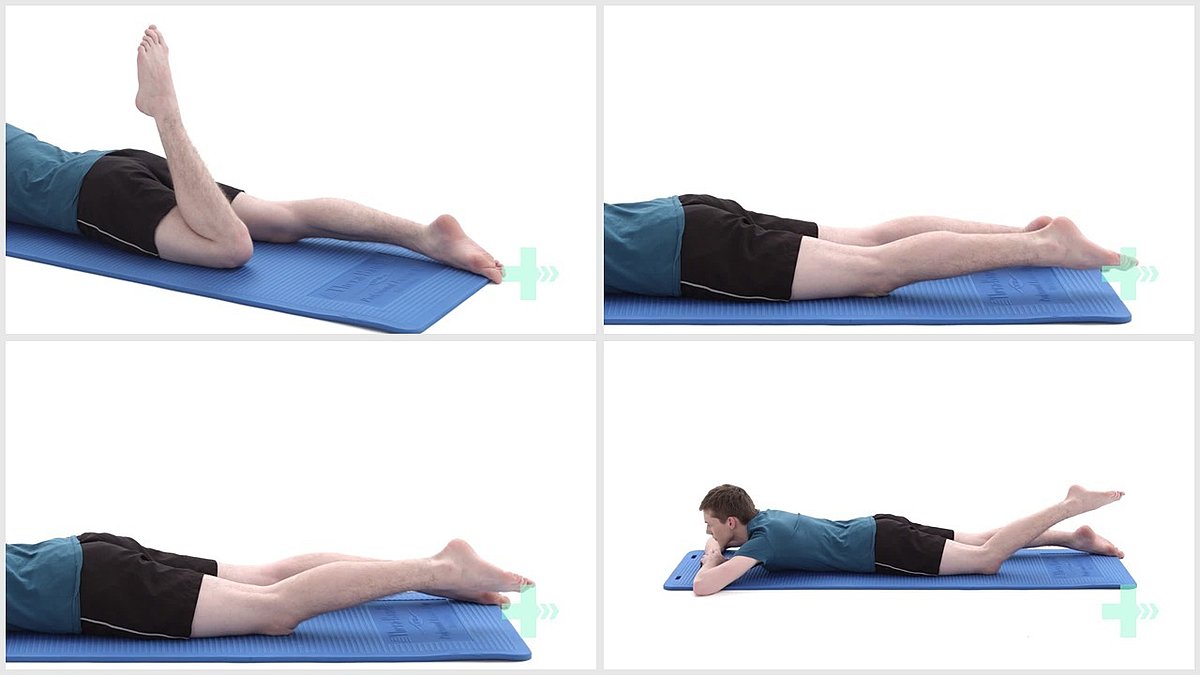
2. Prone hamstring curl
5 Sets / 20 Reps
Header
3. Eccentric hamstrings in prone
5 Sets / 20 Reps
Header
4. Resisted prone hamstring curl
5 Sets / 20 Reps
Header
5. Isometric hamstring in sitting
5 Sets / 10 Reps / 10 s hold
Header

6. Flexion of the knee in standing
5 Sets / 20 Reps
Header
7. Resisted hamstrings in standing
5 Sets / 20 Reps
Header
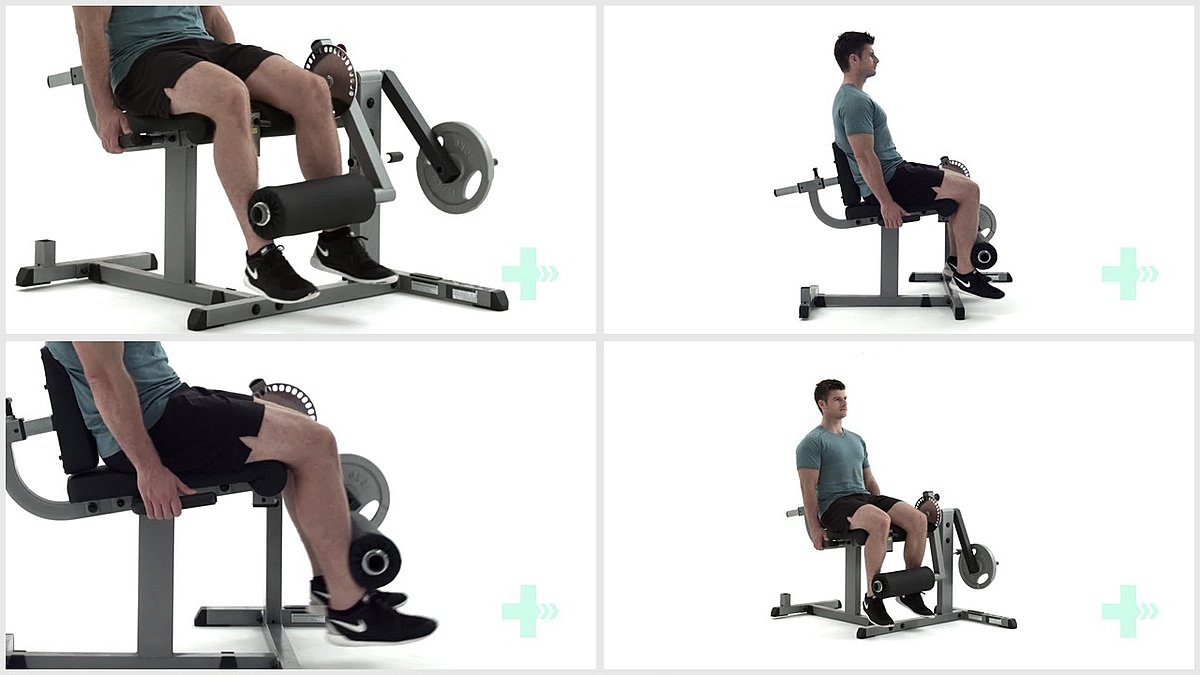
8. Resisted knee flexion seated
5 Sets / 20 Reps
Header
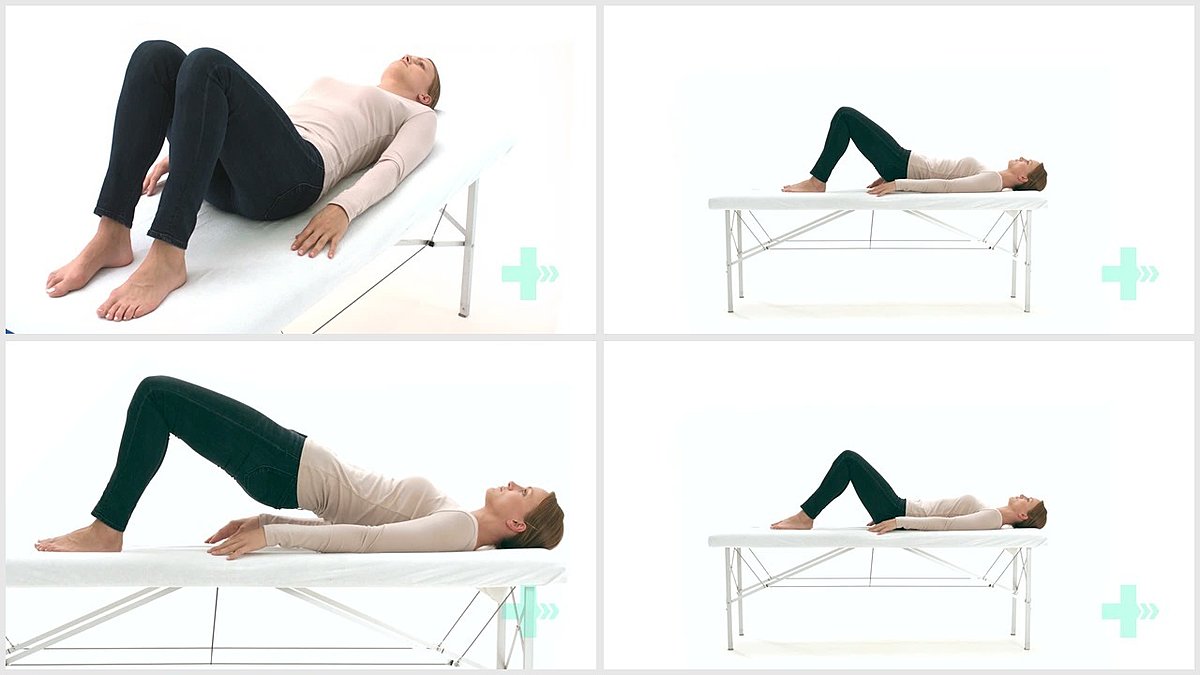
9. Bridge
5 Sets / 20 Reps / 2 s hold
Header
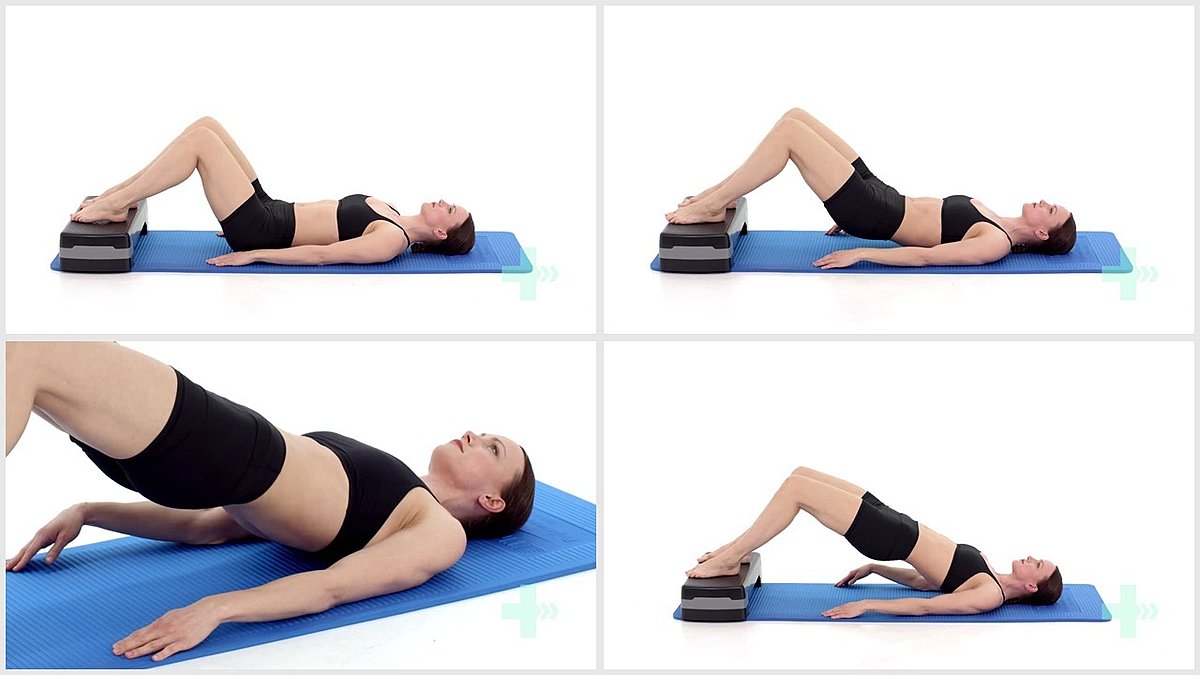
10. Bridge on step
5 Sets / 20 Reps / 2 s hold
Header
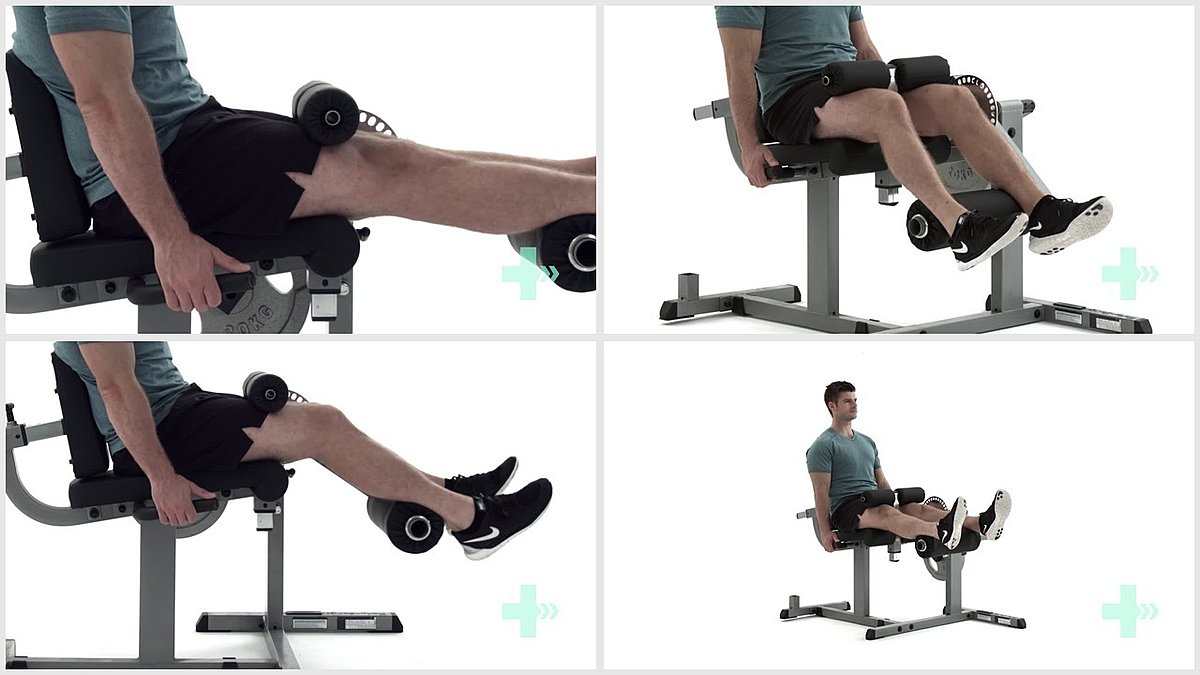
11. Seated hamstring curl - machine
5 Sets / 20 Reps / 4lbs weight
Header
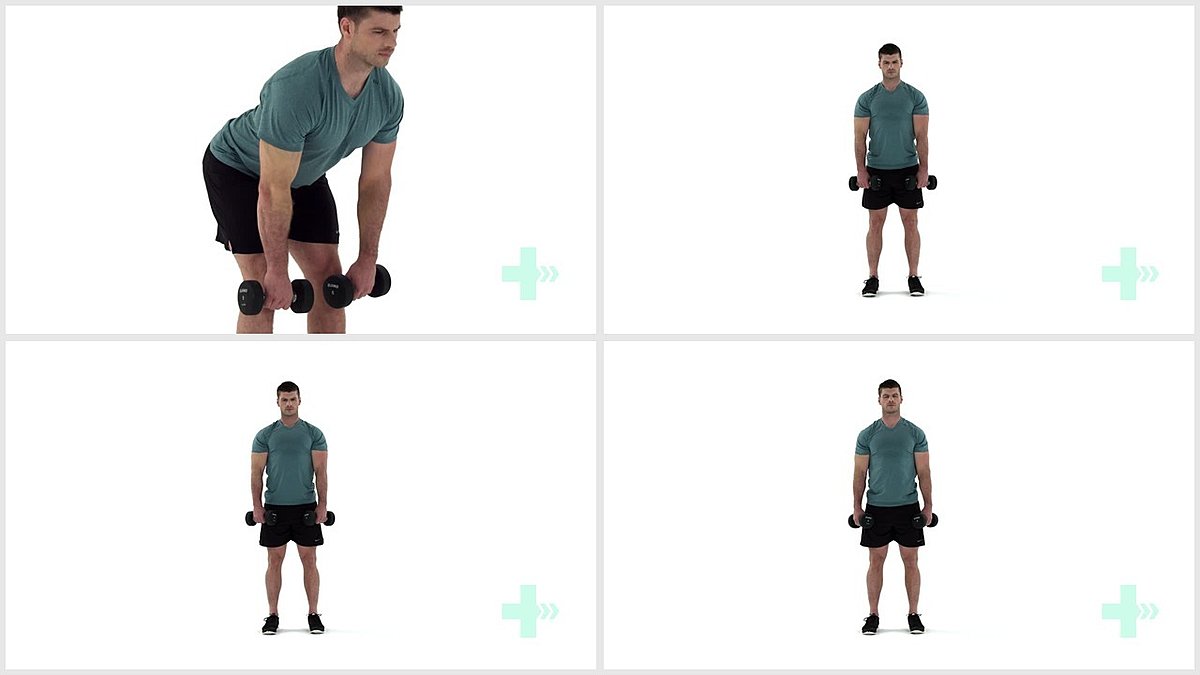
12. Stiff leg deadlift - with dumbbells
5 Sets / 10 Reps / 2lbs weight
Trendelenburg gait is also called lurch gait. This gait pattern I bet is really, really common in stroke survivors. Trendelenburg gait happens when one side of the body has really weak hip abductor muscles. This is what happens when you’re walking…let’s use the right leg. I’m going to describe what you’ll see with the on the right side.
When you’re walking and it’s time for the right leg to leave the ground and advance forward, you need muscles to kick in so that your right foot can clear the ground. A lot of times after a stroke, your leg will have trouble clearing the ground because of weak shin muscles leading to foot drop. This means you must strengthen your tibialis anterior muscle. In this case, it’s weak hip muscles.
Stand on both feet. Now lift up your right leg. Do your hips stay level and unmoving? Or when you lifted your right leg off the ground, did your right hip drop? The correct answer is that your hips stayed level.
When you lift up your right leg, the hip abductor muscles on the OPPOSITE side of the body turn on to prevent your hip from dropping. Since your left leg is stationary, the only way to ABDUCT (move away from midline of the body) the left leg is to raise the right hip. If the hip abductor muscles on the left side are weak, the right hip will drop when the right leg is lifted off of the ground. So if you see a hip drop on the right side, it means that the left hip muscles are weak.
This drop of the hip is called the Trendelenburg sign. Sometimes, the body has compensated in order to find a way to clear the foot when walking. This compensation is by the upper body leaning to the left(in the case of right hip drop) in order to pull the right leg up and allow the foot to clear the ground. So the body will lean to the affected side during advancement of the opposite leg. If you’re affected on the left, the upper body will lean to the left when advancing your right foot forward during the gait cycle. If you’re right side affected, the upper body will lean to the right when advancing the left leg forward. So if this happens to you, you’ll want to exhaustively strengthen the hip abductor muscles.
Some exercises that address this specific issue are on the next few pages.
Header
1. Hamstring stretch in sit
3 Sets / 3 Reps / 10 s hold
Header
2. AROM hip abduction supine
5 sets/ 20 reps
Header
3. AROM hip abduction side lying
5 Sets / 10 Reps / 10 s hold
Header

4. Isometric hip abduction
5 Sets / 10 Reps / 10 s hold
Header
5. Resisted hip abduction in sitting
5 Sets / 20 Reps
Header
6. Clam shells
5 Sets / 20 Reps
Header
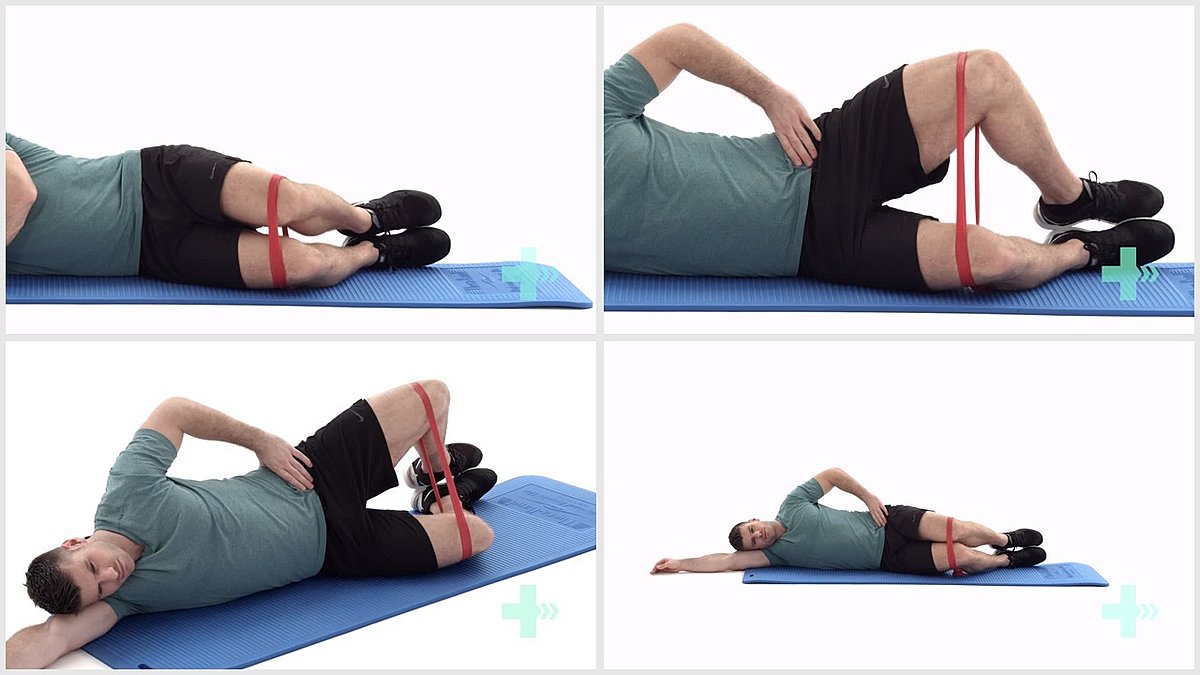
7. Resisted clam shell
5 Sets / 20 Reps
Header
8. Pilates clam
5 Sets / 20 Reps
Header
9. Hip abduction side kick
5 Sets / 20 Reps
Header
10. Standing hip abduction
5 Sets / 20 Reps
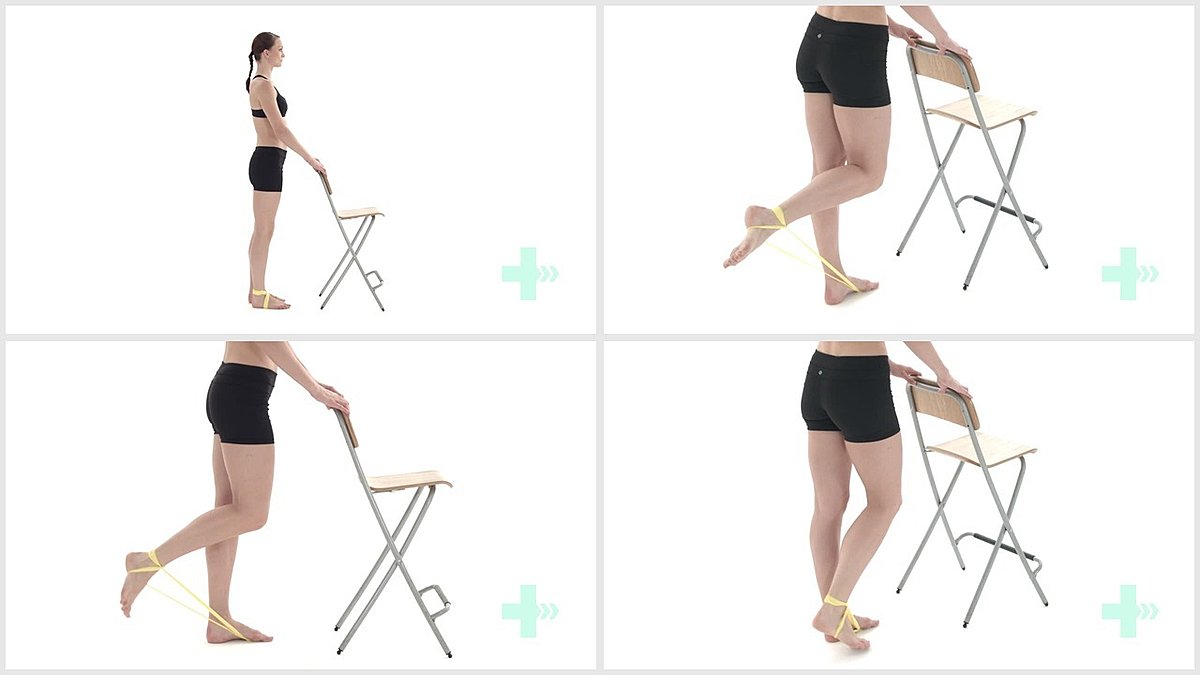
Header
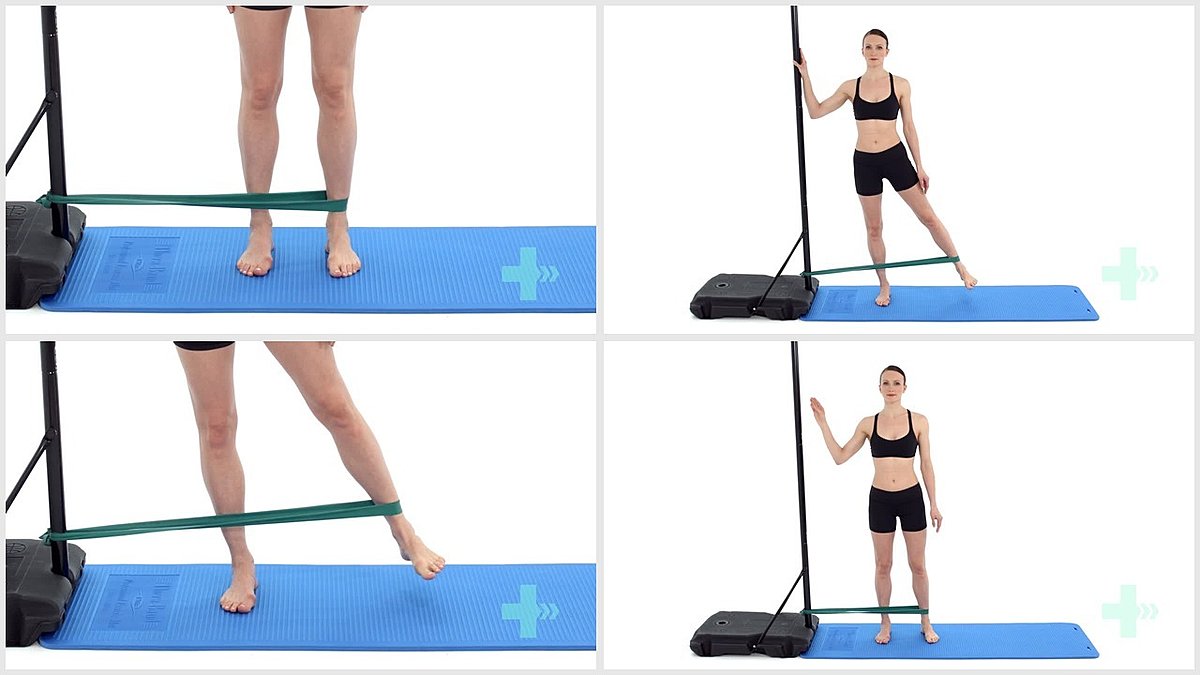
11. Resisted hip abduction (standing with post)
5 Sets / 20 Reps / 2 s hold
Header
12. Hip hikes
5 Sets / 20 Reps
Header
13. Kneeling hip abduction - 90 degrees
5 Sets / 20 Reps
Header
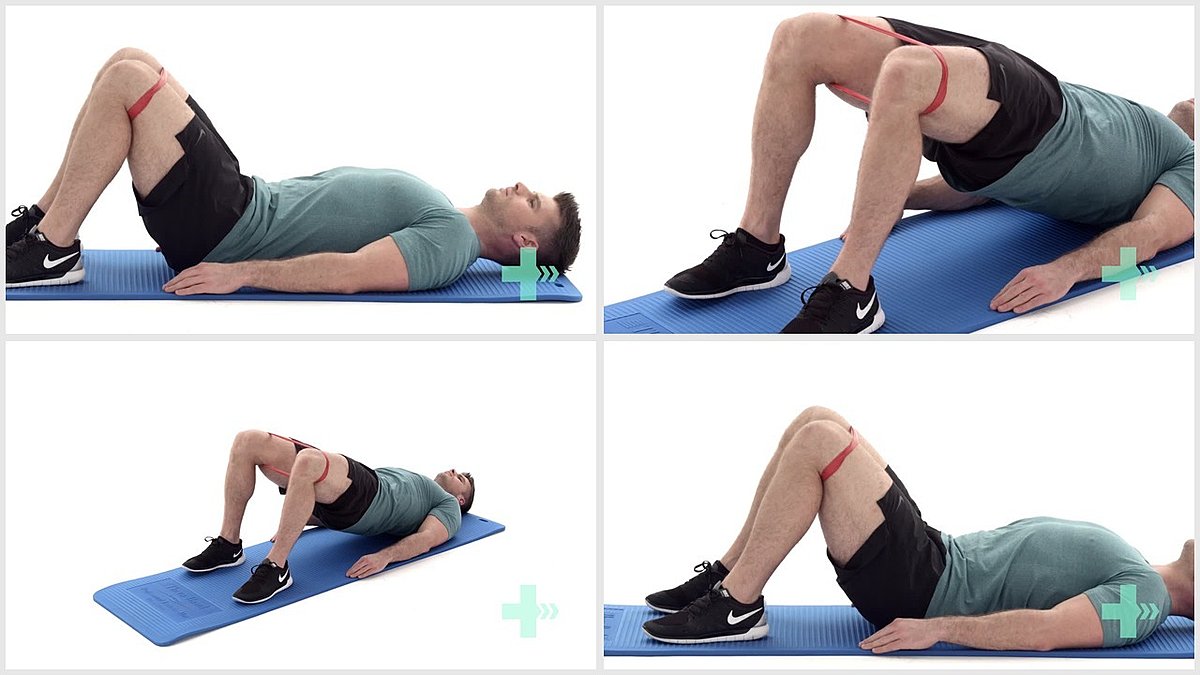
14. Bridging with resisted hip abduction
5 Sets / 20 Reps
Header
15. Side stepping along a support
5 Sets / 20 Reps
Header
16. Lateral step ups
5 Sets / 20 Reps
The glutes. They're the butt muscles. The butt muscles straighten the leg, move it behind you and move the leg out to the side depending on what’s contracted. So they’re very important in standing up and are very involved in walking. In every aspect of walking, every aspect, they are important and why I'm including a chapter on the glutes. In everything I've discussed previously, strengthening the glutes will help. In every glute exercise, take advantage of the mind-muscle connection and really focus on squeezing your glutes!!!
Tip - There is a glute-heel connection and the more weight that you put on your heels for these exercises, the more the glutes will work. Sometimes, when I personally perform a bridge exercise, I will actually lift up my toes in order to put more weight through my heels so that my glutes contract more.
The next few pages have illustrations and instruction on some glute exercises that you can do at home or at the gym.
Header
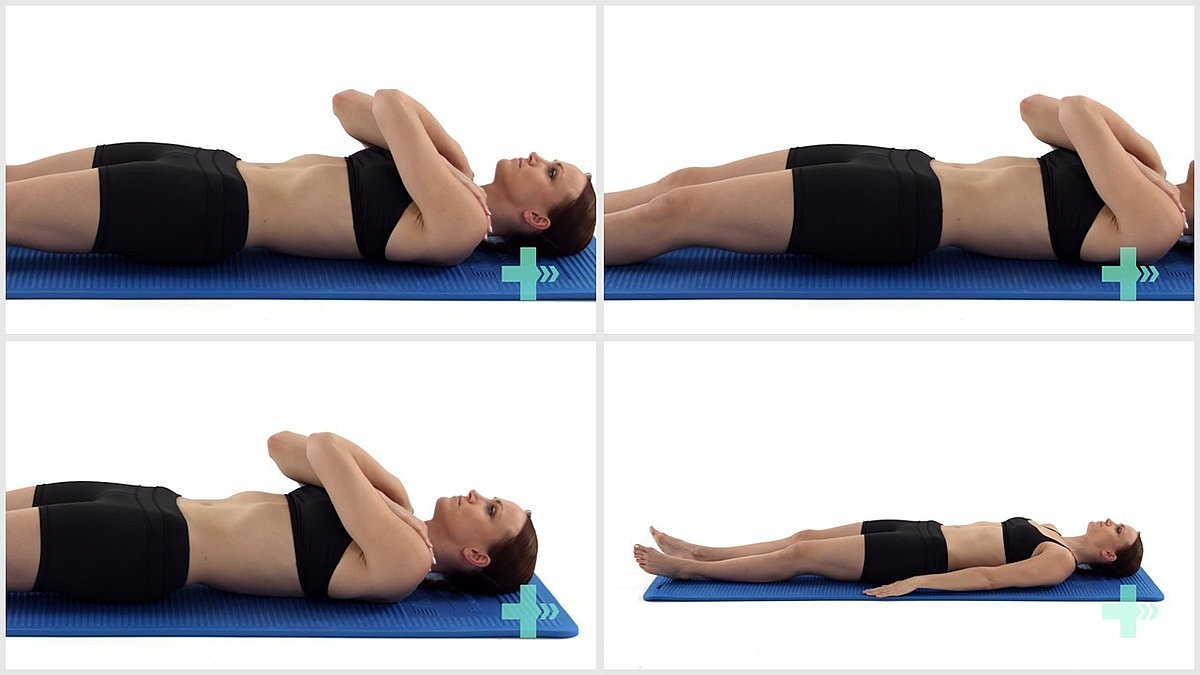
1. Isometric glutes in supine
10 Sets / 10 Reps / 10 s hold
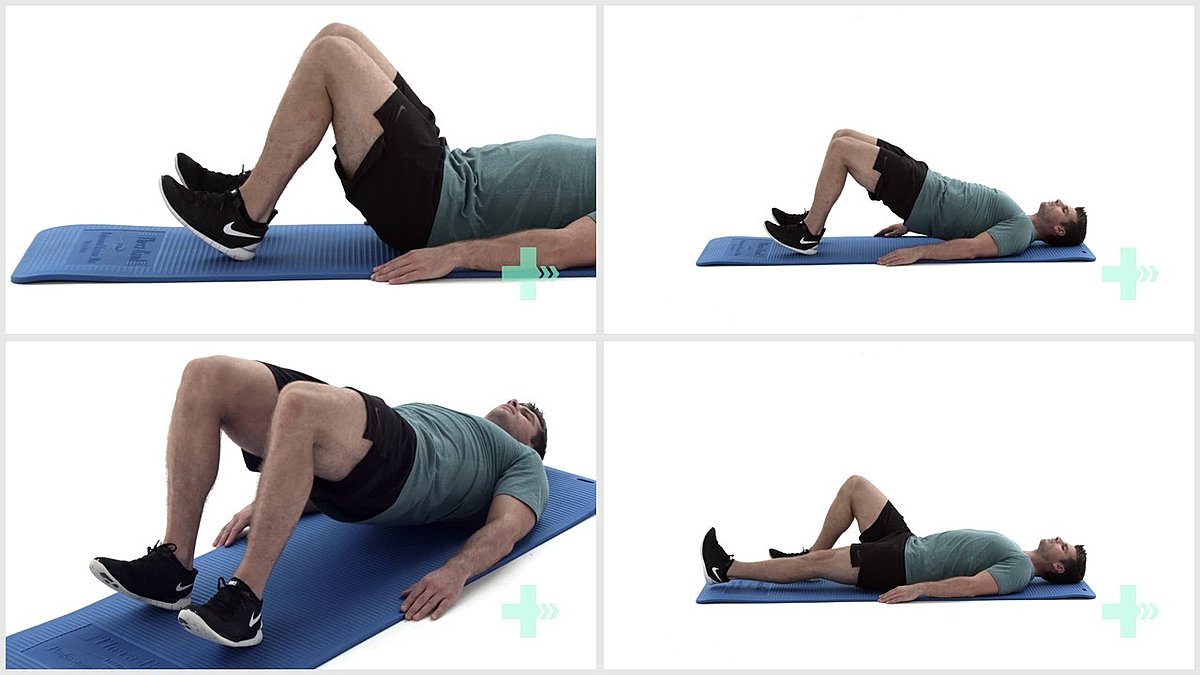
Header

2. Bridge
5 Sets / 20 Reps / 2 s hold
Header
3. Bridge with toes off the floor
5 Sets / 20 Reps / 2 s hold
Header
4. Single leg bridging
5 sets/ 20 reps
Header
5. Bridge while lifting one leg and extending knee
5 sets/ 10 reps
Header
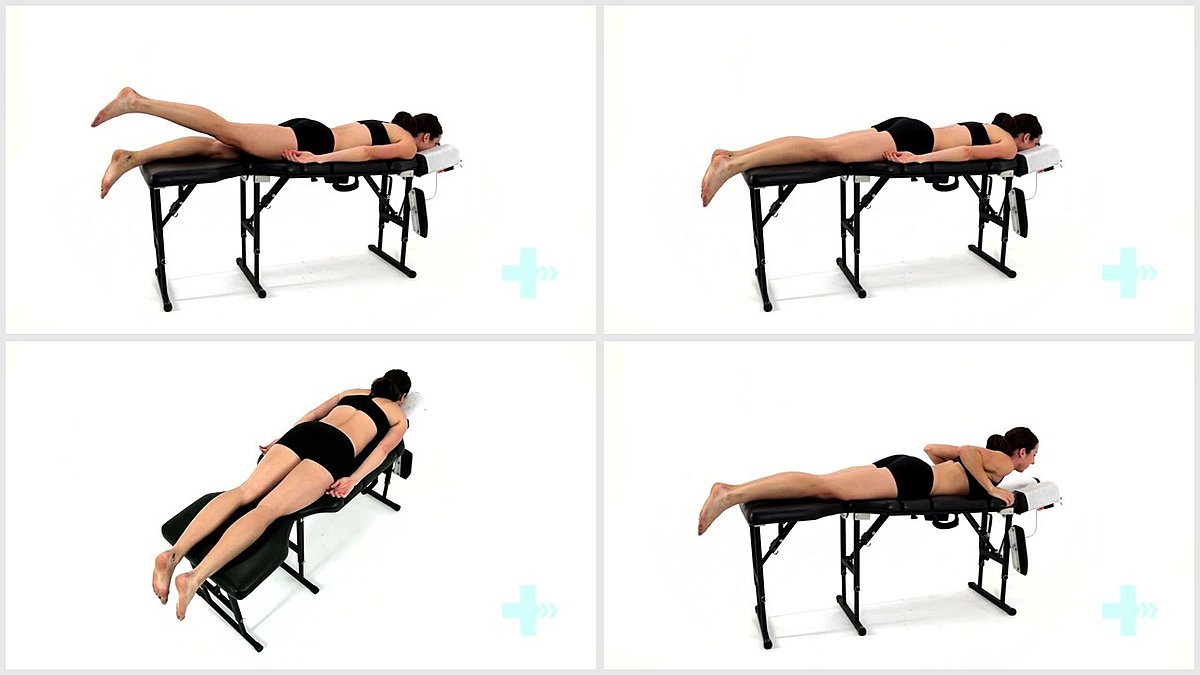
6. Prone hip extensions long lever
5 Set / 20 Rep / 2 s hold
Header
7. Resisted hip extension and ER
5 Sets / 20 Reps / 2 s hold
Header
8. Prone hip extension - leg bent
5 Set / 20 Rep / 2 s hold
Header
9. 4 point kneeling - hip extension to abduction
5 Sets / 20 Reps
Header
10. AROM hip extension
5 Sets / 20 Reps
Header
11. Resisted hip extension standing
5 Sets / 20 Reps
Header
12. Mini squats from a frame
5 Sets / 20 Reps
Header
13. Squat with resisted abduction
5 Sets / 20 Reps
Header
14. Wall squat with ER resistance
5 Sets / 20 Reps
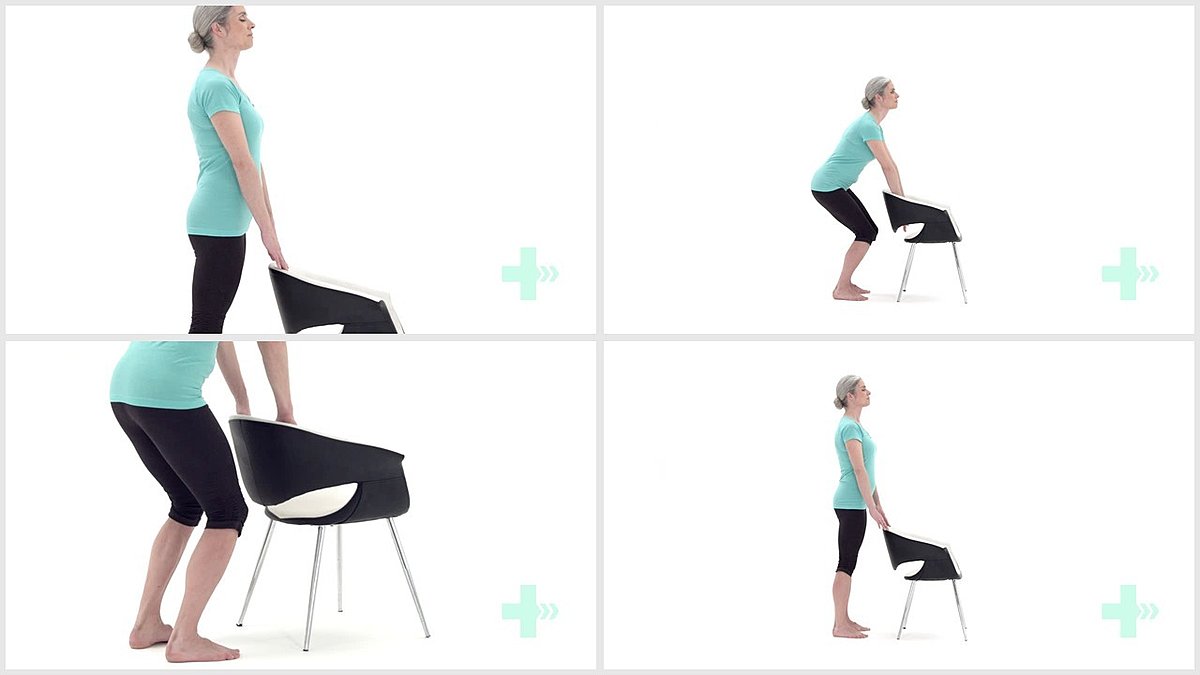
Header
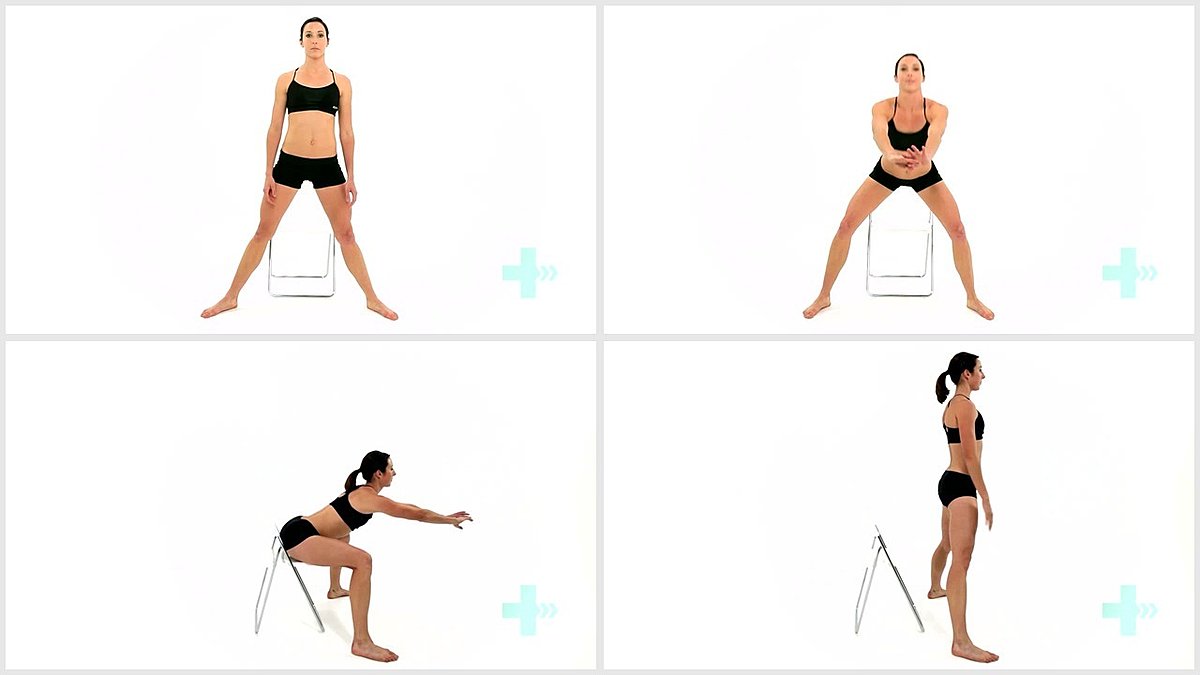
15. Box squat with chair
5 Sets / 20 Reps
Header
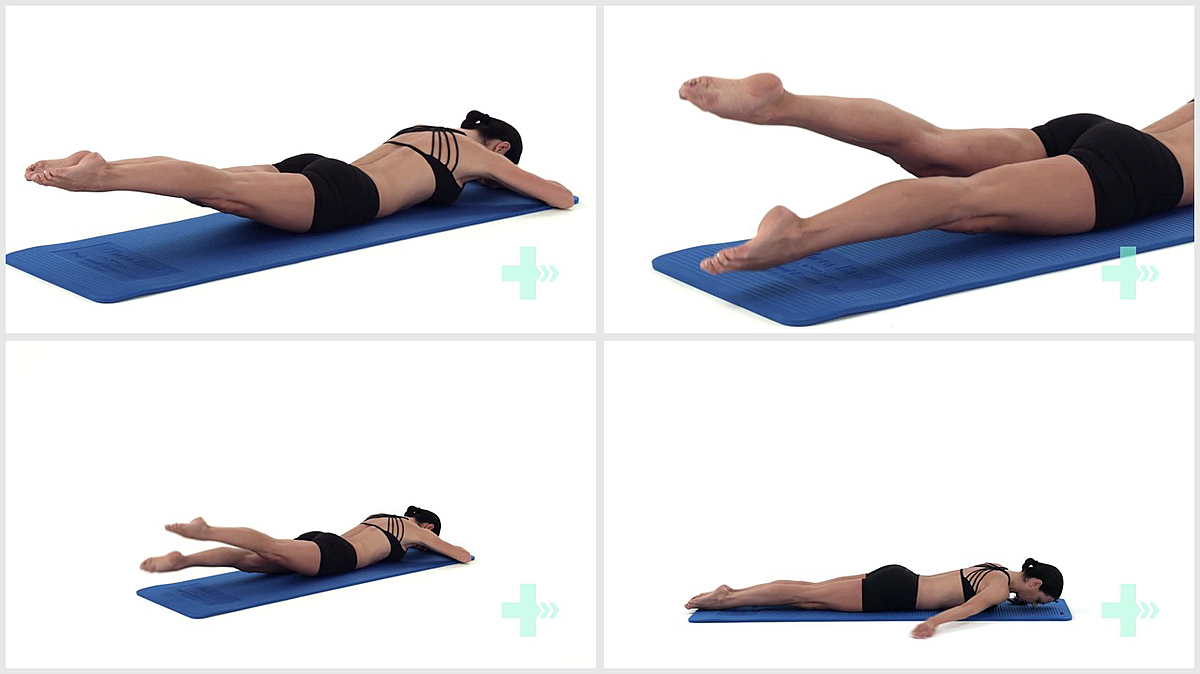
1. Pilates swimming level 1
Header

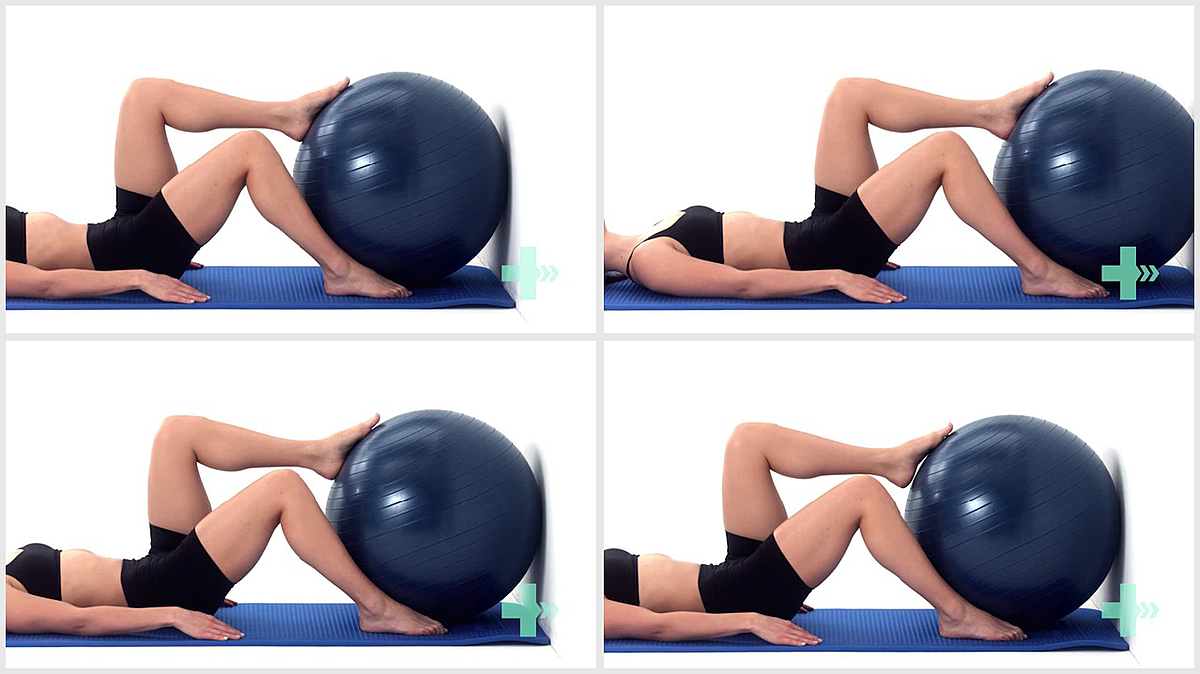
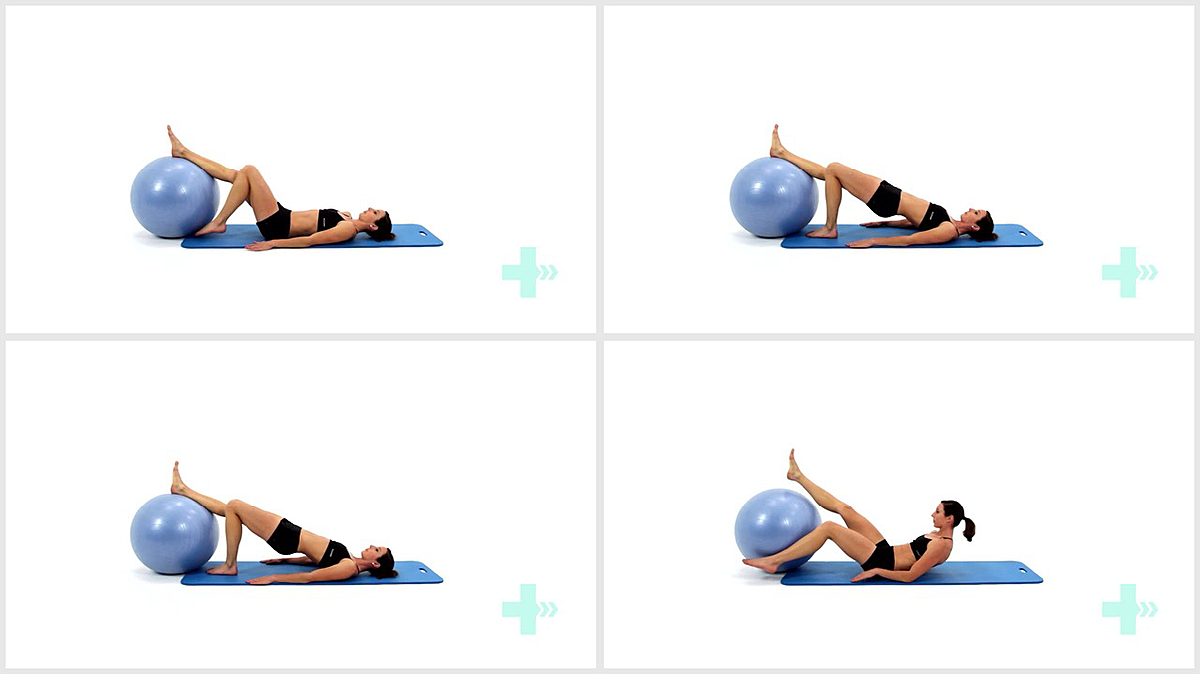
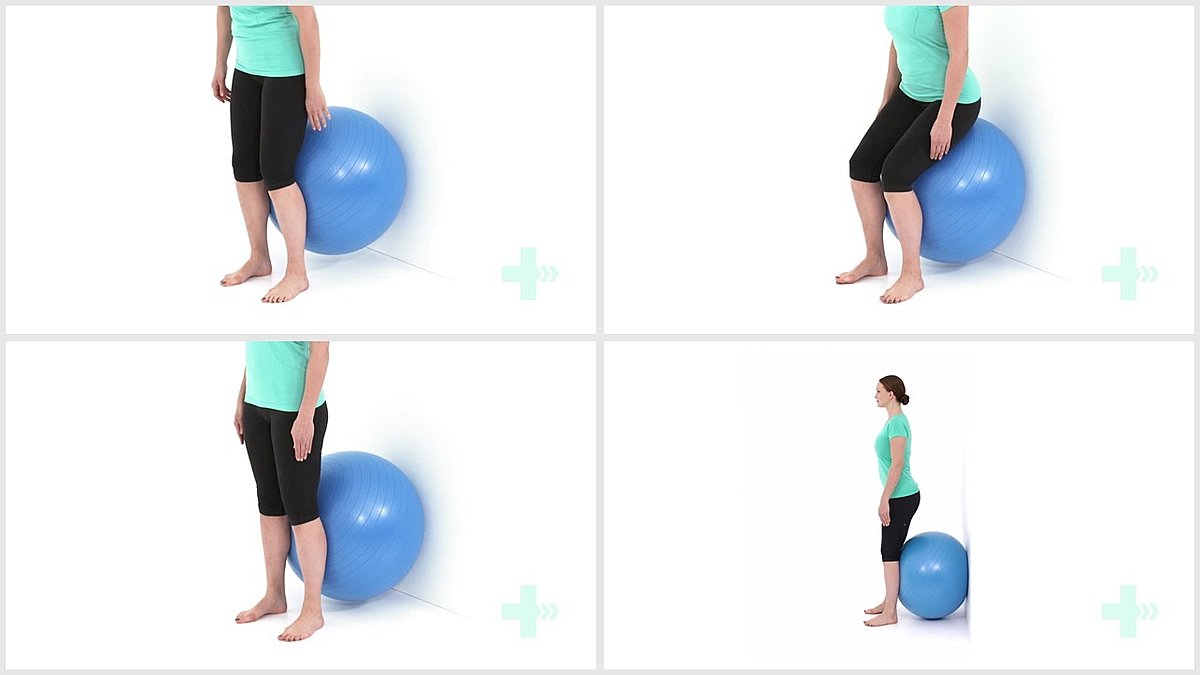
2. Gluteal abd strength with ball against wall and hip flex/ext
5 Sets / 20 Reps
Header
3. Static gluteal activity against ball
10 Sets / 10 Reps / 10 s hold
Header
4. Bridge with bilateral hamstring curls on ball
5 Sets / 20 Reps
Header
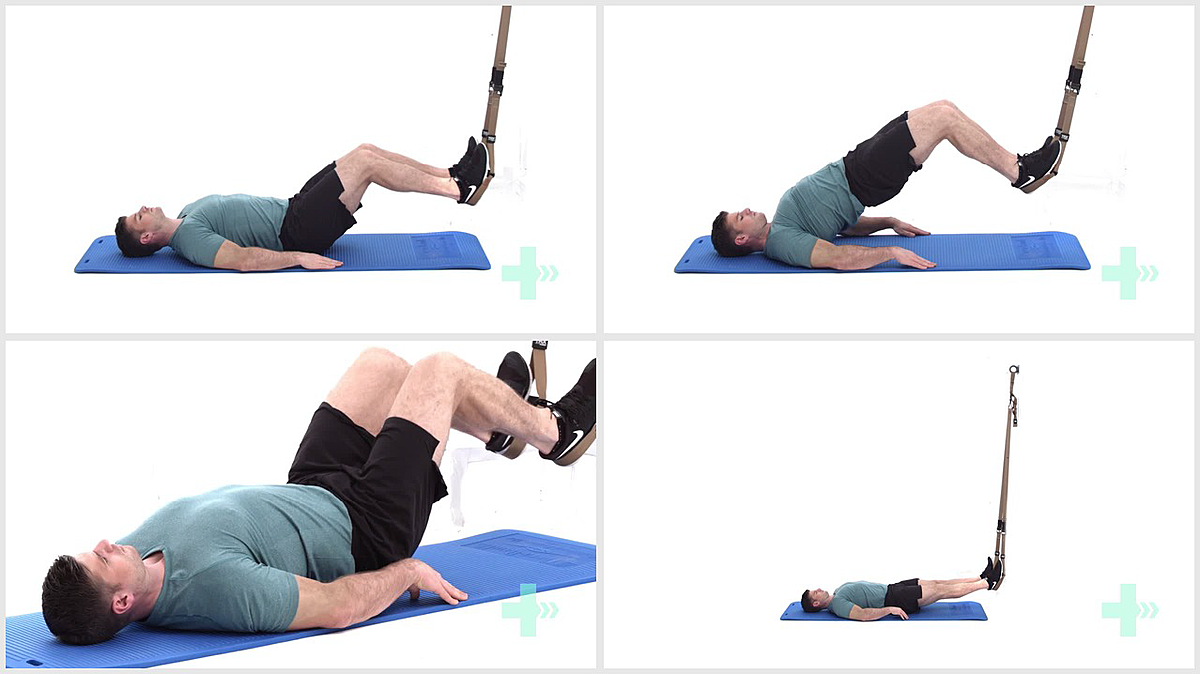
5. TRX glute bridge
5 Sets / 20 Reps
Header
6. Unilateral hip extension
5 Sets / 20 Reps
Header
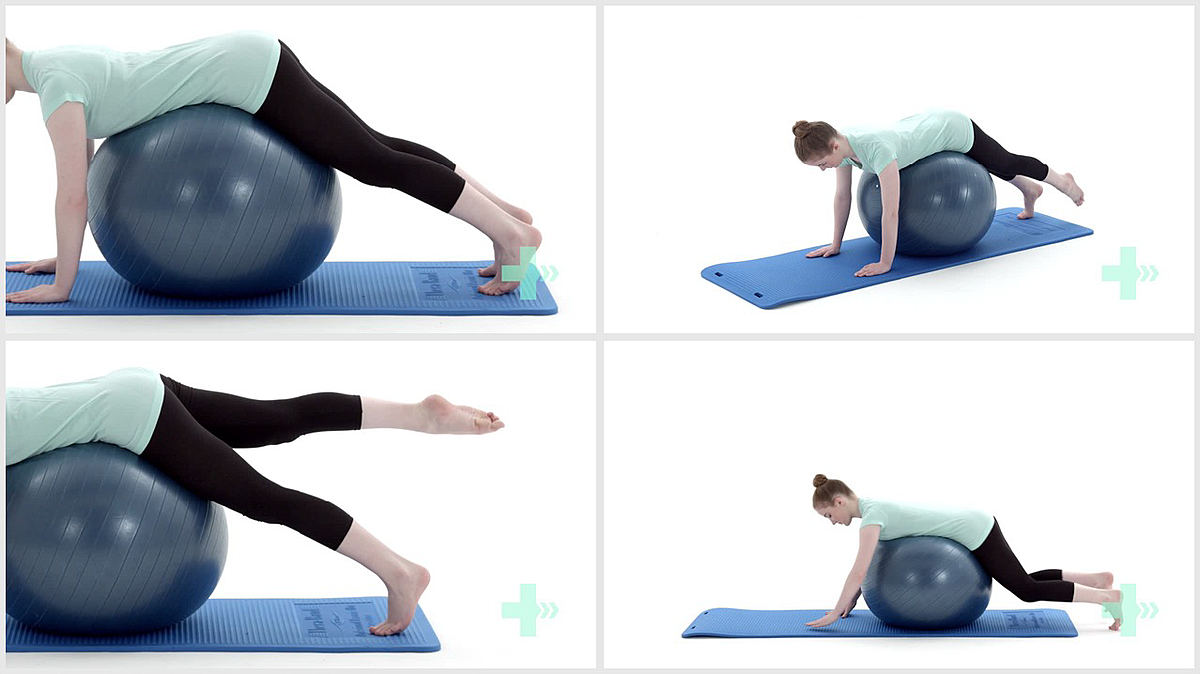
7. Alternate leg extension prone over a gym ball
5 Sets / 10 Reps / 10 s hold
Header
5 sets/ 20 reps
8. Bridge reverse on stability ball
Header
9. Back extension on ball with hands behind head
5 Sets / 20 Reps
Header

10. Bridge on step
5 Sets / 20 Reps / 2 s hold
Header
11. Bridge single leg on step
5 Sets / 20 Reps
Header
12. Cable hip extension
5 Sets / 20 Reps / 2lbs weight
Header
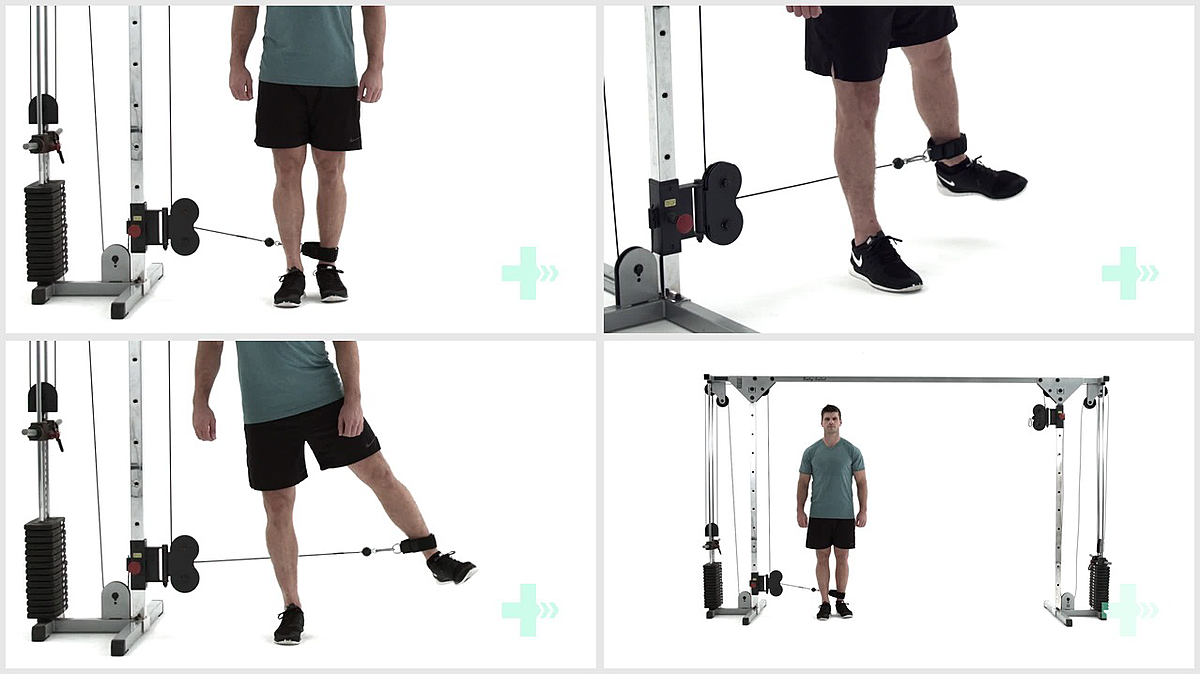
13. Cable hip abduction
5 Sets / 20 Reps / 2lbs weight
Header
14. Resisted hip external rotation in prone
5 Sets / 20 Reps
Header
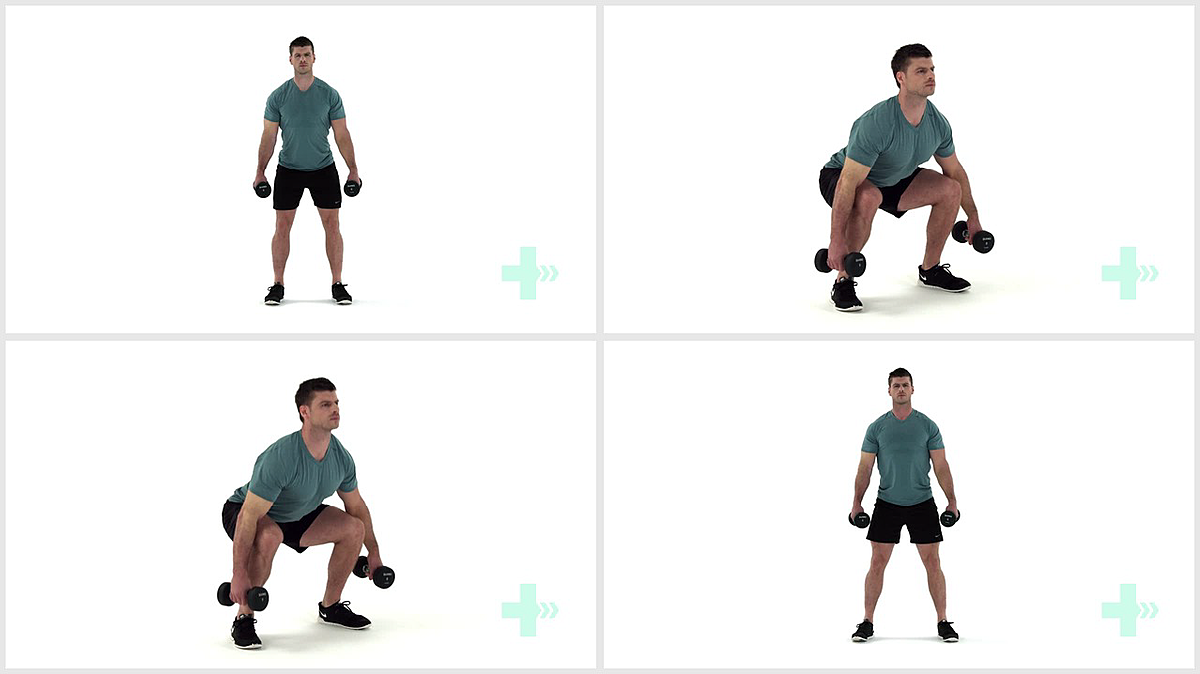
15. Squat - with dumbbells
3 Sets / 10 Reps / 2lbs weight
Header
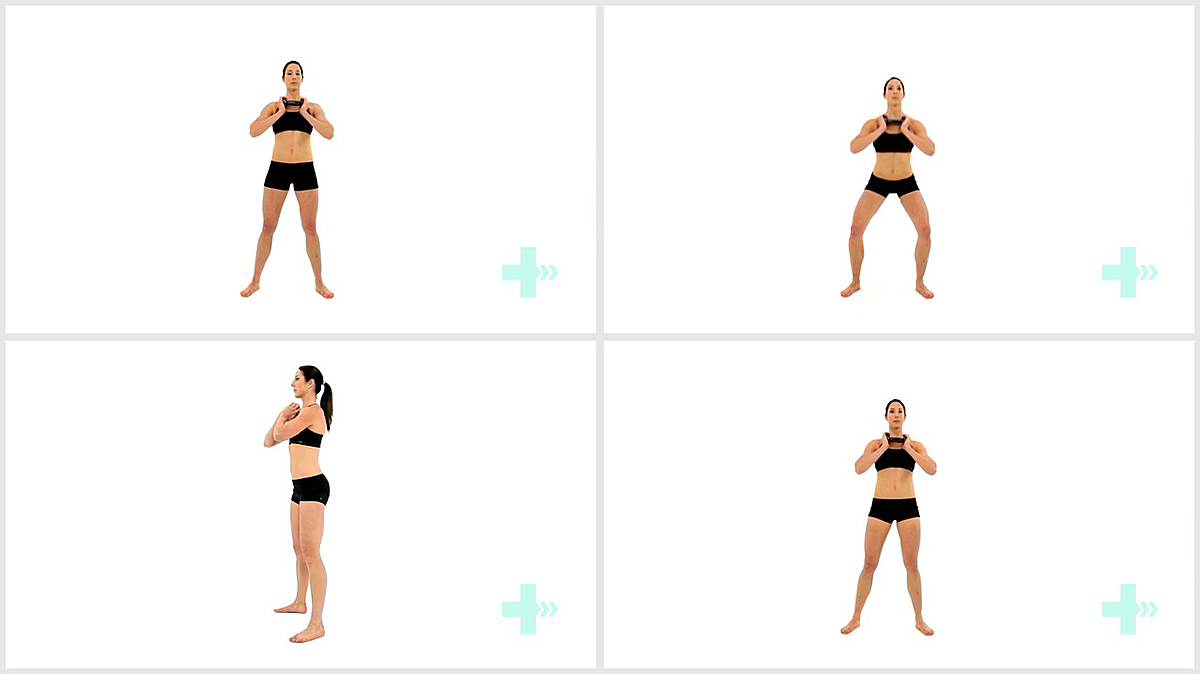
16. Goblet squat
Header
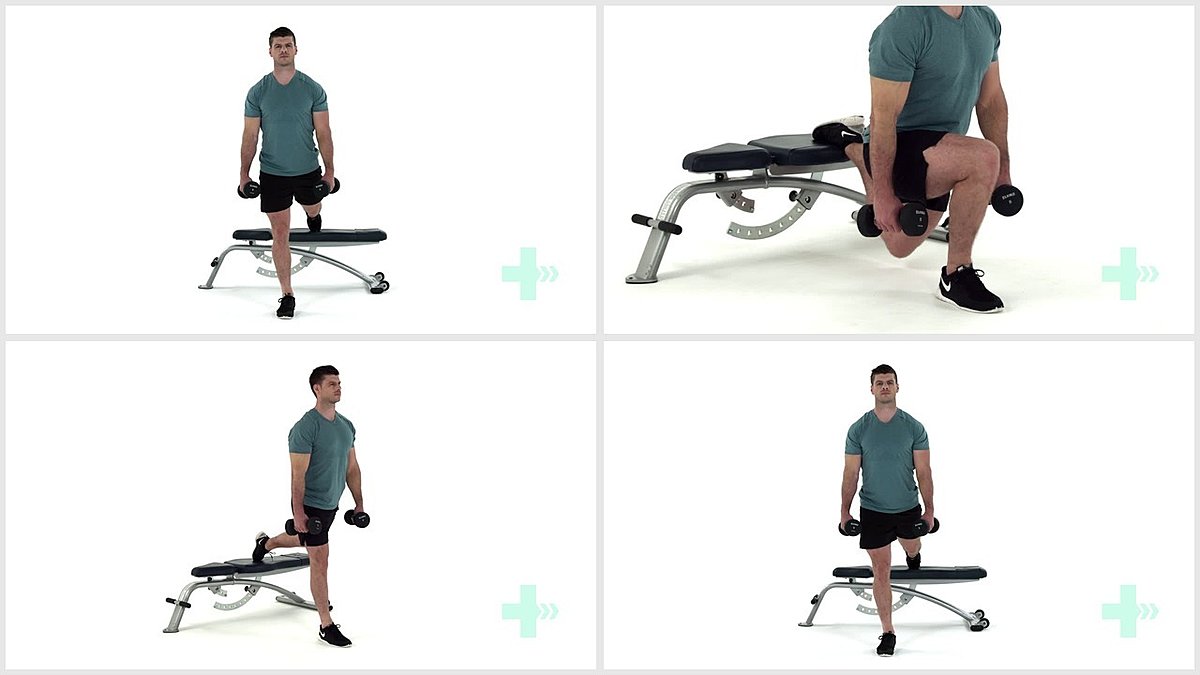
17. Rear foot elevated spilt squat - with dumbbells
3 Sets / 5 Reps / 2lbs weight
Header
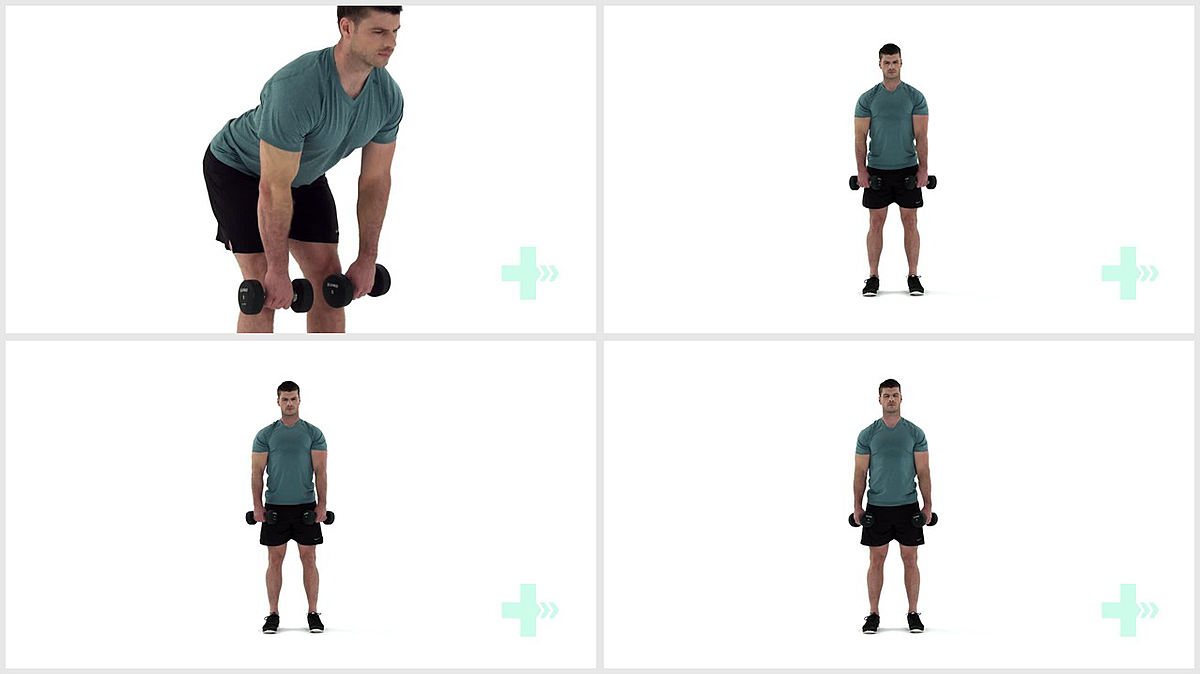

18. Stiff leg deadlift - with dumbbells
5 Sets / 10 Reps / 2lbs weight
If you are unable to perform any of the exercises, here's a tip....
When someone has trouble performing an exercise, making that exercise gravity-eliminated is often helpful. So what does that mean? That means that if someone is not strong enough yet to perform an exercise, like for instance shoulder abduction (raising your arm out to the side), figure out a way to eliminate gravity from the equation.
When someone is sitting or standing and asked to raise their arm out to the side, they’re not only lifting the resistance of the weight of their arm, but lifting against the resistance of gravity as well. Doing this exercise gravity-eliminated would mean doing it lying down on their back and bringing your arm to your ear. That takes away the resistance of gravity.
And to make it even easier, I would sometimes put a sliding board under their arm to also eliminate friction. A sliding board is something that’s really slippery that is usually used as something you sit on to help you ‘scoot.’
But easy is not at all what you want. This is a trick I would use to help get the movement back. But as soon as possible, gravity should be added back in. Then as you gain strength, add resistance.
You may be wondering why I haven't specifically discussed the quadriceps muscles. Most of the exercises in this eBook will hit the quads. They are worked with most exercises to improve gait.
But, the following pages show a few exercises specifically for the quadriceps muscles that may or may not have been included in previous sets of exercises.
Header
1. Isometric quads supine
10 Sets / 10 Reps / 10 s hold
Header
2. Extension strength knee
5 Sets / 20 Reps / 2 s hold
Header

3. VMO quads extension in sit
5 Sets / 20 Reps / 2 s hold
Header
4. Eccentric knee extension in sitting
5 Sets / 20 Reps
Header
5. SAQ in long sitting
5 Sets / 20 Reps
Header
6. Gentle squat
5 Sets / 10 Reps
Header
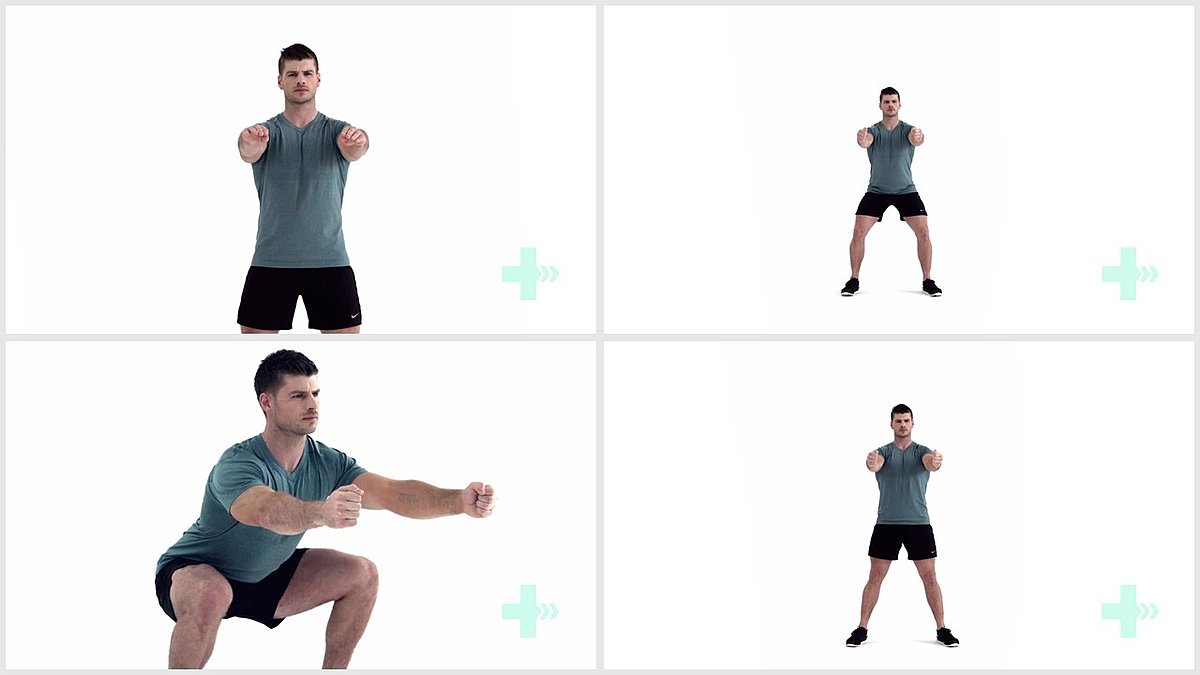
7. Bodyweight squat
5 Sets / 5 Reps / 2 s hold
Header
8. Eccentric squats - stability ball
5 Sets / 20 Reps / 2 s hold
Header
9. Resisted (TKE )terminal knee extension in stand
5 Sets / 20 Reps
Header
10. Knee extension - machine
5 Sets / 20 Reps / 2lbs weight
Header

11. Knee extension single leg - machine
5 Sets / 20 Reps / 2lbs weight
Header
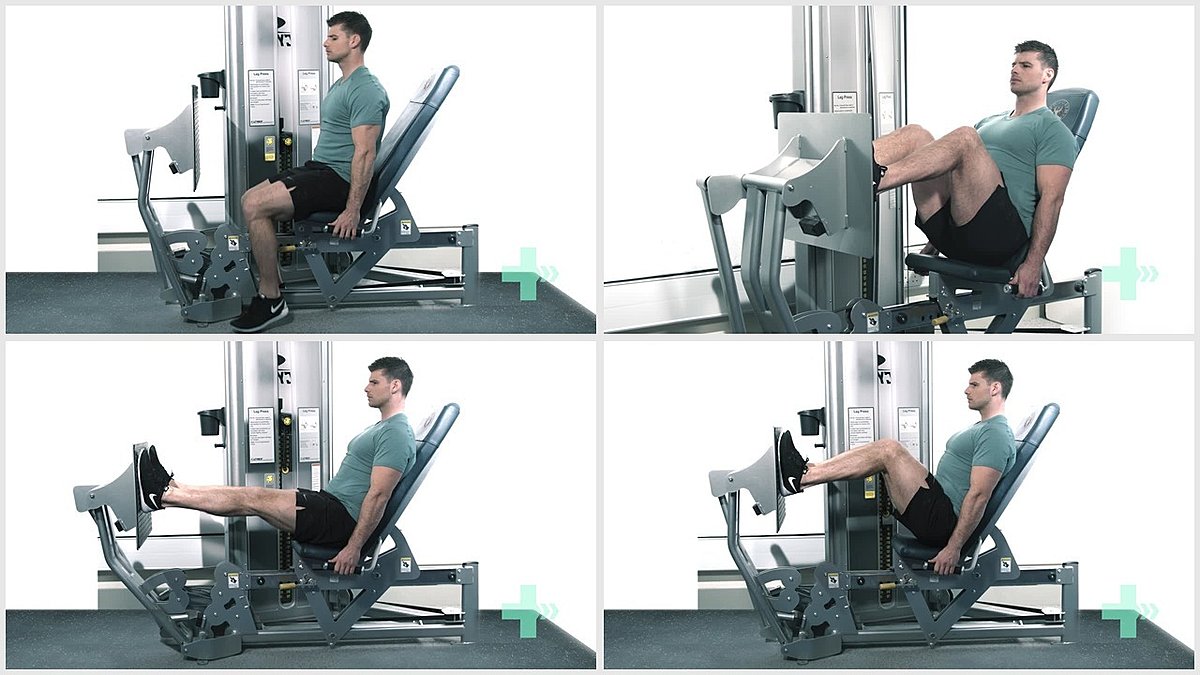
12. Leg press
5 Sets / 20 Reps / 2lbs weight
When I started my blog, www.mycerebellarstrokerecovery.com, in 2012 I thought my life was over and I said in the ‘About Me’ section that “I used to be a physical therapist.” Now, I’m back to work as a physical therapist with an ENTIRELY different perspective and treatment methods.
I had a massive stroke at the age of 30. It’s a lot more common for a young person to have a stroke than anyone thinks. I could’ve taken a continuing education course about strokes but I decided to have one instead. I’m getting a much better education this way.
I have a Doctorate of Physical Therapy and a few certifications on top of that. But more importantly, I am a stroke survivor.
All of that education is all well and good but it is the experience of having a stroke myself that made me think that I had a ton of knowledge to share.
Since my stroke and losing the ability to function as a practicing physical therapist, I have learned that I love writing. I hope these eBooks will help someone.

Amy Elder, PT, DPT, Cert. MDT
This eBook is for informational purposes only. The information contained in this eBook should in no way replace evaluation by a licensed medical practitioner. Attempt the exercises within at your own risk.
This book details the author’s personal experiences with and opinions about stroke recovery and knowledge of specific exercises from having an education as a physical therapist.
The information about health provided in this eBook is not intended to
diagnose, treat, cure or prevent disease. Products, services, information and
other content provided by the Service, including information linking to third-
party websites are provided for informational purposes only.
Information offered by this eBook is not comprehensive and does not cover all
diseases, ailments, physical conditions or their treatment.
Individuals are different and may react differently to different products.
Comments made on the eBook by other users are strictly their own personal views made in their own personal capacity and are not claims made by the author nor do they represent the position or view of the author.
The author makes no guarantee or warranty with respect to any products or
services sold. The author is not responsible for any damages for information
or services provided even if the author has been advised of the possibility
of damages.
Before you begin any healthcare program, or change your lifestyle in any way, you will consult your physician or another licensed healthcare practitioner to ensure that you are in good health and that the examples contained in this book will not harm you.
This book provides content related to physical health issues. As such, use of this book
implies your acceptance of this disclaimer.